Creating contact lists, company lists, and smart lists
By organizing your organization’s contacts and companies into lists, you can access the profiles you need in seconds. A Contact or Company list allows you to manually add records; it is static and does not change. Smart Lists, on the other hand, are dynamic: they are created based on your filter criteria, so new records can be added or removed from Smart Lists depending on whether they match your filter criteria.
Both types of lists can be used to sort contacts in the respective list selectors in the Contact and Company sections of the Contacts module. The same applies to the Membership module, where you can create both lists and Smart lists.
Creating Contact lists
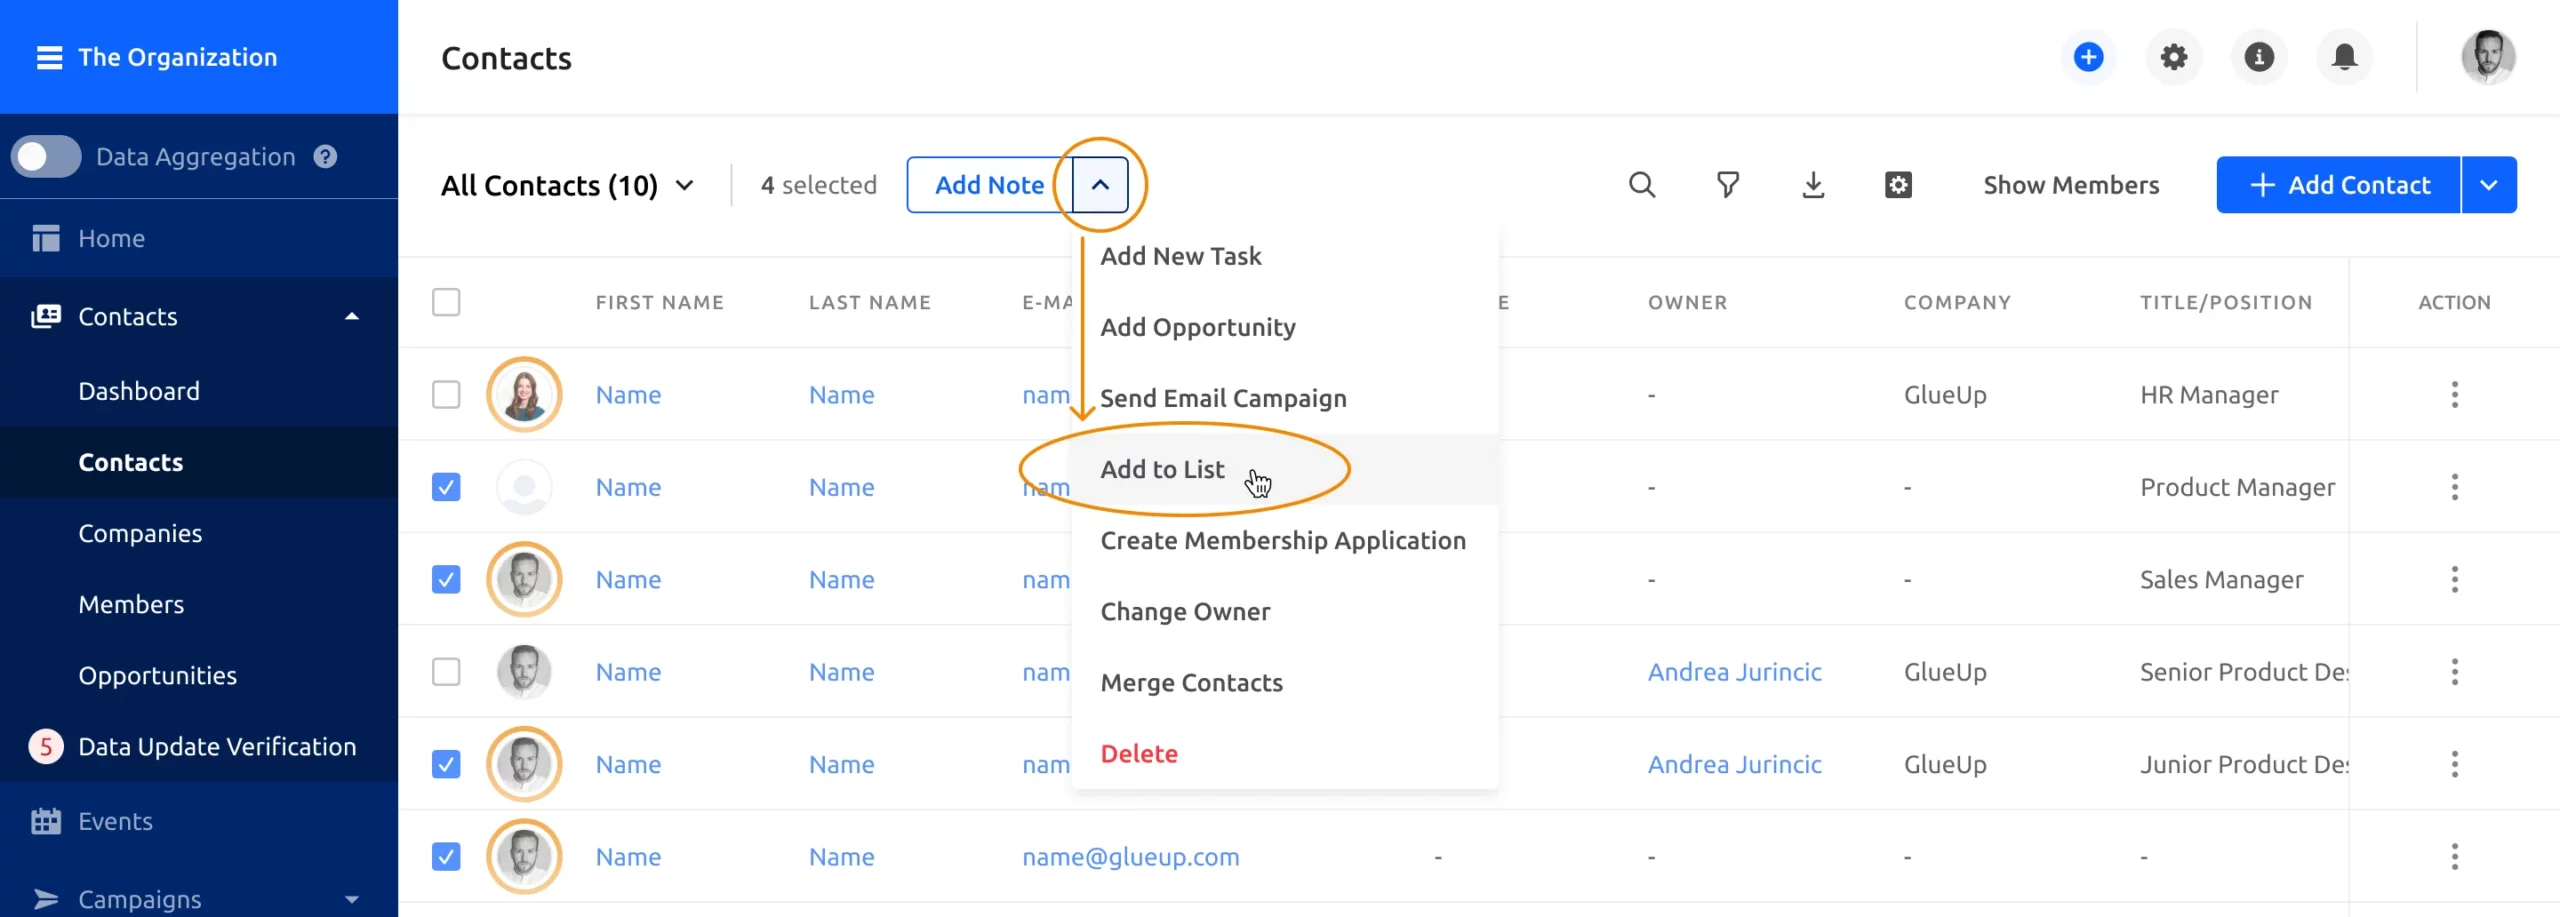
Method 1: Create a contact list by opening the list selector in the Contacts section of the Contacts module. Click the +New Contact List at the bottom of the menu and enter the name of your new contact list. You can then add contacts to your new list by selecting one or more contacts in the main contacts table and clicking on the selector next to “Add Note” then “Add to List” button at the top of the main screen.

Method 2: Select the contacts and click on the selector next to “Add Note”. Choose “Add to List – Create New List”. In the second pop-up modal, type the name of your new list.
Tip: If you have a list of contacts in an Excel file and want to import them into the same contact list, click the down arrow that is part of the + Add Contact button and click Import Contacts. You can then select your Excel file (.xlsx) to upload.
Tip 2: If you want to clean up your lists and delete contacts in bulk, you can create a list, import the contacts into that list, and then delete the list. You will be asked if you want to delete this list and keep all its contacts in the Contacts, or if you want to delete this list AND the its contacts from the Contacts. You can choose the latter to completely remove these contacts from your Contacts.

Creating a company list
Method 1: Create a company list by opening the list selector in the Company section of the Contacts module. Click the +New Company List at the bottom of the menu and enter the name of your new company list. You can then add companies to your new list by selecting one or more companies in the main companies table and clicking on the selector next to “Add Note” then “Add to List” button at the top of the main screen.
Method 2: Select the companies and click on the selector next to “Add Note”. Choose “Add to List – Create New List”. In the second pop-up modal, type the name of your new list.

Creating a smart list
Click the filter icon to narrow your search results in the Contact or Company section of the Contacts module. Next, click the Save as New Smart List button located just above the filter results. A pop-up window will appear allowing you to name your new Smart List. Click Create to save. Your Smart List is now accessible from the list selector in that section.

Reminder: When you save a group of contacts as a Smart List, the Smart List is saved in the Contacts section of the Contacts module. If you save a group of companies as a Smart List, the Smart List will be saved in the Companies section of the Contacts module.
Managing smart lists
Access your Smart Lists by opening the section’s list selector. Scroll down to see your Smart Lists. Pencil, gear, and x icons are available to edit, manage, and delete Smart Lists as needed.
You can also click a Smart List in the List Pane and adjust the search filters. Results are displayed according to your filter settings. Click the Save Changes button to override your old filters and save your new filters for the list you are editing.
