Importing your organization’s member information is a critical component of getting started with Glue Up’s Membership module. Follow the process below to import member data into the platform.
Data Preparation
Before beginning the import process, it is crucial for admins to collect and centralize their membership data in one place. If you have been using a previous system, it is important to download your data from that system and ensure it is readily available for the import process. Here are the key steps to prepare for a successful data import into Glue Up:
Collect and Centralize Membership Data:
- Gather all relevant membership data from various sources and systems.
- If using a previous system, download the data and ensure it is accessible for the import.
Clean up Data Formatting:
- Prioritize data cleaning by removing misspelled words, trailing spaces, and unwanted prefixes.
- Correct improper cases and eliminate nonprinting characters.
Ensure Data Accuracy and Currency:
- Verify the accuracy and currency of the collected data.
- Remove outdated or irrelevant information to maintain data integrity.
Remove Duplicate Entries:
- Identify and eliminate duplicate entries within the membership data.
- Duplicates can lead to confusion and data inconsistencies, so ensure they are removed.
Membership Configurations on Glue Up
Before importing membership data into Glue Up, create your membership types and set up your membership application forms.
Initiating the Data Import
Navigate to the Settings menu and select “Import History & Activation”.

In the “Import Data” section, choose if you would like to import an individual or corporate membership and then select a membership type using the dropdown menu. Click on “Confirm” to continue.

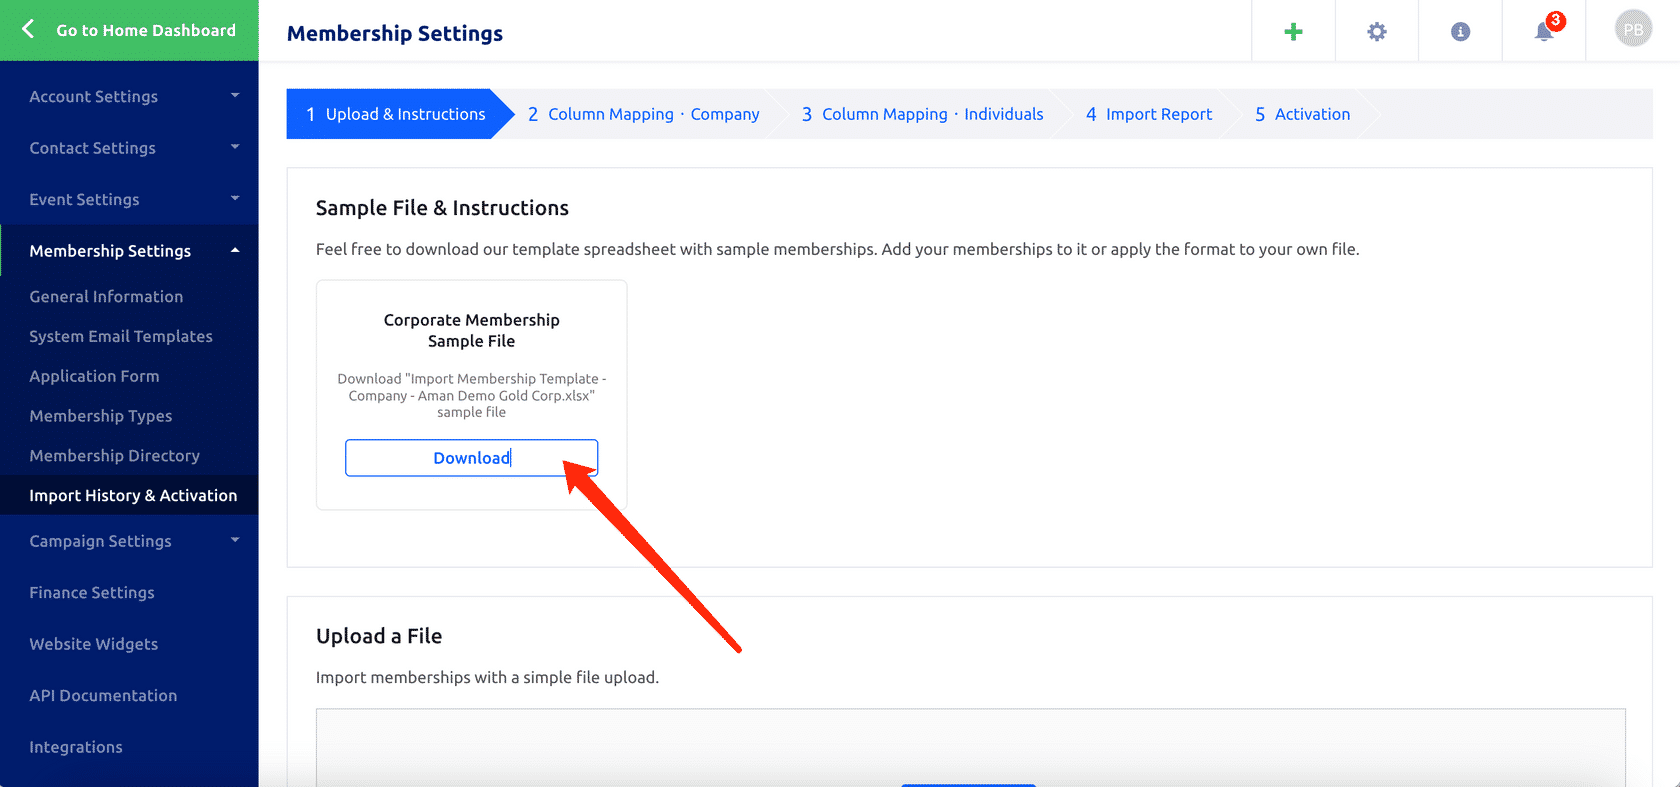
In this step, you can download a Glue Up import template tailored based on the application form you created for this membership. Using this template spreadsheet to import your data is recommended to simplify the process and reduce the chance of mistakes occurring. Alternatively, you can update your own existing file to the required Glue Up format.
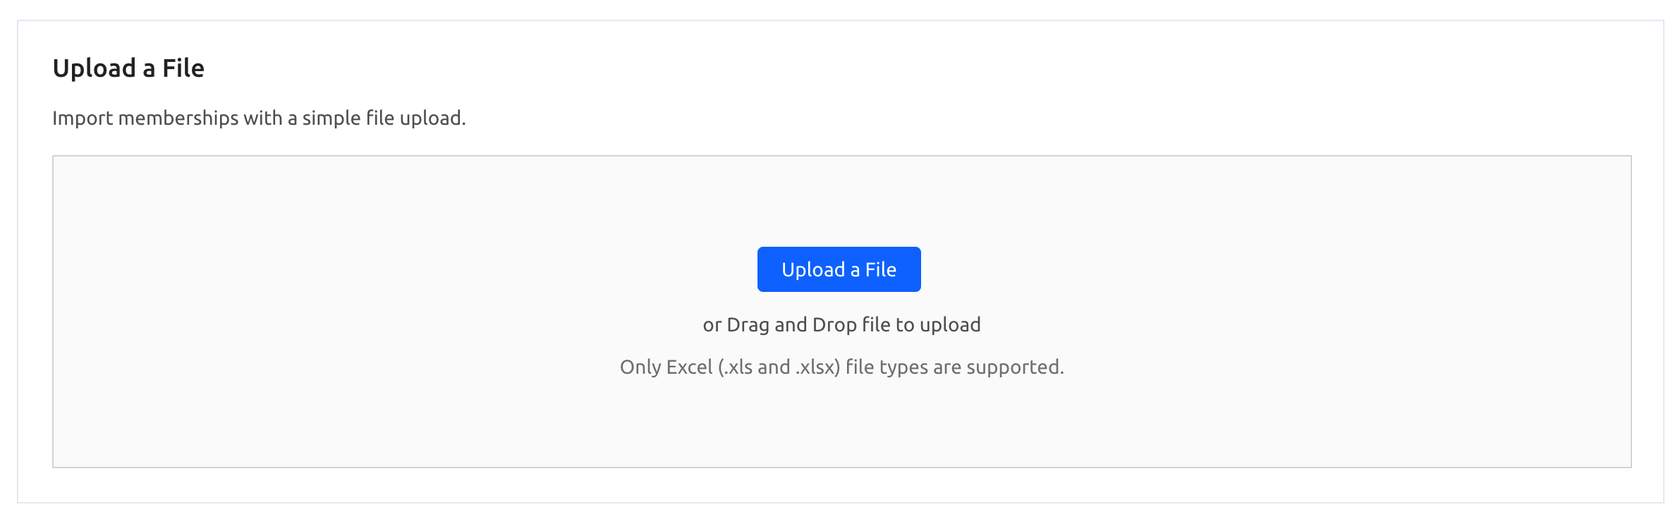
Important: Only Excel (.xls and .xlsx) file types are supported.
Formatting the import template for Individual memberships
Once you download and open the membership import template, you will notice that the template already has all the necessary fields as column headers. The columns on the template correspond to the fields on the designated Membership Application Form for this Membership Type.
For individual membership templates, you’ll find a single sheet in the spreadsheet.

Simply copy the data from your existing spreadsheet or source, and paste it into the corresponding columns of the Glue Up Membership Import Template. Ensure that the data aligns with the respective column headers in the template.
To ensure a successful import, it’s important to fill out the mandatory fields. These include:
- Membership Start Date: The date must be in Excel’s “Short Date” format and contain the year, month and date.
- Membership End Date: The date must be in Excel’s “Short Date” format and contain the year, month and date.
- First Name: The first name of the individual member.
- Last Name: The last name of the individual member.
- Email Address: The email address used by the individual member.
Formatting the import template for Corporate memberships
Similar to templates for individual membership types, once you download and open the membership import template for corporate memberships, you will notice that the template already has all the necessary fields as column headers. The columns on the template correspond to the fields on the designated Membership Application Form for this Membership Type.
The corporate membership import template consists of two sheets: “Company Members” and “Individual Members.” These sheets serve different purposes and require specific information to be provided.

Company Members Sheet
This sheet is used to list the companies or organizations associated with corporate memberships.
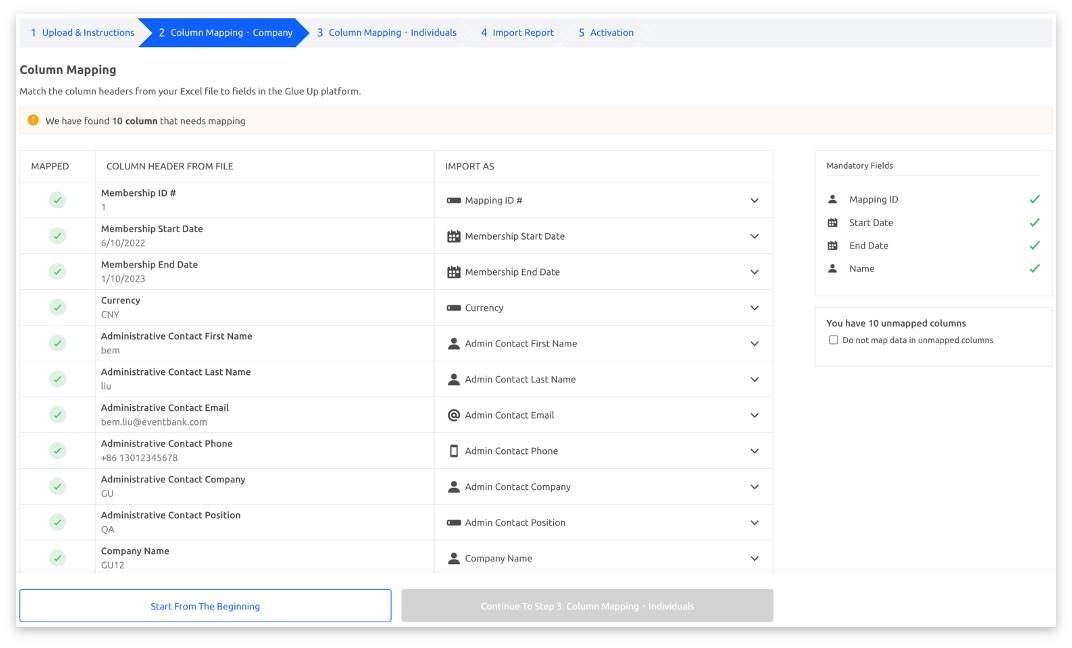
Enter the relevant details of each company or organization in separate rows. To ensure a successful import, it’s important to fill out the mandatory fields. These include:
- Mapping ID: Only numerical values can be inserted in this column
- Membership Start Date: The date must be in Excel’s “Short Date” format and contain the year, month and date.
- Membership End Date: The date must be in Excel’s “Short Date” format and contain the year, month and date.
- Company Name: A company member’s name must be an identical match to the company names listed in the Individual Members tab for all individual members who are part of that company.
Individual Members Sheet
This sheet is used to list all the individuals associated with each organization.
Both primary and regular members should be included.
Each individual’s information should be entered in separate rows. To ensure a successful import, it’s important to fill out the mandatory fields. These include:
- Mapping ID: Only numbers can be inserted in this column. Mapping IDs must be an identical match to the related company’s Mapping ID for all individual members who are part of that company.
- Primary Member: A primary member is a person who is designated as the main person for managing a company’s corporate membership. Each corporate membership can only have one primary member. If the member is a primary member for a corporate membership, insert ‘Yes’. If the member is not the primary member for a corporate membership, insert ‘No’.
- First Name: The first name of the member.
- Last Name: The last name of the member.
- Email Address: The email address used by the member.
- Company Name: An individual member’s company name must be an identical match to a company name listed in the Company Members tab.
The mapping ID in the Corporate Membership Import Template serves as a unique identifier used to establish connections between companies and their associated members. By assigning a mapping ID to each organization, you can link the companies listed in the first sheet with their respective members listed in the second sheet. It is important to choose a distinct mapping ID for each organization and ensure consistency by using the same mapping ID for all members associated with that organization. Remember, the mapping ID is solely used for the import process and will not be visible after the import is completed.
Troubleshooting and Best Practices
Select all cells in your Excel template, and use the clear all hyperlinks function and clear formats function.
Proper Format for Phone Numbers: ensure phone numbers are formatted correctly in the following manner: (+)(country code)(space)(free format)…(extension), for example, +86 10 XXXXXXX ext. 123.
Proper Format for Email Addresses: verify that each cell contains only one email address in the proper format, such as ‘xxxxxx@gmail.com.’ Avoid improper formats, including spaces between letters, spaces at the beginning or end, characters like ; / ‘ < >, missing @ symbol, or having double @ symbols, e.g., xxxxx@xxxxx@gmail.com. Excel filters can help identify improper email address formats.
Downloading Answer Keys for Default Fields
Certain fields, such as industry and country fields, necessitate the use of predefined codes instead of full English words. The platform recognizes these codes, ensuring accurate matching during the import process. For instance, when importing a country field representing Canada, you should input the ISO code “CA.” You can refer to this link to find the appropriate codes for your data import.
Proper Format for Custom Single/Multiple/Cascading Choice Fields
Always download the Answer Key to match the actual value before importing custom single/multiple/cascading choice fields. You can find the answer key for these fields by navigating to the “Field Settings” section under Contact Settings and clicking on the three-dots next to the field you wish to import.
The membership end date is an optional field in the membership import, and it will be automatically filled by the system based on the start date and the term length, if the start date is provided.
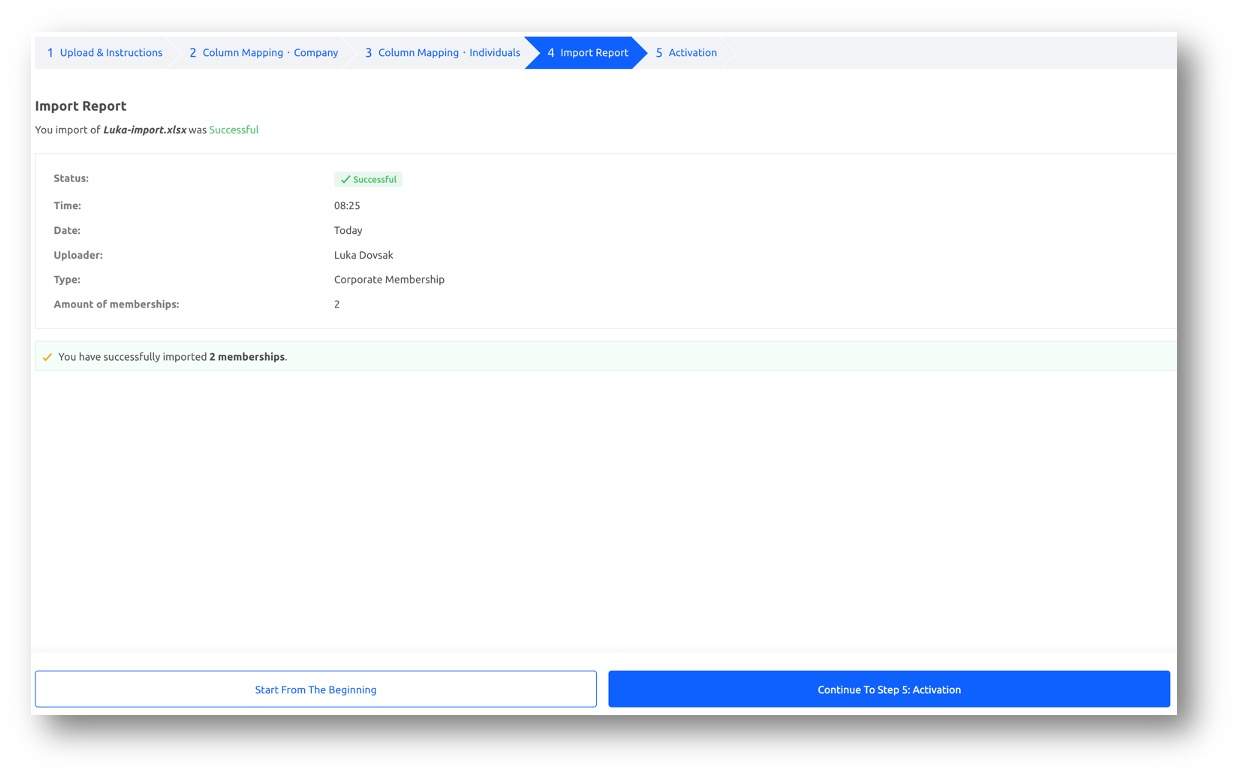
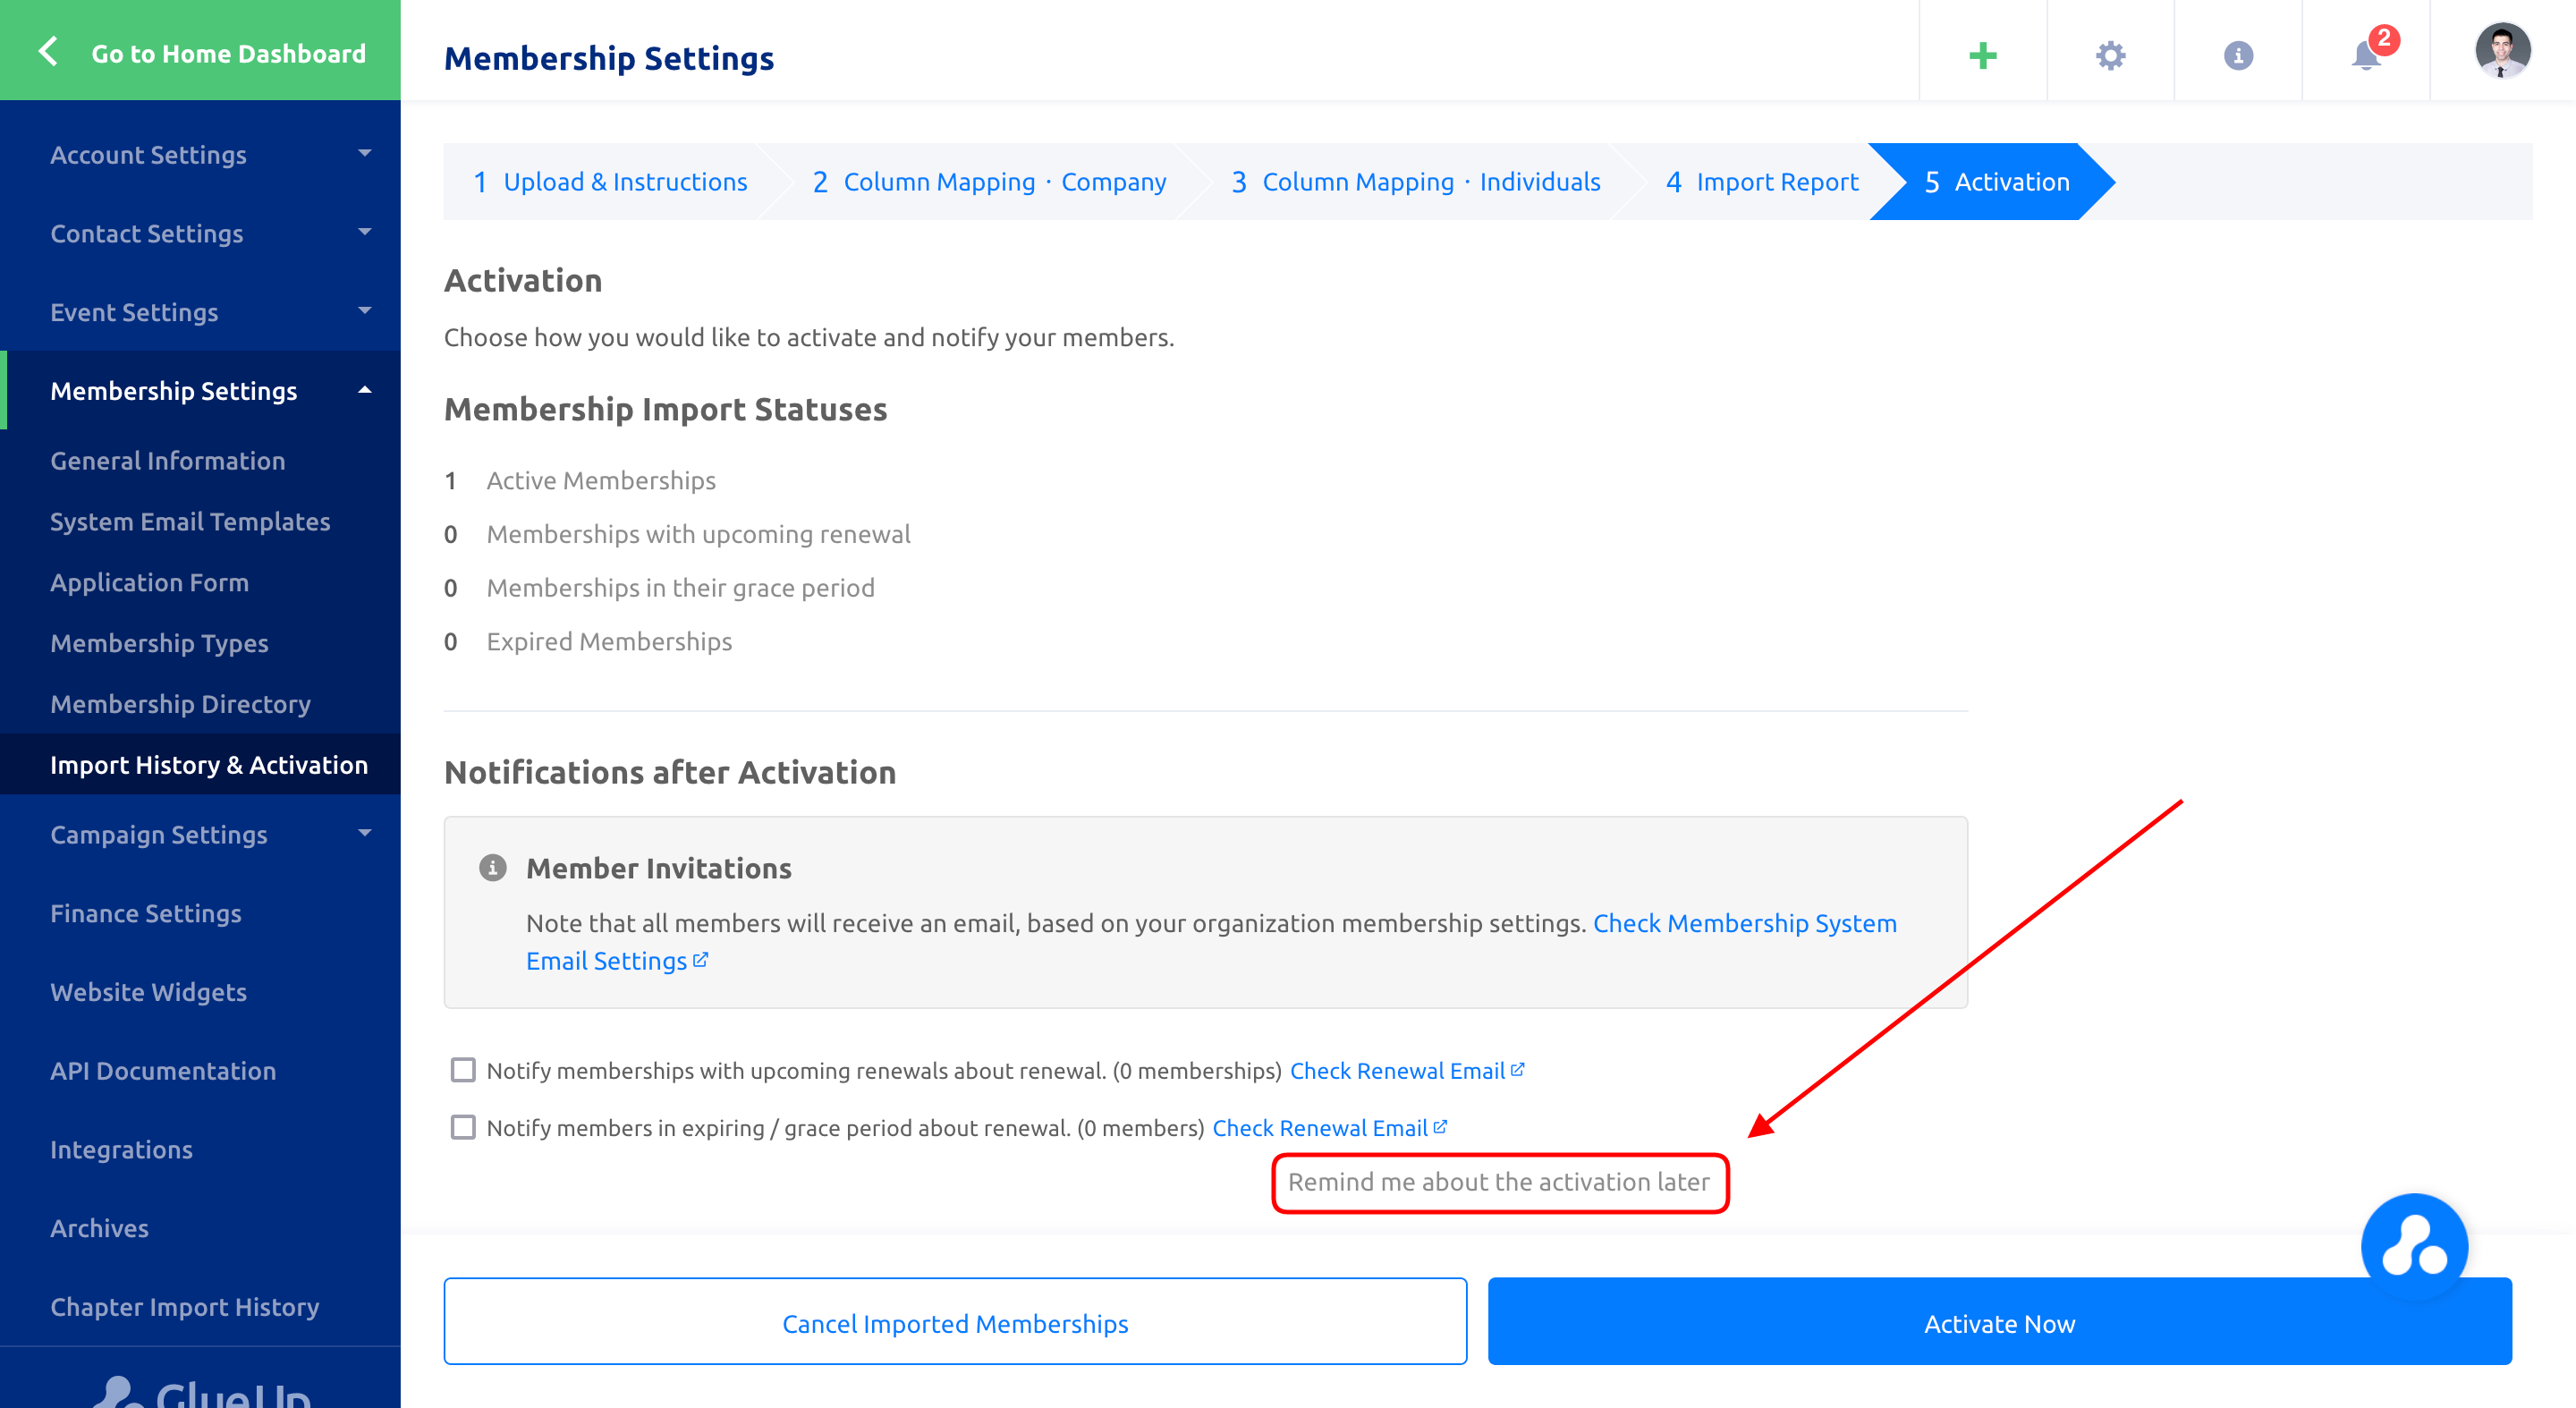
Uploading Memberships and Activation
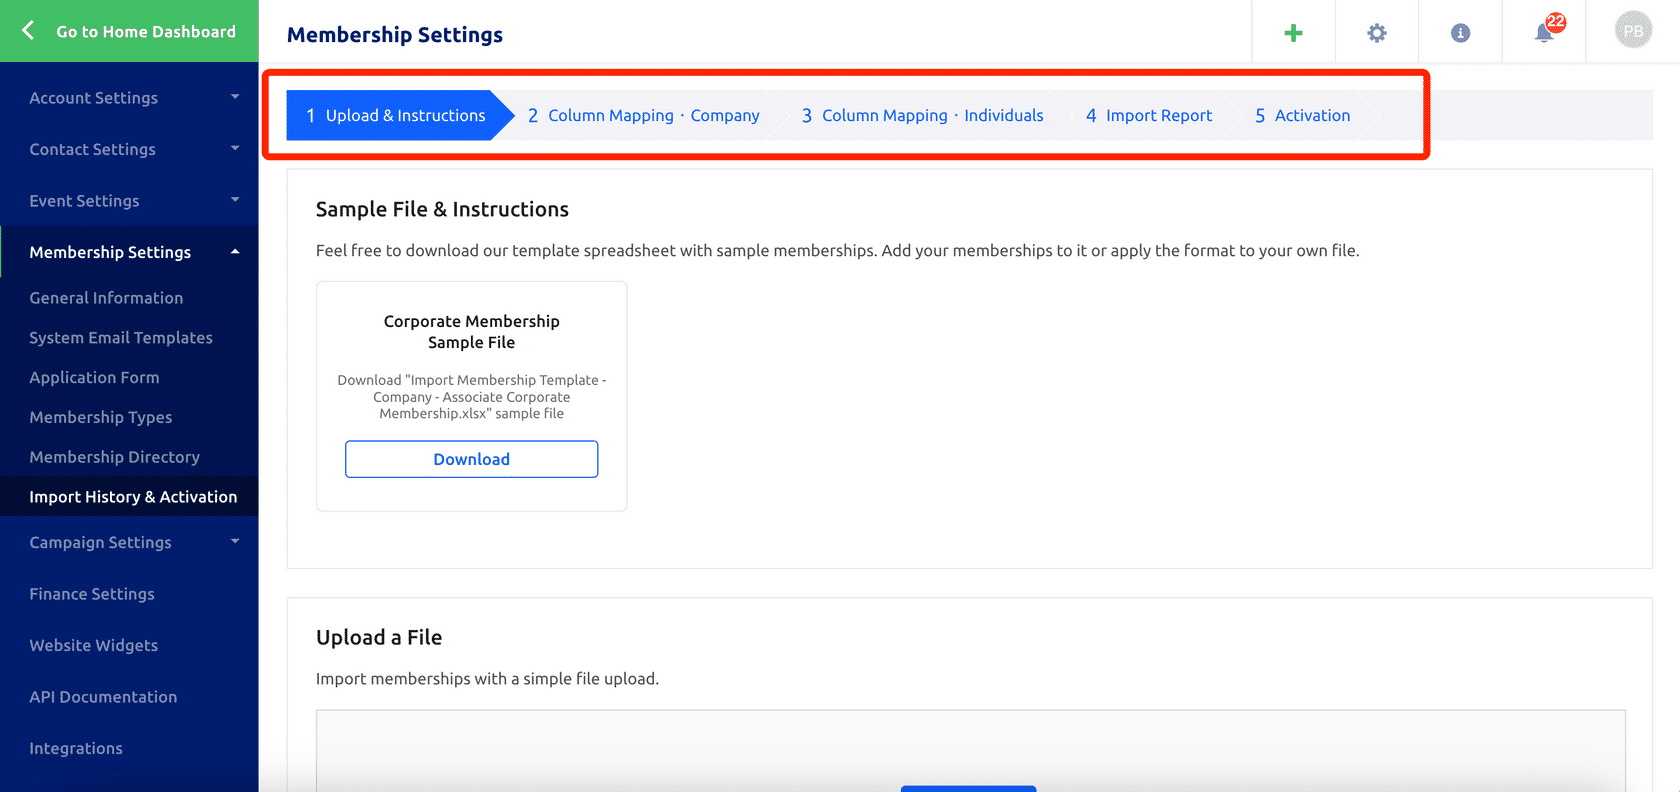
Once you’ve filled in the import template with your data, the next step is to import your file into Glue Up. The process involves four steps for individual membership files and five steps for corporate membership files.
To begin the import process, start with step one: uploading your import file. Just click on the blue “Upload a file” button, then select your file, or you can conveniently drag and drop it into the designated area.