Follow these steps to ensure a smooth and efficient import of attendee data into the Glue Up platform.
1. Create an Event:
Start by creating an event on the Glue Up platform. Follow the recommended steps to fill in all necessary event details, such as event name, date, location, and description. Ensure that you save your progress as you proceed through the setup.
2. Attendee List Section:
Navigate to the «Attendee List» section, which can typically be found in step 4 of your event setup. This is where you can manage and import your list of attendees.
3. Add or Import Attendees:
Click on the «Add» or «Import Attendee» button to initiate the import process. For a smoother experience, we highly recommend using the provided Excel template. This template is designed to streamline the data entry process and ensure that your information is formatted correctly for the Glue Up platform.
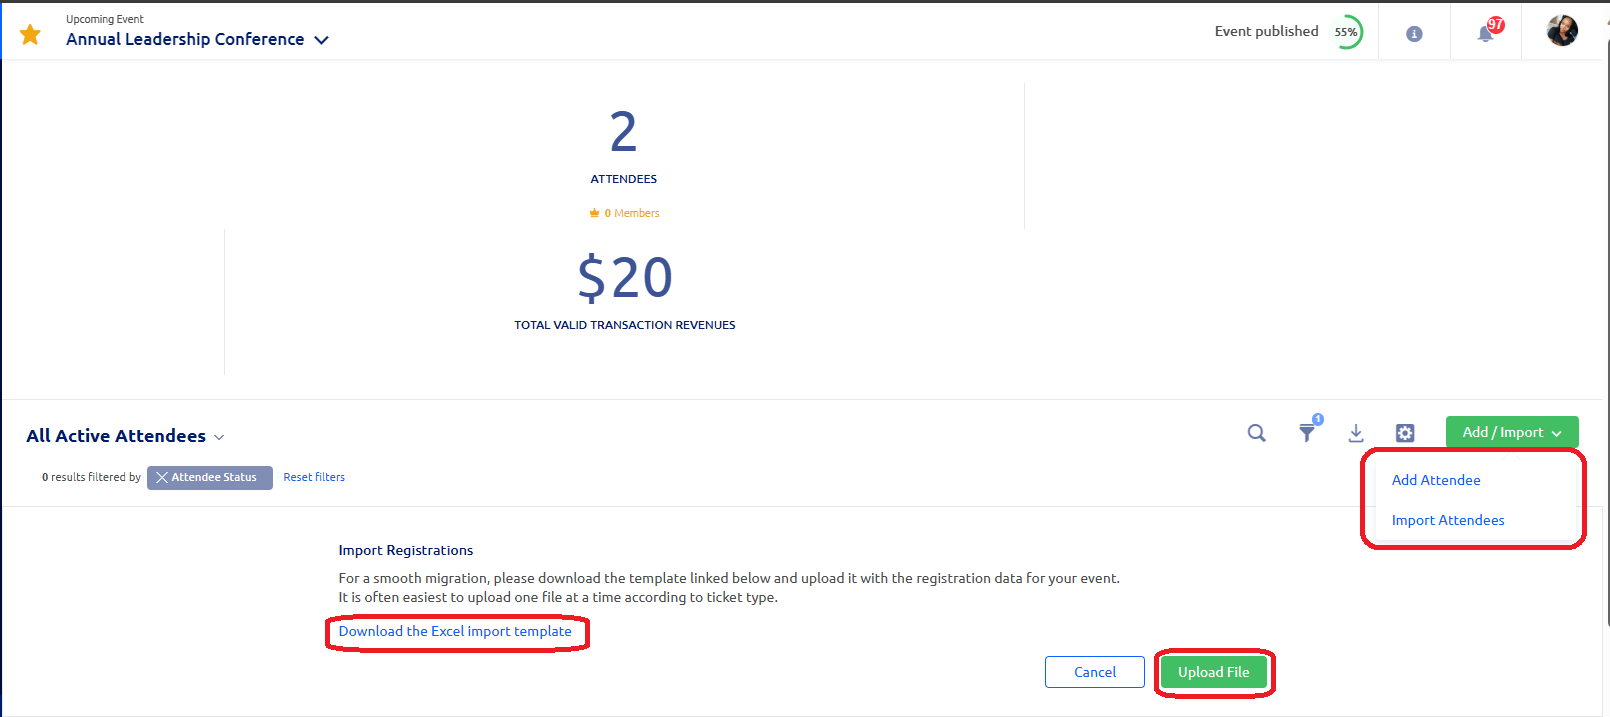
4. Populate the Template:
Download the Excel template and fill in the required details for each attendee. Ensure that the data aligns with the column headers in the template. This will help the platform correctly map the information when you import the file.
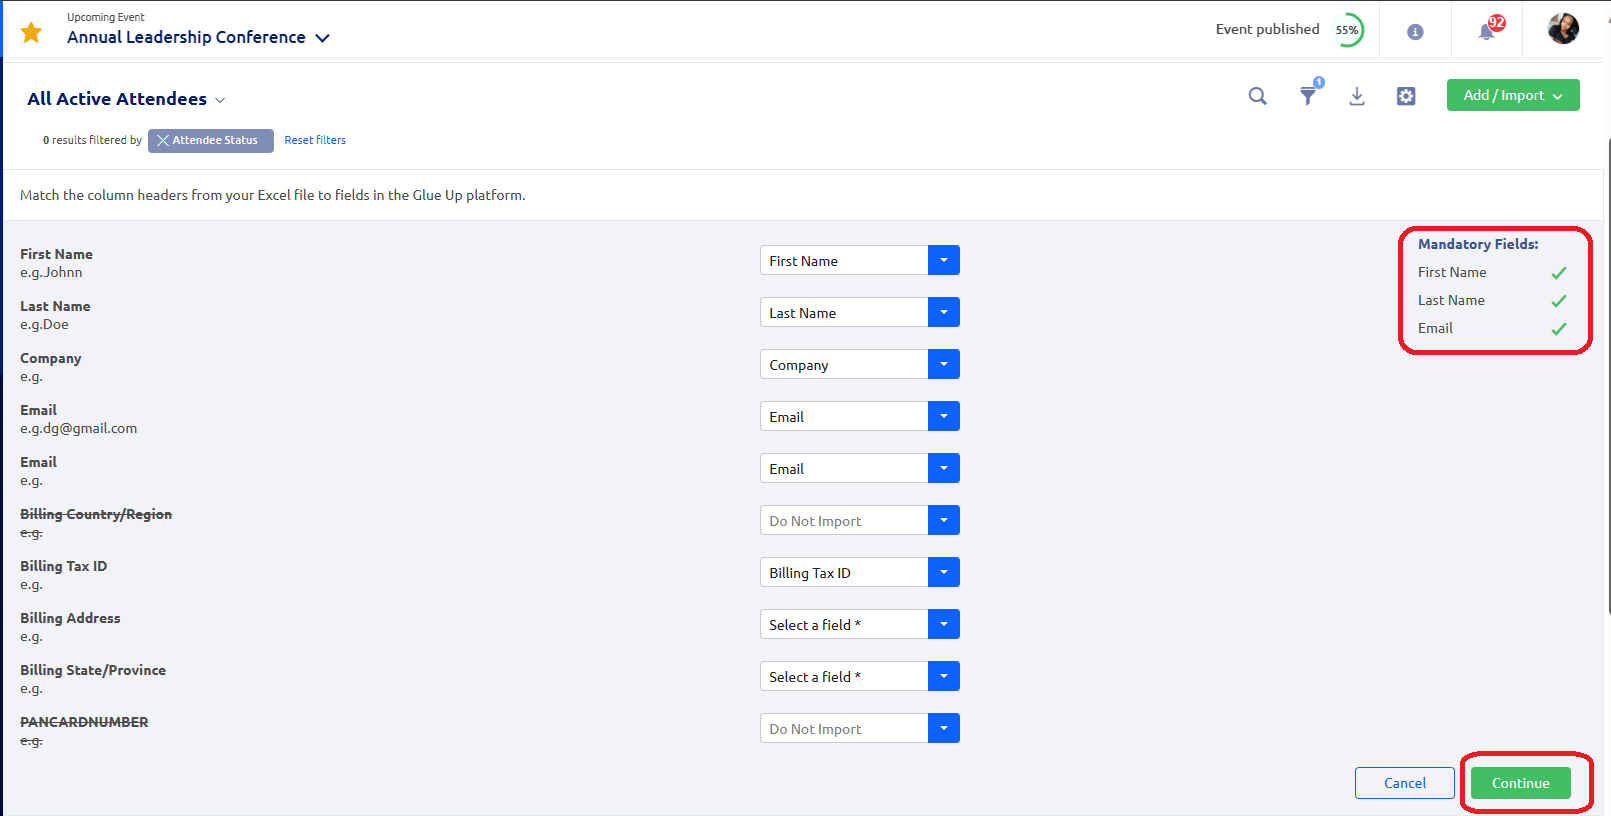
5. Map Data to Glue Up Fields:
When importing the file, map the column headers from your Excel file to the corresponding fields in the Glue Up platform. This step ensures that the data is correctly matched, and each attendee’s information is accurately represented.
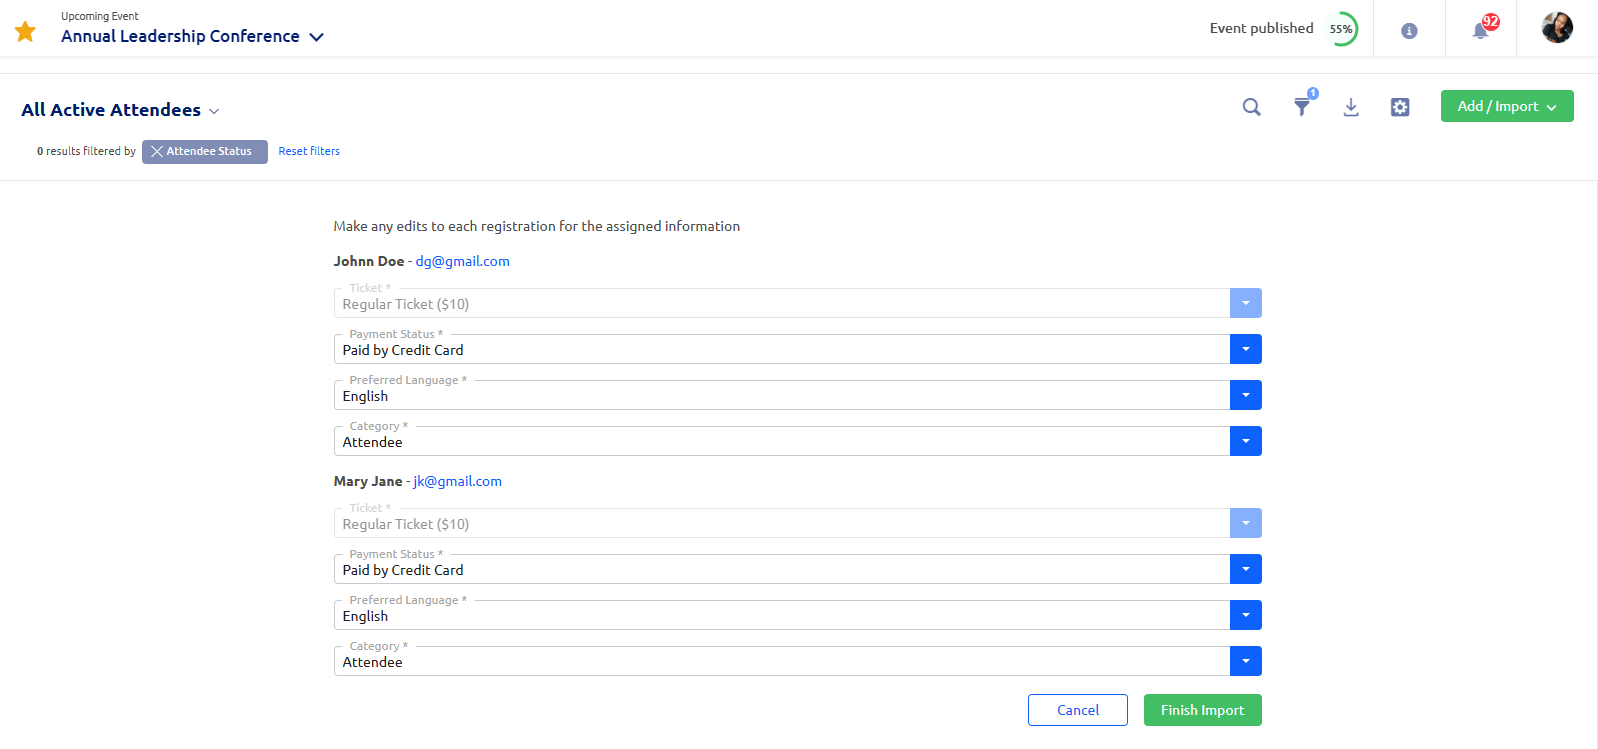
6. Assign Ticket, Payment Status, Preferred Language, and Category:
Take advantage of the platform’s capabilities by assigning tickets, specifying payment status, indicating preferred language, and categorizing each individual (e.g., attendee, sponsor, delegate). This helps in effective event organization and communication.
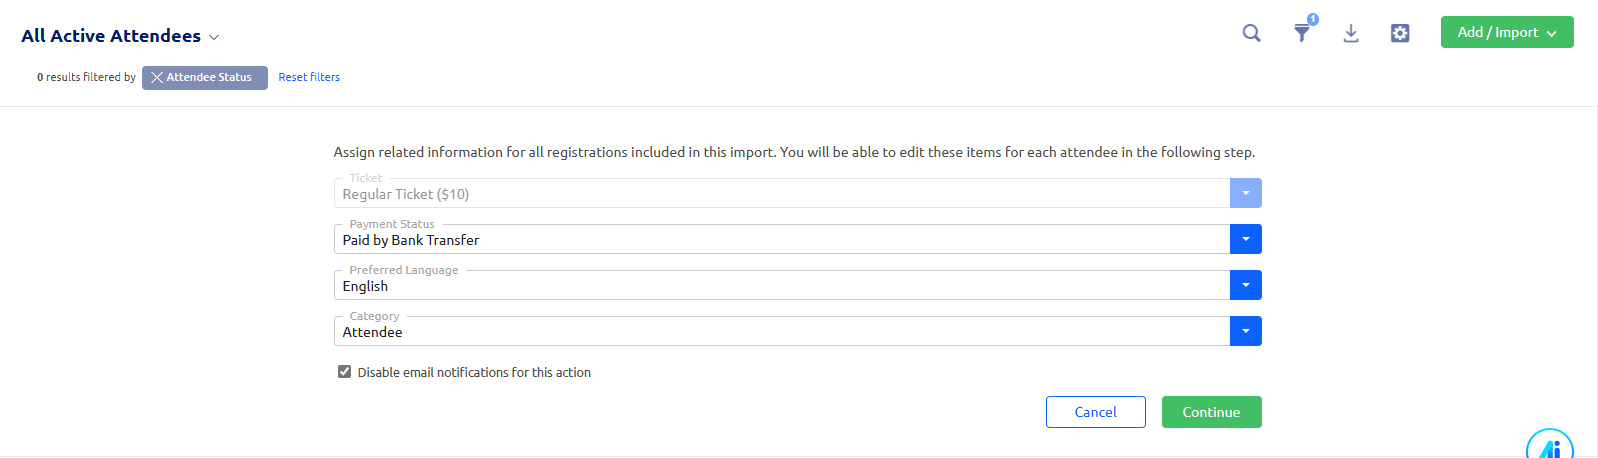
7. Disable Notifications (Optional):
If you don’t want attendees to receive registration confirmation emails, you have the option to disable notifications during the import process. Simply choose this option if it aligns with your event strategy.
8. Edit Registrations:
Review the imported registrations and make any necessary edits. This step ensures that all attendee information is accurate and up-to-date.
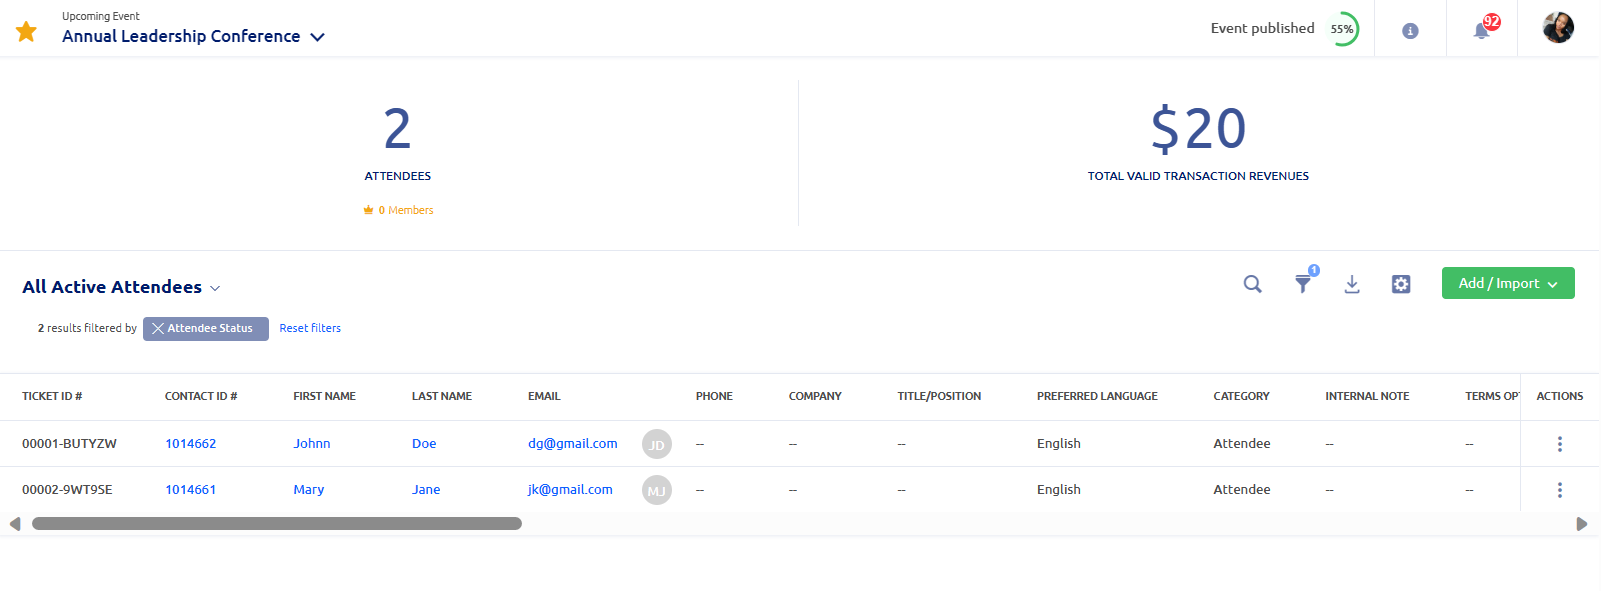
9. Attendee List Overview:
In the «Attendee List» section, you’ll find a summary of the total number of attendees and the overall ticket value. This overview provides valuable insights into your event’s attendance and financials.
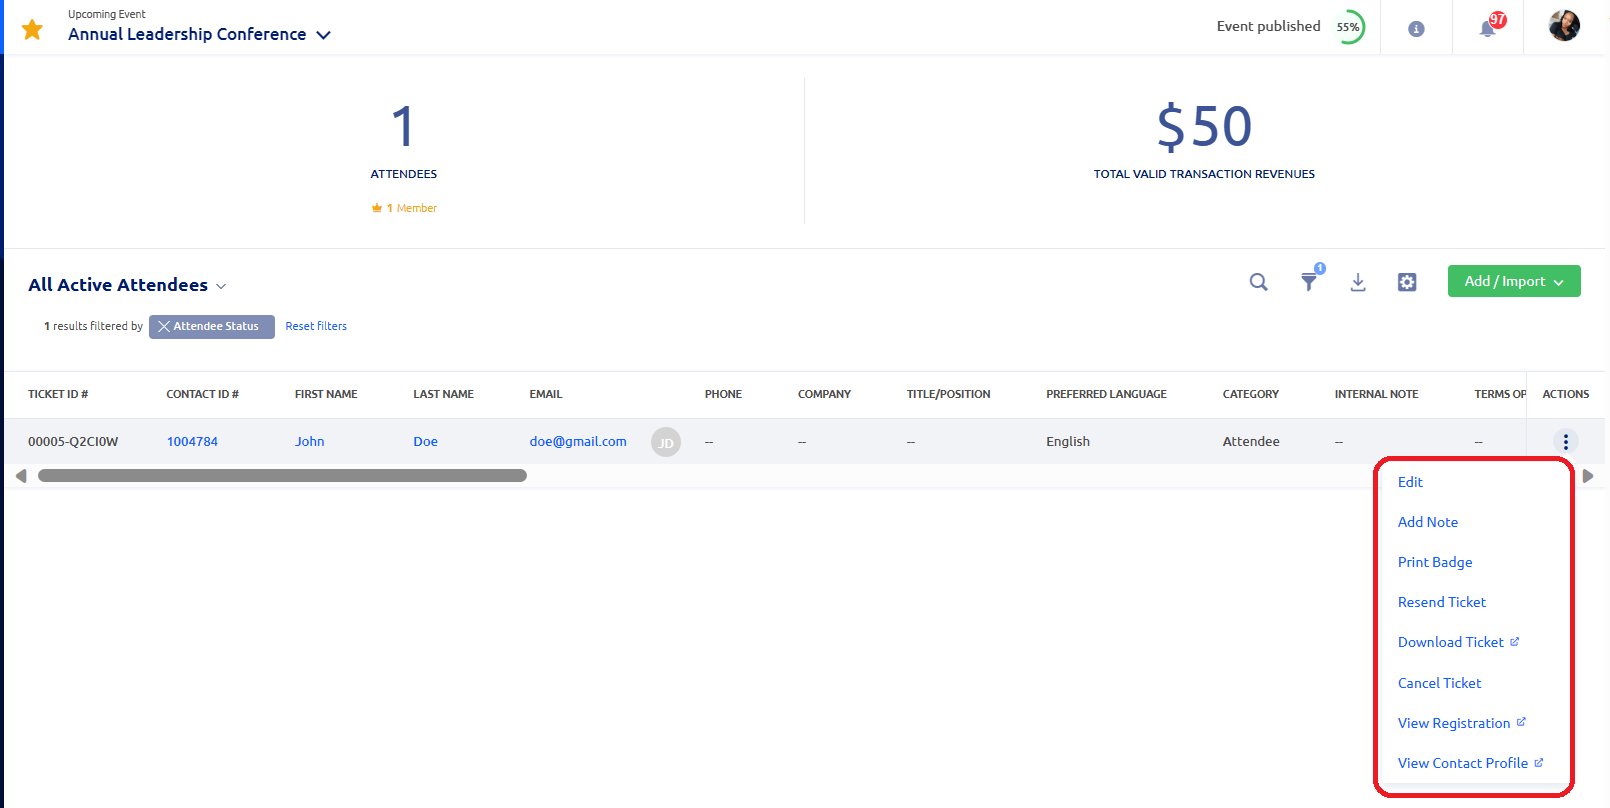
10. Attendee actions:
Once the data is successfully imported, you can perform various actions to enhance your event management experience.
- Edit- Make any necessary modifications to individual registrations, such as updating personal information or changing ticket types.
- Add note- Enhance communication by adding notes to individual registrations, providing important context or details for your team.
- Print Badge- Generate and print event badges directly from the platform, streamlining the check-in process.
- Resend Ticket- If an attendee requests a ticket resend, easily send them a duplicate ticket with a single click.
- Download ticket- Access the option to download individual tickets for attendees, making it convenient for both organizers and participants.
- Cancel ticket- In case of cancellations or changes, efficiently cancel individual tickets with the option to communicate the details to the affected attendees.
- View registration- Dive into the details of each registration to gather specific information about attendees and their participation in your event.
- View contact profile- Gain deeper insights into your attendees by viewing their contact profiles, helping you understand their engagement history and preferences.