Glue Up has several possible integrations for you to automate your payments, invoices, and data, allowing you to receive online purchases and have all modules synchronized. Paygage is the payment integration gateway available to our customers in the United States. There are numerous advantages to utilizing Paygage as it offers an automated process that allows customers to have control and visibility over transactions in their account. Some benefits of Paygage are as follows:
- Funds will be directly deposited into your bank account, instead of disbursed from Glue Up.
- Payment is settled on a weekly basis, rather than every two weeks (1st payout will be 7-10 business days after 1st successful transaction).
- Paygage is 2% Less expensive than the default payment solution (3.4% plus $0.30 for every transaction + annual fee).
- With Paygage you will have access to your own account dashboard within the Paygage gateway (including issuing refunds).
- The annual fee is only $120, which was paid upon signing your contract with Glue Up.
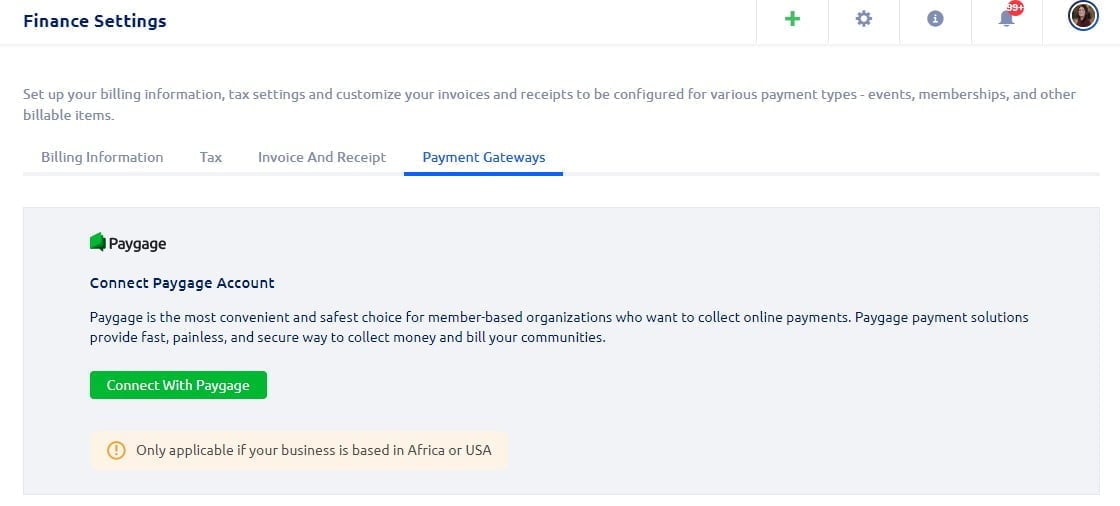
- The application process is easy and straightforward. You can access the Paygage application directly from the Finance Settings in your Glue Up Platform.
- Easily submit refunds directly from your Paygage account.
- Payouts are batched out 9:30pm EST business day of transaction, funded 6pm EST the next business day, and in the merchant bank account the 2nd business day.
Setting up a Paygage account requires coordination between you (the customer) and the Paygage team. As the customer you will need to connect with Paygage through the Glue Up Platform. Please note the three parts to the Standard Paygage Application below:
- The Owner’s information
- The Business information
- The Bank Account details

Helpful Hints for the Paygage Application process:
- It is highly recommended that the person completing the Paygage application is the Owner or an Executive within the organization.
- If the organization is a Non-profit, the same address can be used for both the business and the owner.
- Paygage does not accept PO Boxes for address entries.
- If the business is a Corp the ownership percentage must be entered and verified using the legal business documentation.
Paygage Application Process:
The first part of the Paygage application requires Personal Identifiable Information from the owner or executive who is completing the application; including Social Security Number, date of birth and home address. Providing your SSN and home address is a requirement when applying for most merchant services accounts. This information is used to verify identities and to protect against illicit financial activities. For your business to accept credit card and debit card payments, you’ll need to open a merchant account. Providing information, such as a Social Security Number, when applying for a merchant account is used for identity verification purposes required in accordance with Section 326 of the U.S. Patriot Act, signed into law in October 2001. Please note that there is no credit check conducted; the PII is purely collected for security measures. (This process is like setting up a new bank account for your business. There is specific information that must be provided to verify the legitimacy of the business and the owner or executive of the business). 
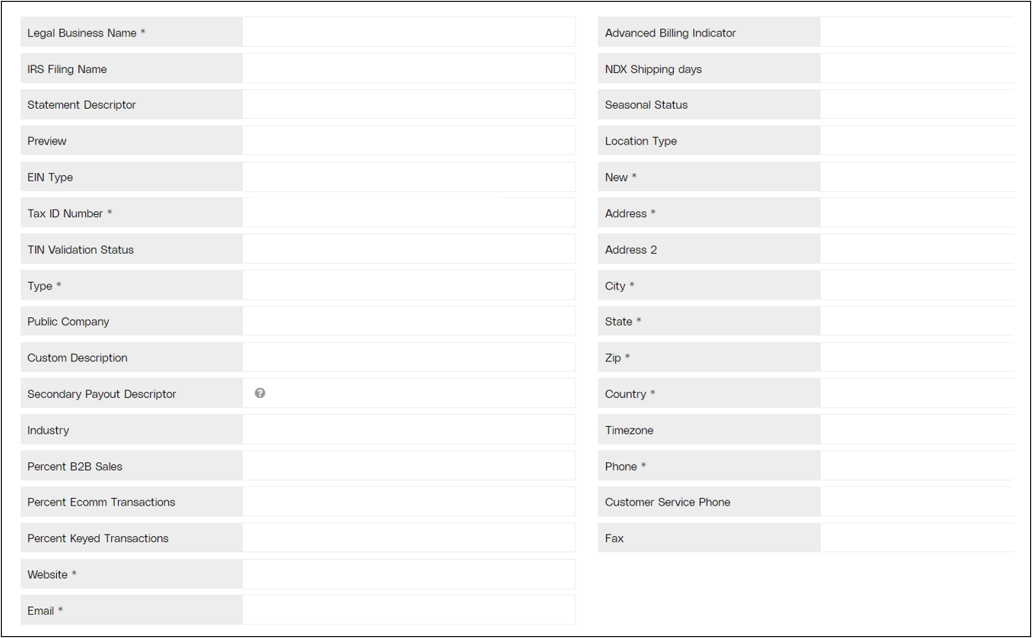
Part two of the Paygage application requires the below business information. As reminder PO boxes are not accepted in the address field.

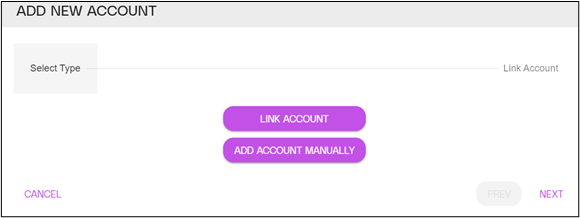
The Third and final part of the Paygage application is where you will link the business’s bank account information to the Paygage gateway.

Once you have been onboarded and your merchant account has been linked to Glue Up, the admin that completed the application will be able to use the same login credentials to access your Paygage account. As an admin of the account, you have the ability to add team members and grant appropriate permissions depending on their role within your organization.
Once your Paygage account has been successfully onboarded a withdrawal request is made automatically. Please note that first-time payouts are held for 3 days after the withdrawal request. All future payouts are sent weekly based on your transactions.
Paygage Dashboard:
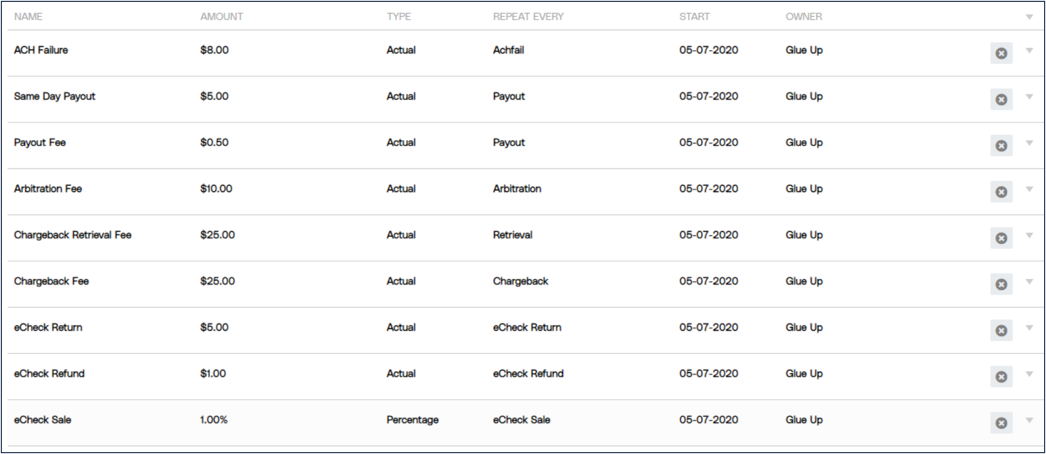
In the dashboard of your Paygage account you will be able to see all fees associated with your account. From here you will also be able to manage transactions, add users, issue refunds, and run reports. See the below steps for reference:
- Issue a Refund: Payment History > Click on the transaction > Click Refund
- Set up Email Alerts: Dashboard > Admin > Email Alerts
- Add a User to the Paygage Dashboard: Dashboard > Users > Add User
- Running Transactions Detail Report. (This will help with accounting reconciliations):
Dashboard > Payment History > Transaction Details Report > Enter Report Date Parameters > Click Checkmark > Run Report > Export to XLS

FAQs
- Can I put in an EIN after the account is set up? Yes, the SSN is only needed for the application process.
- How do I get help with Paygage? Reach out to your dedicated Glue Up Customer Success team member.
- How long is the application process? Typically, under one week. Delays are most often caused by incomplete or inaccurate information.
- Can’t I just use Stripe or PayPal? No, Glue Up does not integrate with those services in the United States.
- Can a partial refund be issued? No, a partial refund cannot be granted. The first transaction must be refunded, and a new transaction must be initiated.
- What will appear on user bank statements? Payout and Secondary Payout Descriptor will determine how payments appear on user bank statements.
- Where do I go to log onto Paygage once my account has been set up? https://dashboard.paygage.us/
Click here for steps on how to Add a User to your Paygage Account.
