Content
Custom HTML Emails
Import your own HTML email design to fully customize the look and feel of your email campaigns. Creating your own personalized email campaigns ensures you communicate the precise message you want to deliver.
Note: This feature is only available for Regular email campaigns.
Please do not use this feature unless you have experience writing HTML/CSS code. The drag-and-drop editor is an easy, straightforward alternative.
Creating a Custom HTML Campaign
- Create a new campaign
- In the Campaign module, click ‘Draft’ in ‘Campaigns’ and then click the button ‘Create Campaign’ in the top right corner.
- Name your campaign, select ‘Send Regular Campaign’, and click the button ‘Create’.
- Select recipients
- In Step 01: Recipients, select the appropriate campaign recipients and click ‘Next’.
- Insert your code
- If you choose to copy and paste, you will be redirected to Step 03: Layout and Content to proceed with the process.
- If you choose to import a file, a file upload window will appear so you can select a file. The HTML code will immediately be imported into the system upon selection.
- In Step 02: Setup, find the Custom HTML box located in the Layout Section at the bottom of the screen. You may choose to directly copy and paste the HTML or import a HTML file that includes the code.

- Make any edits or adjustments
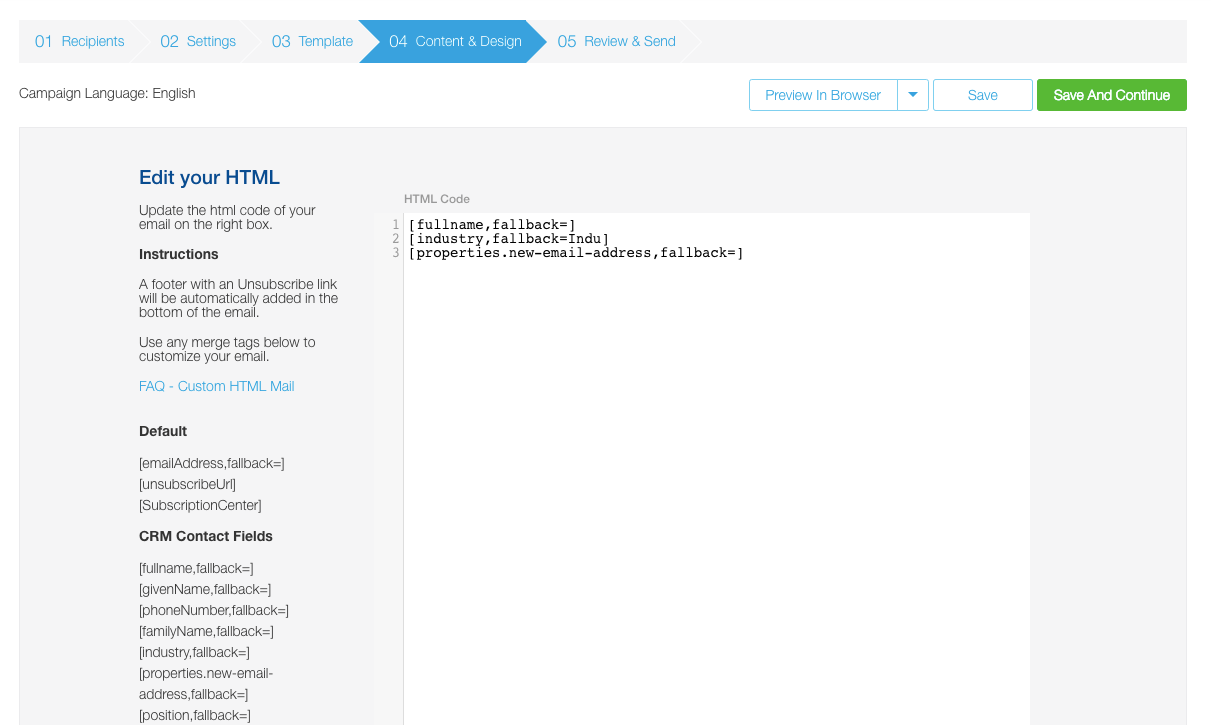
- In Step 03: Layout and Content, a box is available for you to insert and edit the HTML. Notably, you can also add Merge Tags in this area, but please ensure pictures and other files are uploaded in a separate location and linked accordingly. Once edits are complete, press ‘Save’.
- Note: The platform may clean your code for security purposes. Be sure to preview your email to ensure everything is set the way you like.
- You can now preview, schedule, or send your campaign using the buttons in the top right corner of the screen.

A standard footer will automatically be added to the bottom of all custom HTML email campaigns. The footer will contain a “Powered by Glue Up” badge and unsubscribe link that is unique to each recipient.

Adding Merge Tags
Merge Tags let you incorporate recipient information directly from the CRM module and allow you to deliver personalized emails specific to each of your recipients. Tags must include brackets and be pasted directly into your HTML code. Available tags are divided into default and CRM Contact form fields:
Default Tags
CRM Contact Fields Tags
All existing CRM Contact form fields are available except multiple file upload and single file upload field. Tags can also be used in the HTML code if applicable.
When the CRM Contact’s first and last name has saved in each languages character the Full Name field will display as below:
- English: First Name and Last Name
- Spanish: First Name and Last Name
- Chinese: Last Name and First Name
- Russian: Last Name and First Name
- Korean: Last Name and First Name
You can define a fallback by inserting a word or input. This will be used if there is no matching CRM entry information. Available fallback inputs are:
- Letters
- Numbers
- Special characters including . , (space) _ — @ ’
Important: If you manually input «fallback» in Unsubscribe URL and Subscription Center merge tag, all contacts will receive the fallback value. Therefore, adding fallback in both fields are not recommended.
Examples
HTML input: “Dear [givenName,fallback=Member], happy to have you join us!”
- If the First Name field in the CRM entry includes the name ‘Jason’, the email recipient will view:
- Dear Jason, happy to have you join us!
- If the First Name field in the CRM entry is blank, the email recipient will view:
- Dear Member, happy to have you join us!
Please be sure to preview your HTML email campaigns to ensure the coding is correct.
General Suggestions for HTML/CSS Email Coding
- Be sure to use “” when appropriate and do not add <script> or <iframe> tags to avoid changes to the code for security purposes. Flash, ActiveX, embedded movies, and sound files will also not function properly.
- When adding HTML code, be sure to follow best practice guidelines for HTML emails. You do not need to add the <html> or <head> tags, and simply need to begin your content with <body>.
- The recommended width of an email is 600px and we encourage you to complete the “alt” parameter for images. A lot of email clients block images by default.
- We also advise using inline CSS and not additional <style> tags as some email providers remove <style> tags and their content.
Notes
- Glue Up is not responsible for the errors generated by incorrect HTML code entered by the user. Please be sure to preview your HTML email to ensure the coding is correct.
- Please be aware that email providers handle HTML code differently. If possible, preview your HTML campaigns with different email clients to ensure everything works the way you like.