Beginning the Check-in Process
Checking in the attendees is one of the most crucial tasks on the day of the event. There are several options available for checking in attendees, and determining which option suits your needs is the first step. All check-in options are available in the Onsite Toolkit section of the Events module. Check-in options include the Standard Check-in process, Self Check-in Kiosks, and the Glue Up Manager app.
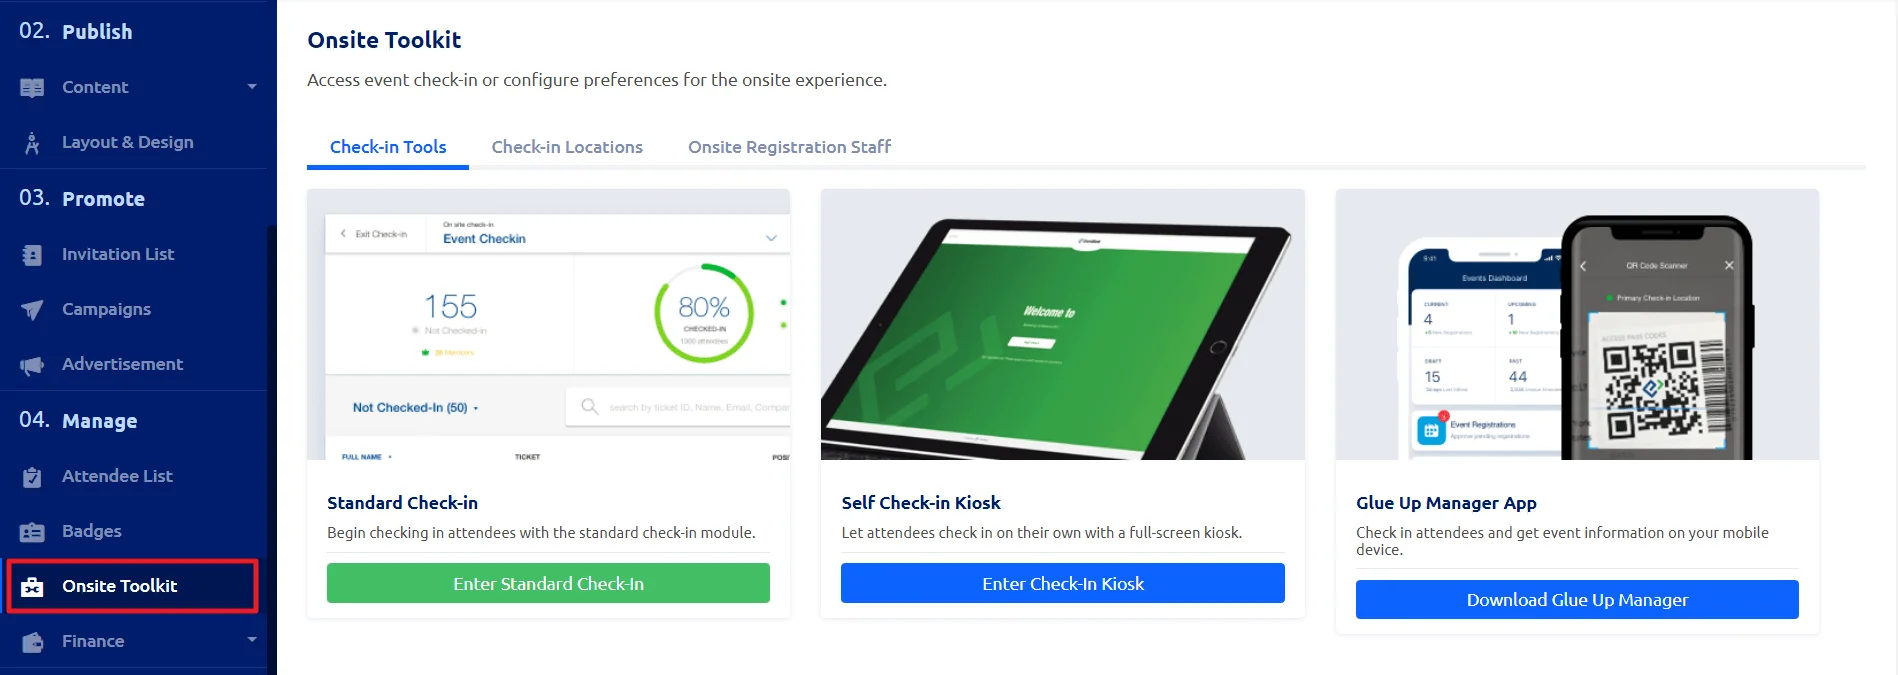
Using Standard Check-in
In the Onsite Toolkit section of the Events module, click on the ‘Enter Standard Check-in’ button to begin the regular check-in process. On the following page, your team members or temporary event staff can easily search for attendees and complete the check-in process.
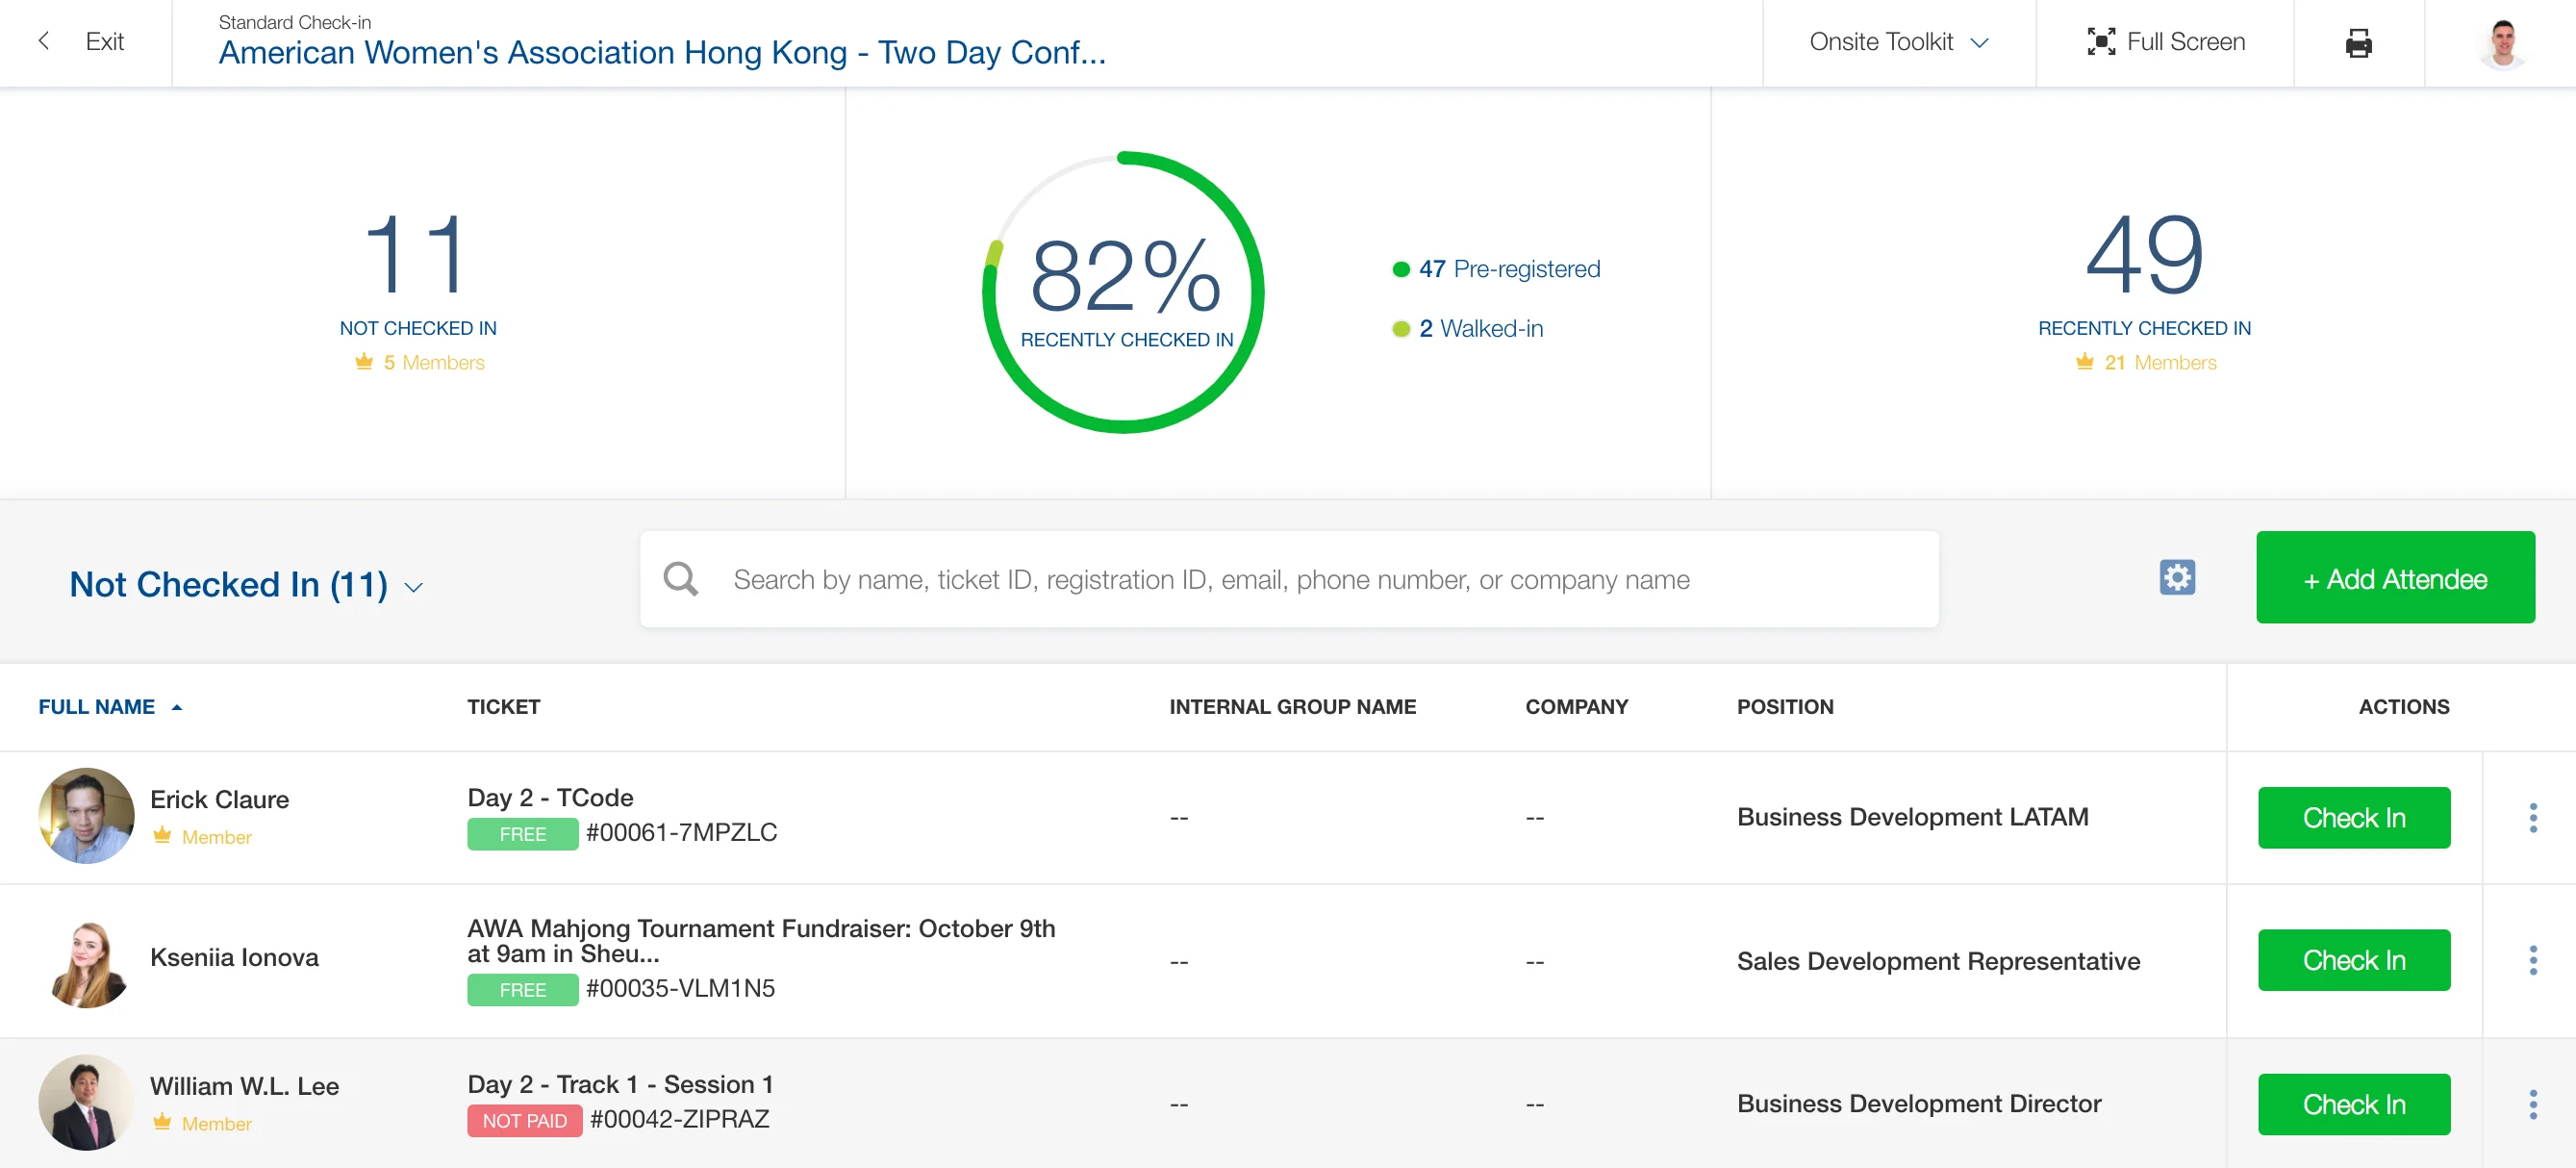
Searching for Attendees and Managing the Table
You can search attendees by name, ticket ID, email, phone number, or company name in the search field.
Also, you can add or remove any additional information on the list by clicking on the gear icon.

To register walk-in attendees, first, click on the ‘+ Add Attendee’ button and then complete the attendee information as needed. Furthermore, to automatically check in the walk-in attendee into the event, check the ‘Automatically check-in this attendee’ box.
Tip: If an attendee already exists in your organization’s CRM, you can quickly search for the person’s information in the search box.
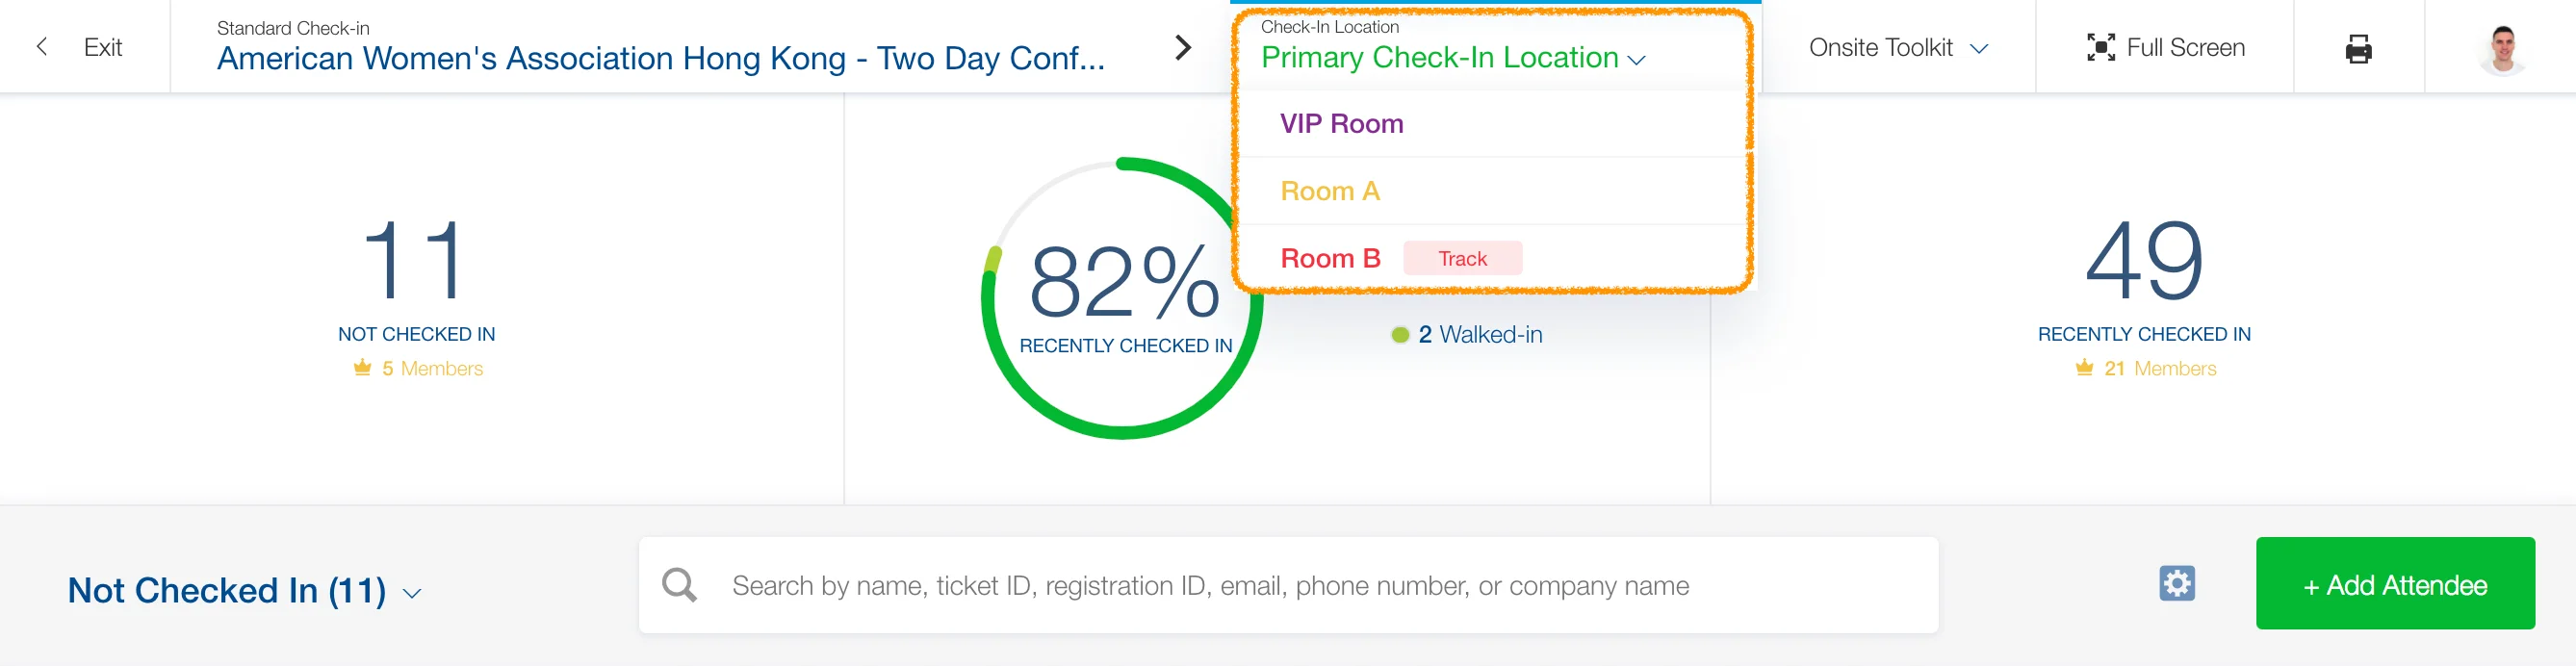
Sorting Attendees by Check-in Location
The check-in location selector, on the top of the screen, lets you switch between different check-in locations. The primary check-in location is selected by default.
Sorting Attendees by Check-in Status
You can filter attendees according to their check-in status by clicking on the selector on the left side of the screen. Check-in statuses include:
- Not Checked In: Only shows attendees who are not checked in.
- All Registrants: Shows all attendees whether or not they have checked in.
- Checked In: Only shows attendees who have already checked in.

Quick Actions on Attendee Profiles
By clicking on the three vertical dots action button on the Actions column, you can:
- Edit: To edit the attendee’s registration information.
- Add Note: To add a comment to the attendee’s registration.
- Print Badge: To print a badge for the attendee. To learn more about preparing a badge design, click here.
- Add Payment: To add a payment to the attendee’s registration.
- Comp Ticket: To waive the fee for the attendee; as a result, marking the payment status as ‘comped‘.
- Change Ticket Type: To change the attendee’s ticket type.
- Resent Payment Notice: To resend a payment notice to the attendee by email.
- Resend Ticket: To resend the ticket to the attendee by email.
- View Registration: If you need to verify all attendee details, this leads you to the attendee registration page.
- Cancel Ticket: To cancel the attendee’s ticket.
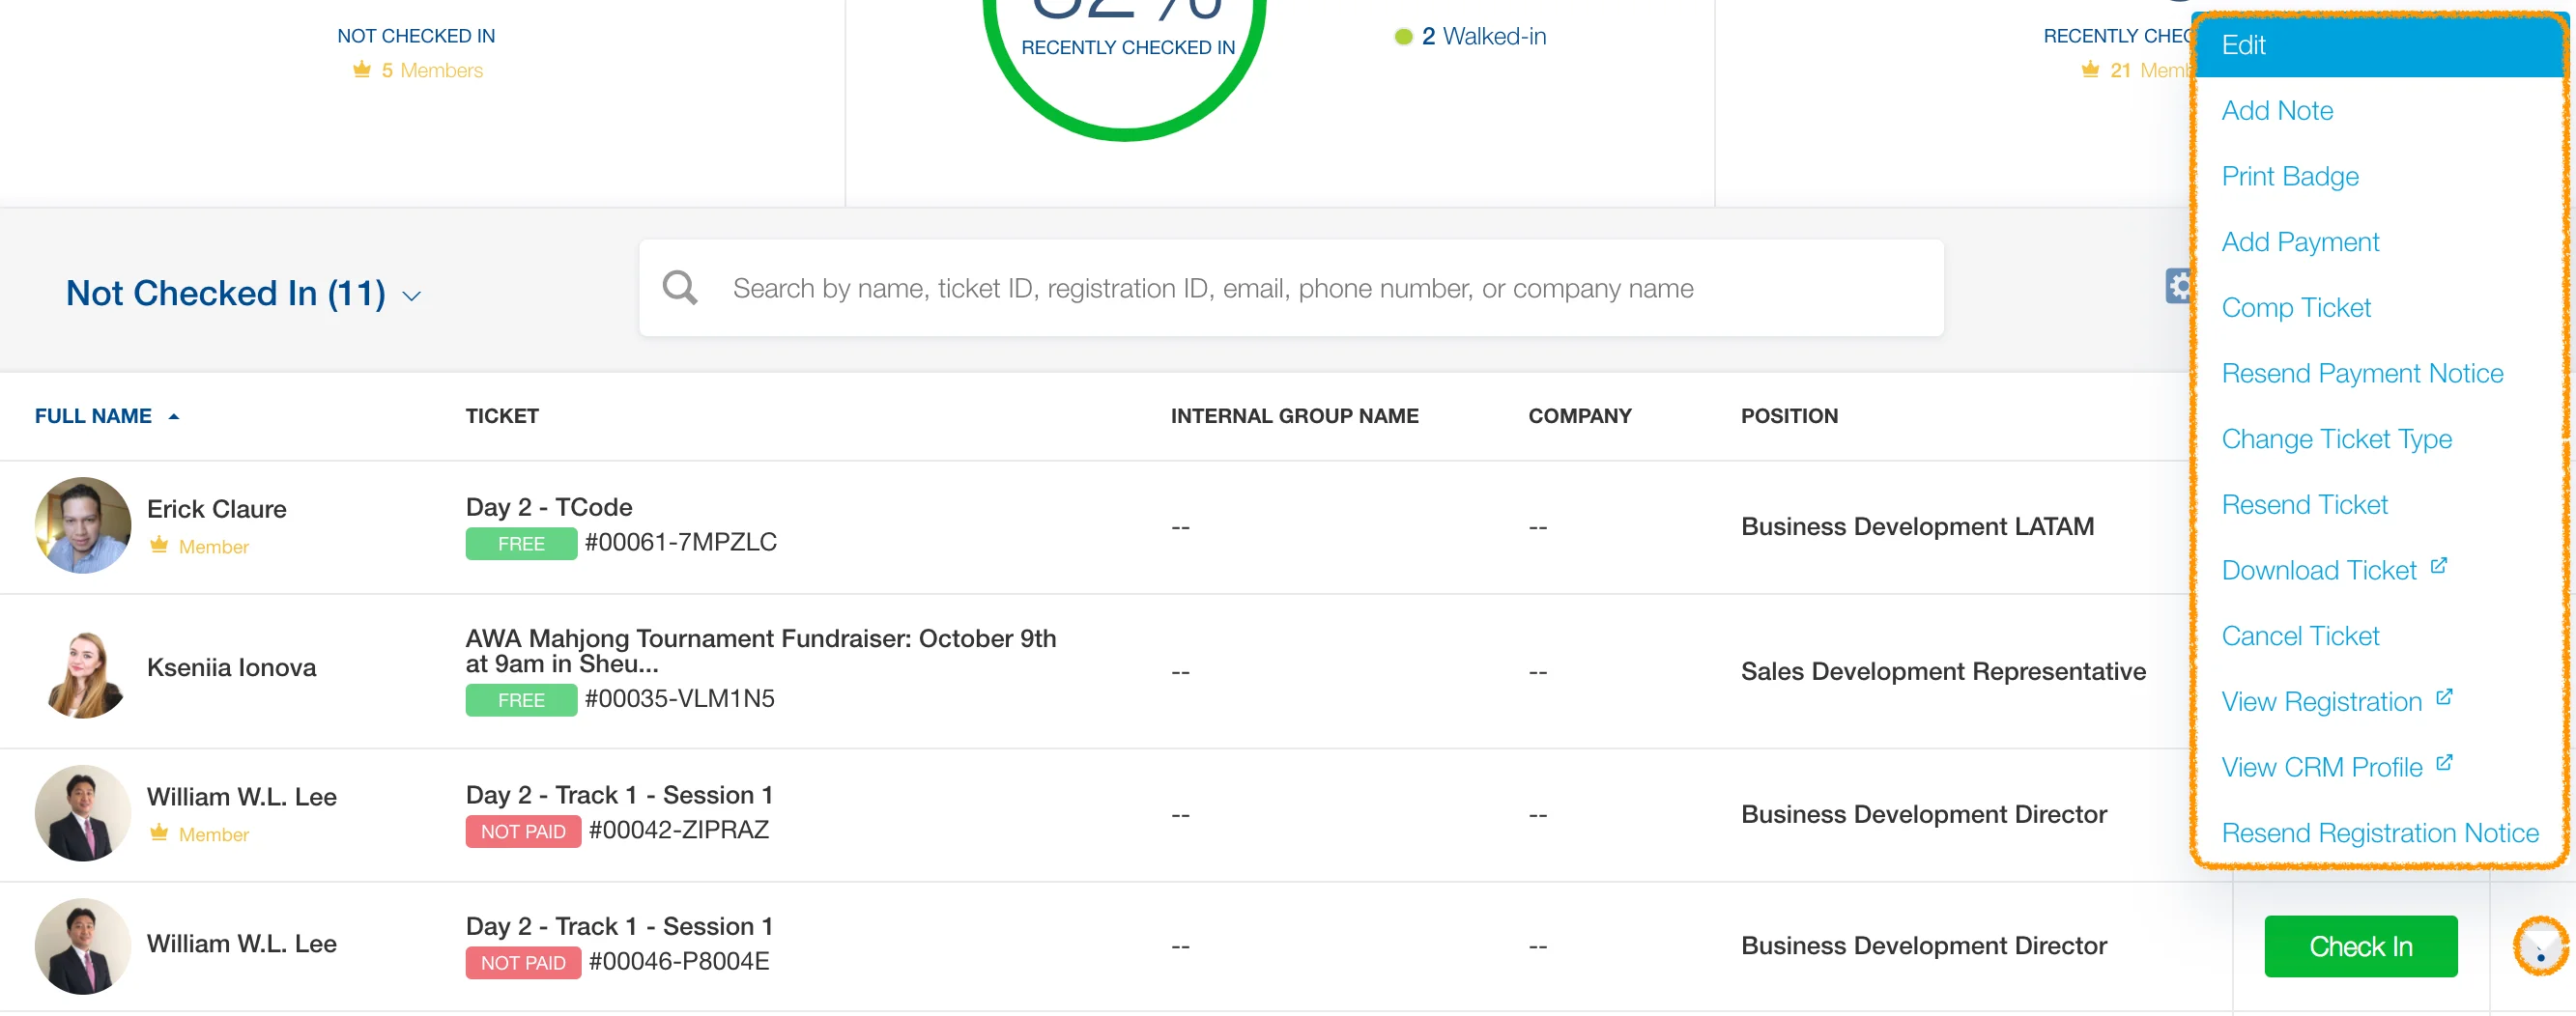
Additionally, by clicking on each attendee, a side panel with an overview of their profile information appears.
Onsite Toolkit Dropdown Menu
By clicking on the ‘Onsite Toolkit’ dropdown menu, located on the top dashboard, you can switch between different check-in options. Furthermore, you can make your mobile device into a self-check-in kiosk, manage check-in locations, or adjust temporary event staff settings (Read more here).
Using the Self Check-in Kiosk
The check-in kiosk function allows attendees to check in independently with the help of a computer or iPad on site. First, go to the ‘Onsite Toolkit’ section of the ‘Events’ module, then click on the ‘Enter Check-in Kiosk’ button to get started.
First, configure your check-in settings. That includes granting permission for camera access to scan QR codes and setting up search options. Finally, click ‘Launch Fullscreen Kiosk Mode’. To set up an additional kiosk, follow the instructions provided on the right side of the screen.
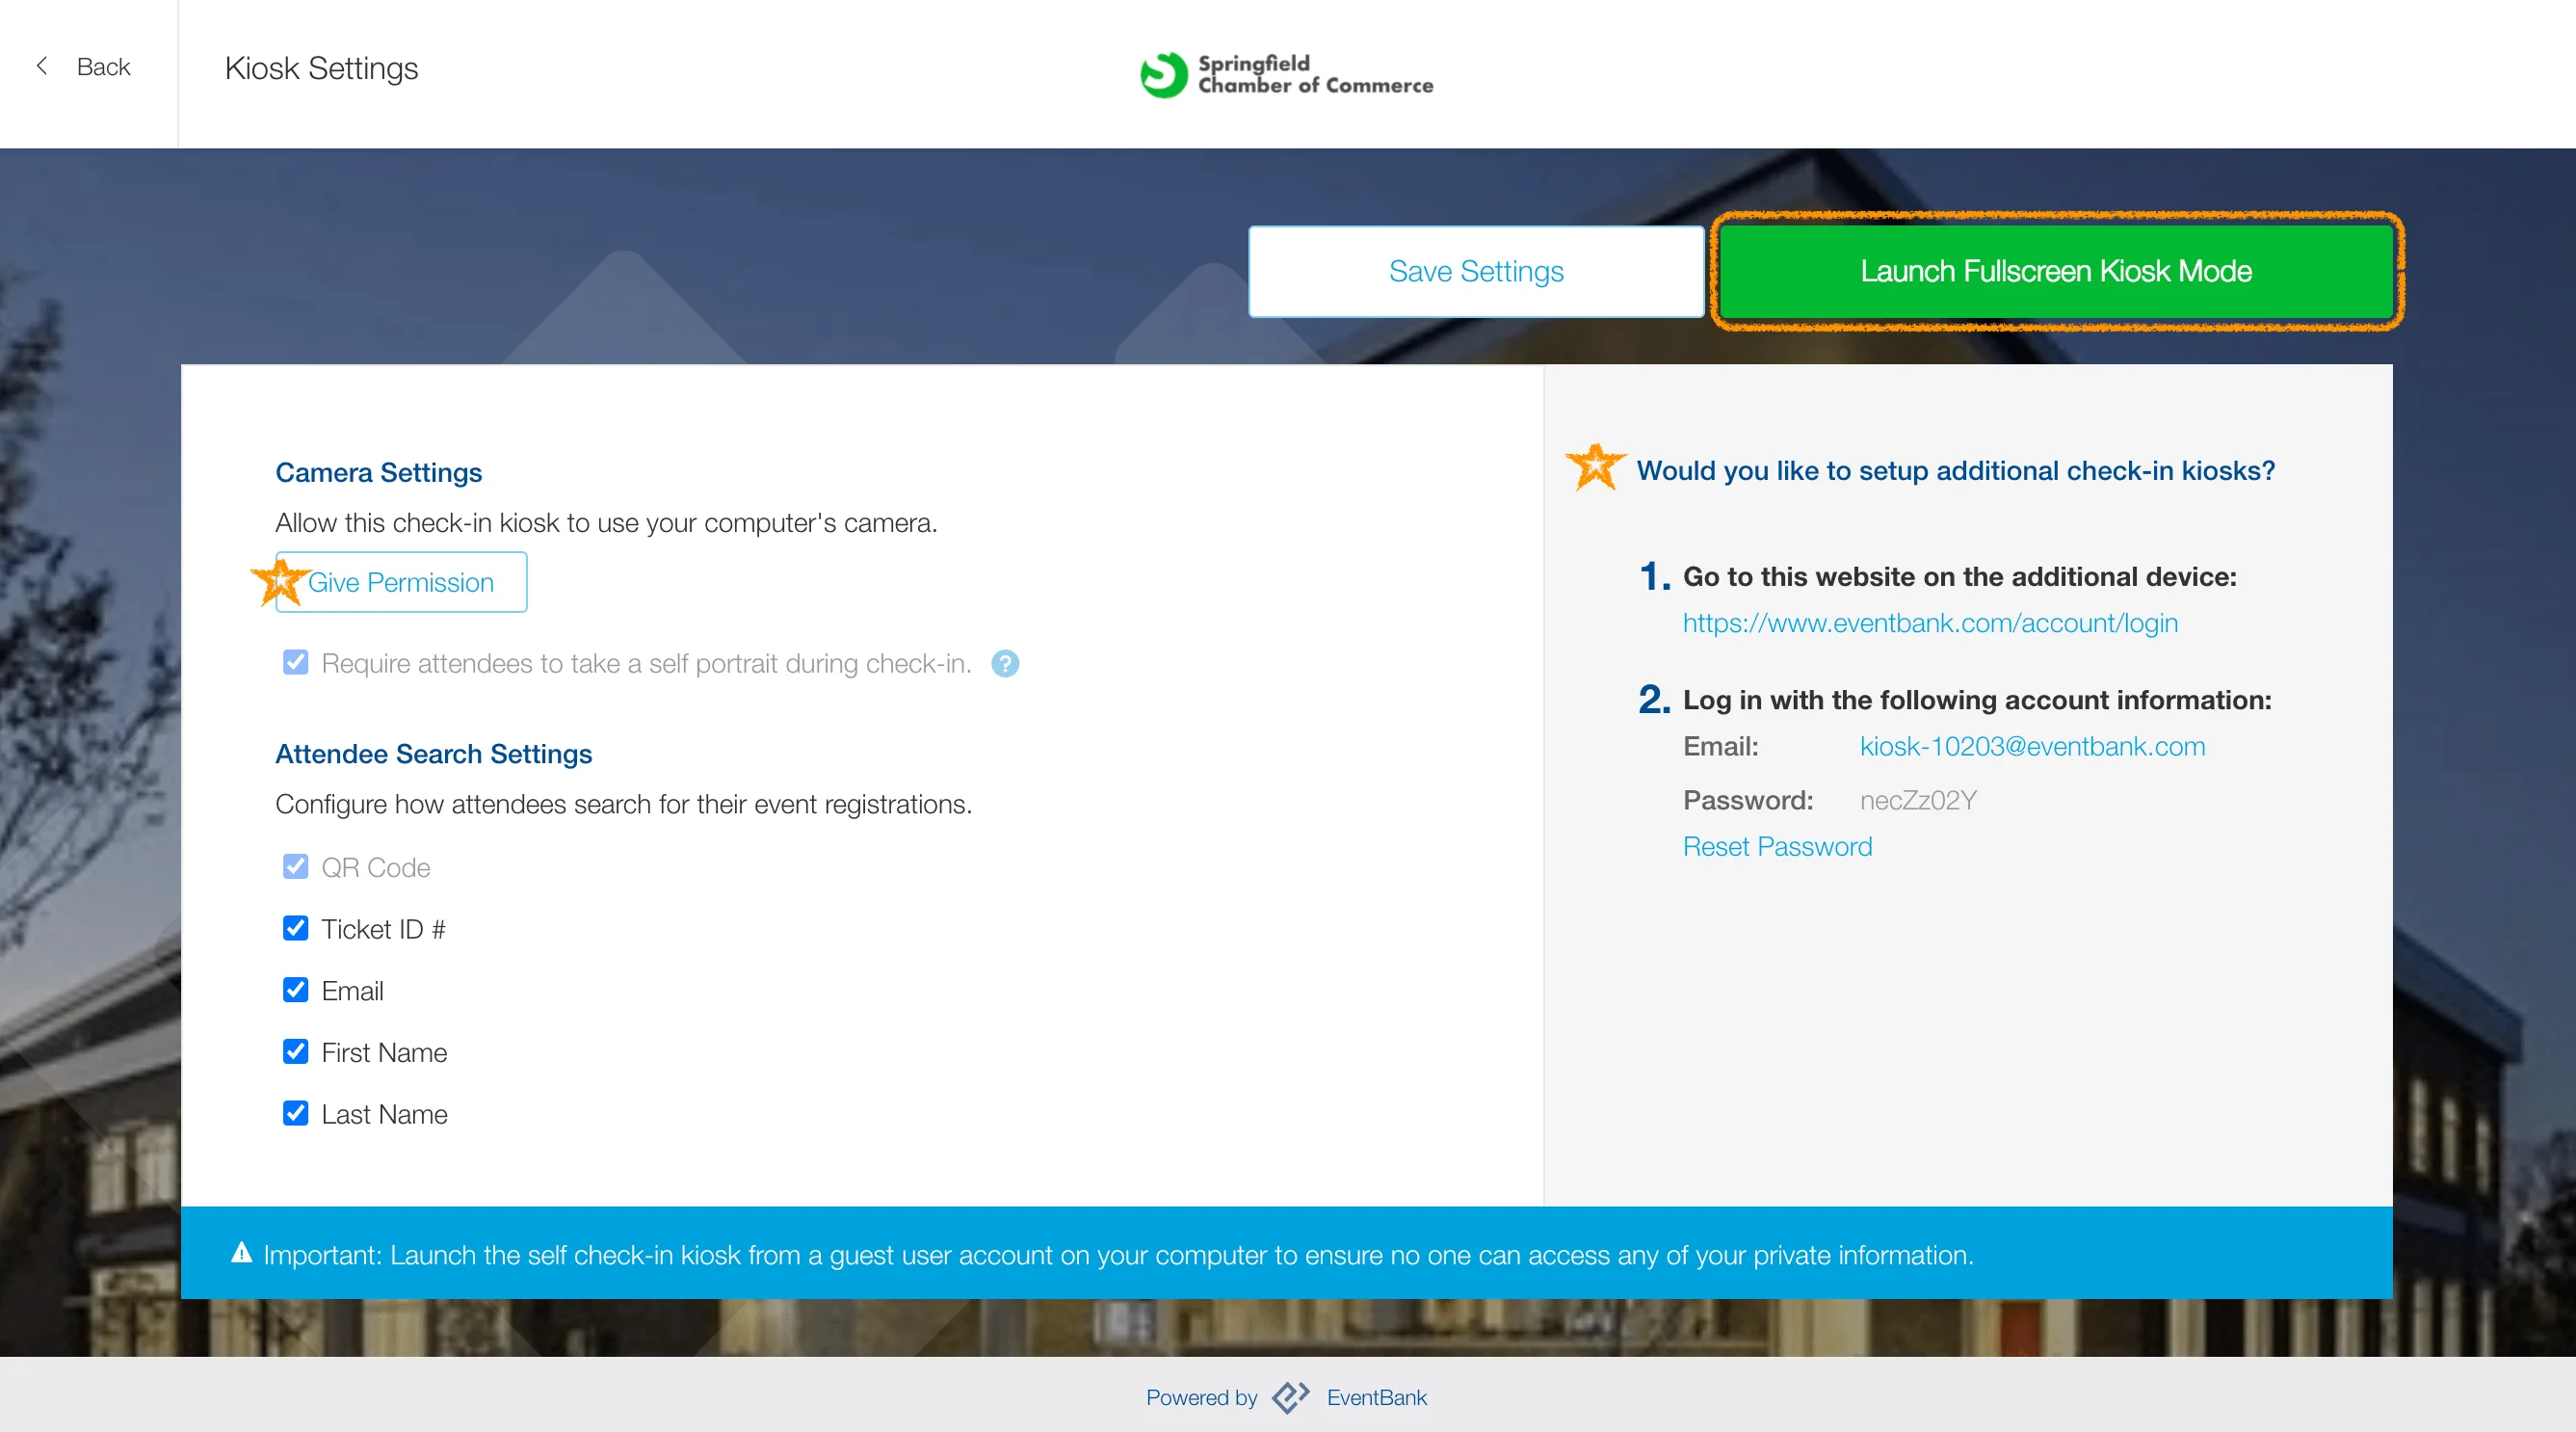

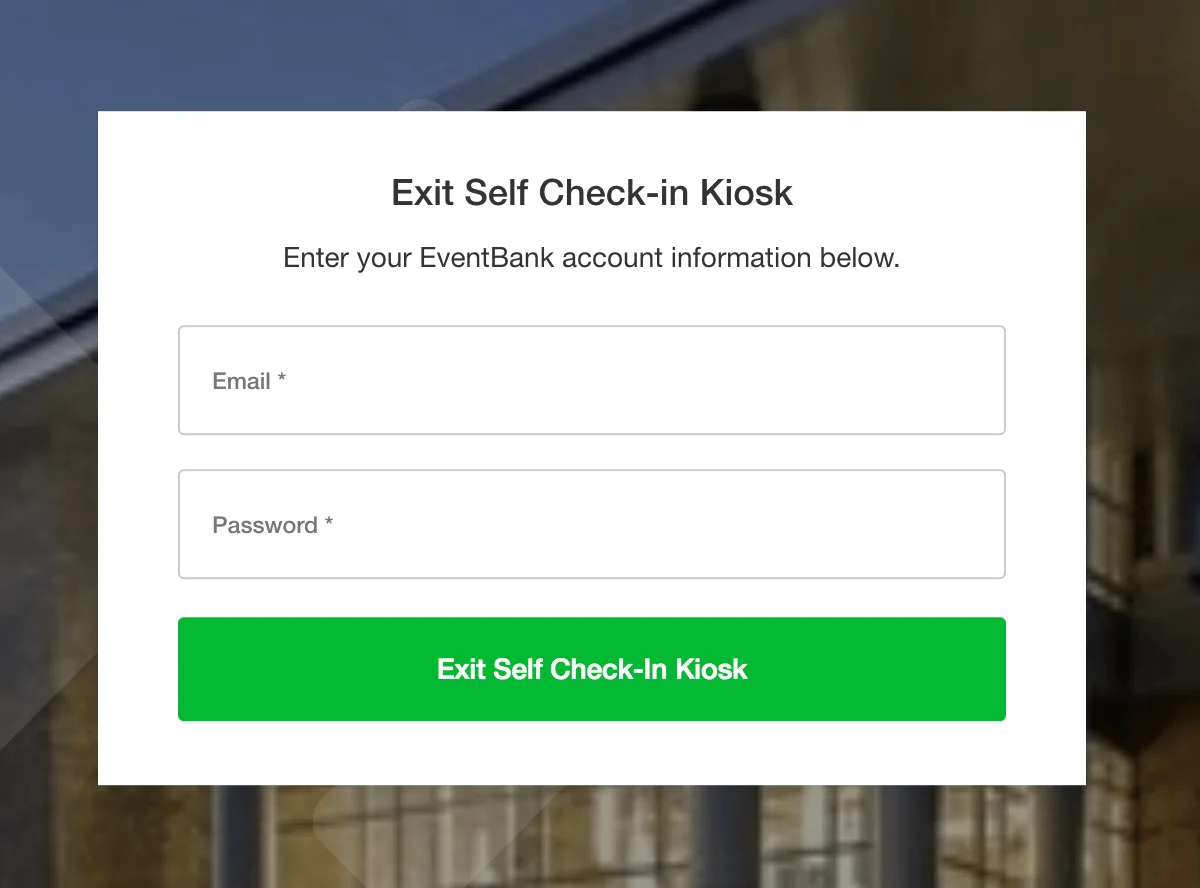
Important: Launching the kiosk locks the screen on your device. You can click the ‘Admin’ button located in the top left corner of the screen to exit. However, this requires an event team member to enter their login information.
Searching event registrations
According to your kiosk setup preferences, attendees may search for themselves by typing the requested information into the search box.
Alternatively, attendees can scan their access pass or Glue Up QR code by clicking the ‘Start Scanning’ button. Lastly, by pressing the ‘Check In’ button, the attendee moves on to complete the check-in process. The self-check-in kiosk returns to the main search screen after approximately 10 seconds.
Note: To verify the identity of attendees who use the check-in kiosk, we recommend having a staff member present on site.