Introduction
Simplifying membership processes and empowering our customers to carry out these functions independently has always been a top priority for us at Glue Up. In a continuous effort to enhance the user experience, we are proud to announce several significant improvements to the membership import process. This article will provide an in-depth overview of these updates and show you how to migrate your membership data into Glue Up.
How to import existing membership data into Glue Up
Step 1: Import History & Activation
To migrate your existing membership data into Glue Up, navigate to the Settings menu and select «Import History & Activation».
Step 2: Select Membership Type
In the «Import Data» section, choose if you would like to import an individual or corporate membership and then select a membership type using the dropdown menu. Click on «Confirm» to continue.
Important: Make sure to create your membership types before proceeding with this step.

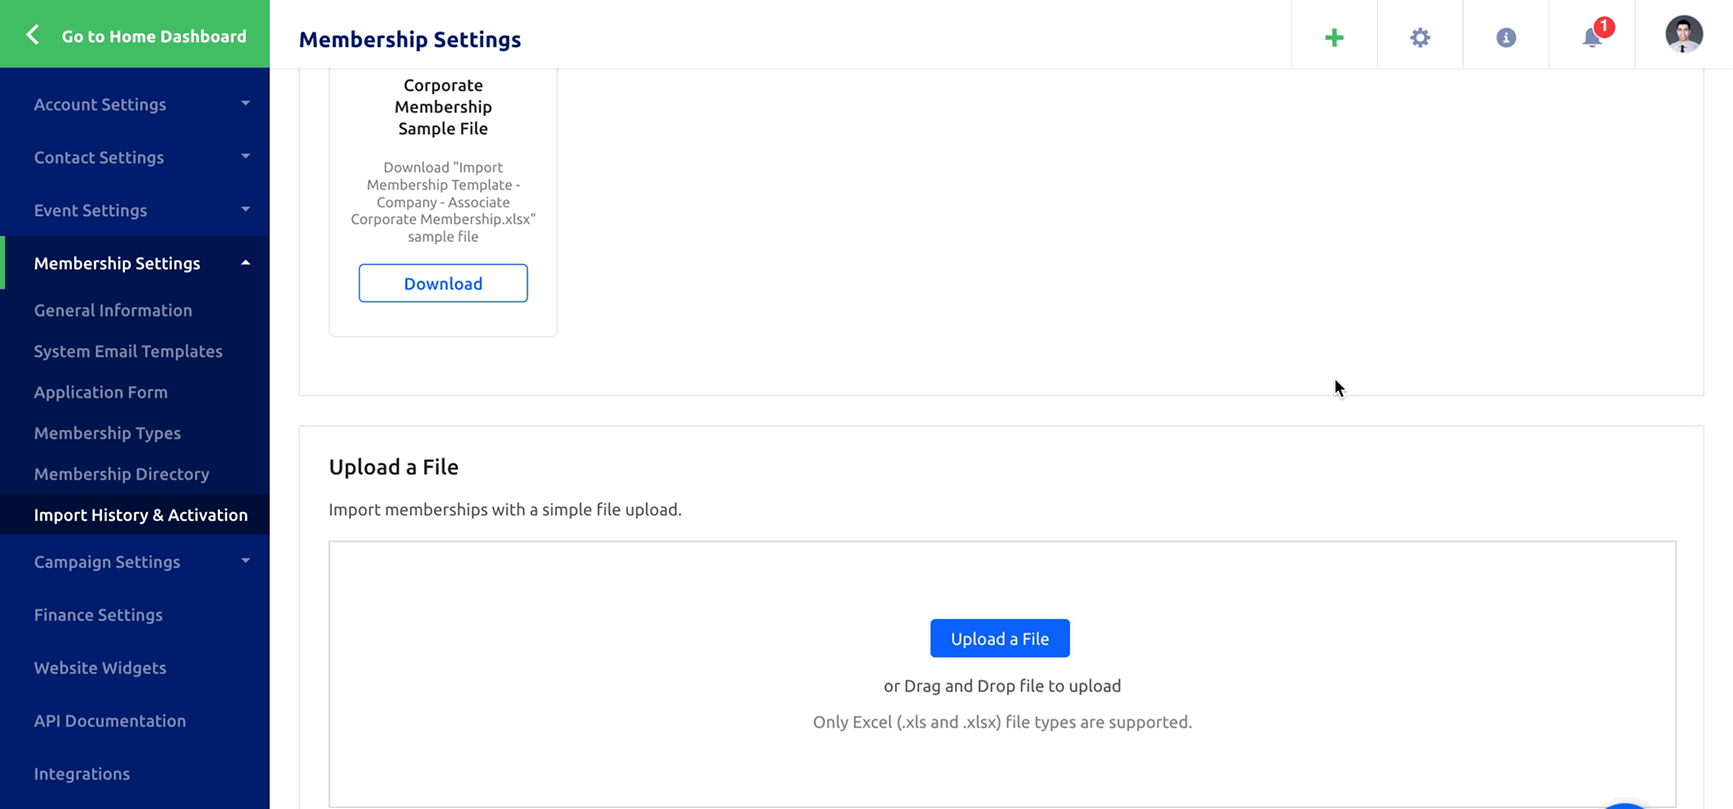
Step 3: Download Template & Upload Import Files
In this step, you can download a Glue Up import template tailored based on the application form you created for this membership. Using this template spreadsheet to import your data is recommended to simplify the process and reduce the chance of mistakes occurring. Alternatively, you can update your own existing file to the required Glue Up format.
Upload your file by clicking on the blue «Upload a File» button or drag and drop your file in the designated area to continue.
Important: Only Excel (.xls and .xlsx) file types are supported.
Step 4: Mapping
The column mapping step is an integral part of the membership import process. Our user-friendly mapping interface makes it easy to match the headers from the file with the system. To help users keep track of their actions, the system provides visual cues in the form of checkmarks and errors. If a mapping is successful, it will be indicated by a green checkmark, while an orange warning sign means that attention is required. If there is an issue with a mapping, it will be indicated by a red error message, and the user will be prompted to either check and map the column or opt to not import it. For convenience, there is also an option to mark any unmapped columns as «Do not import» with just one click using the simple checkbox provided.
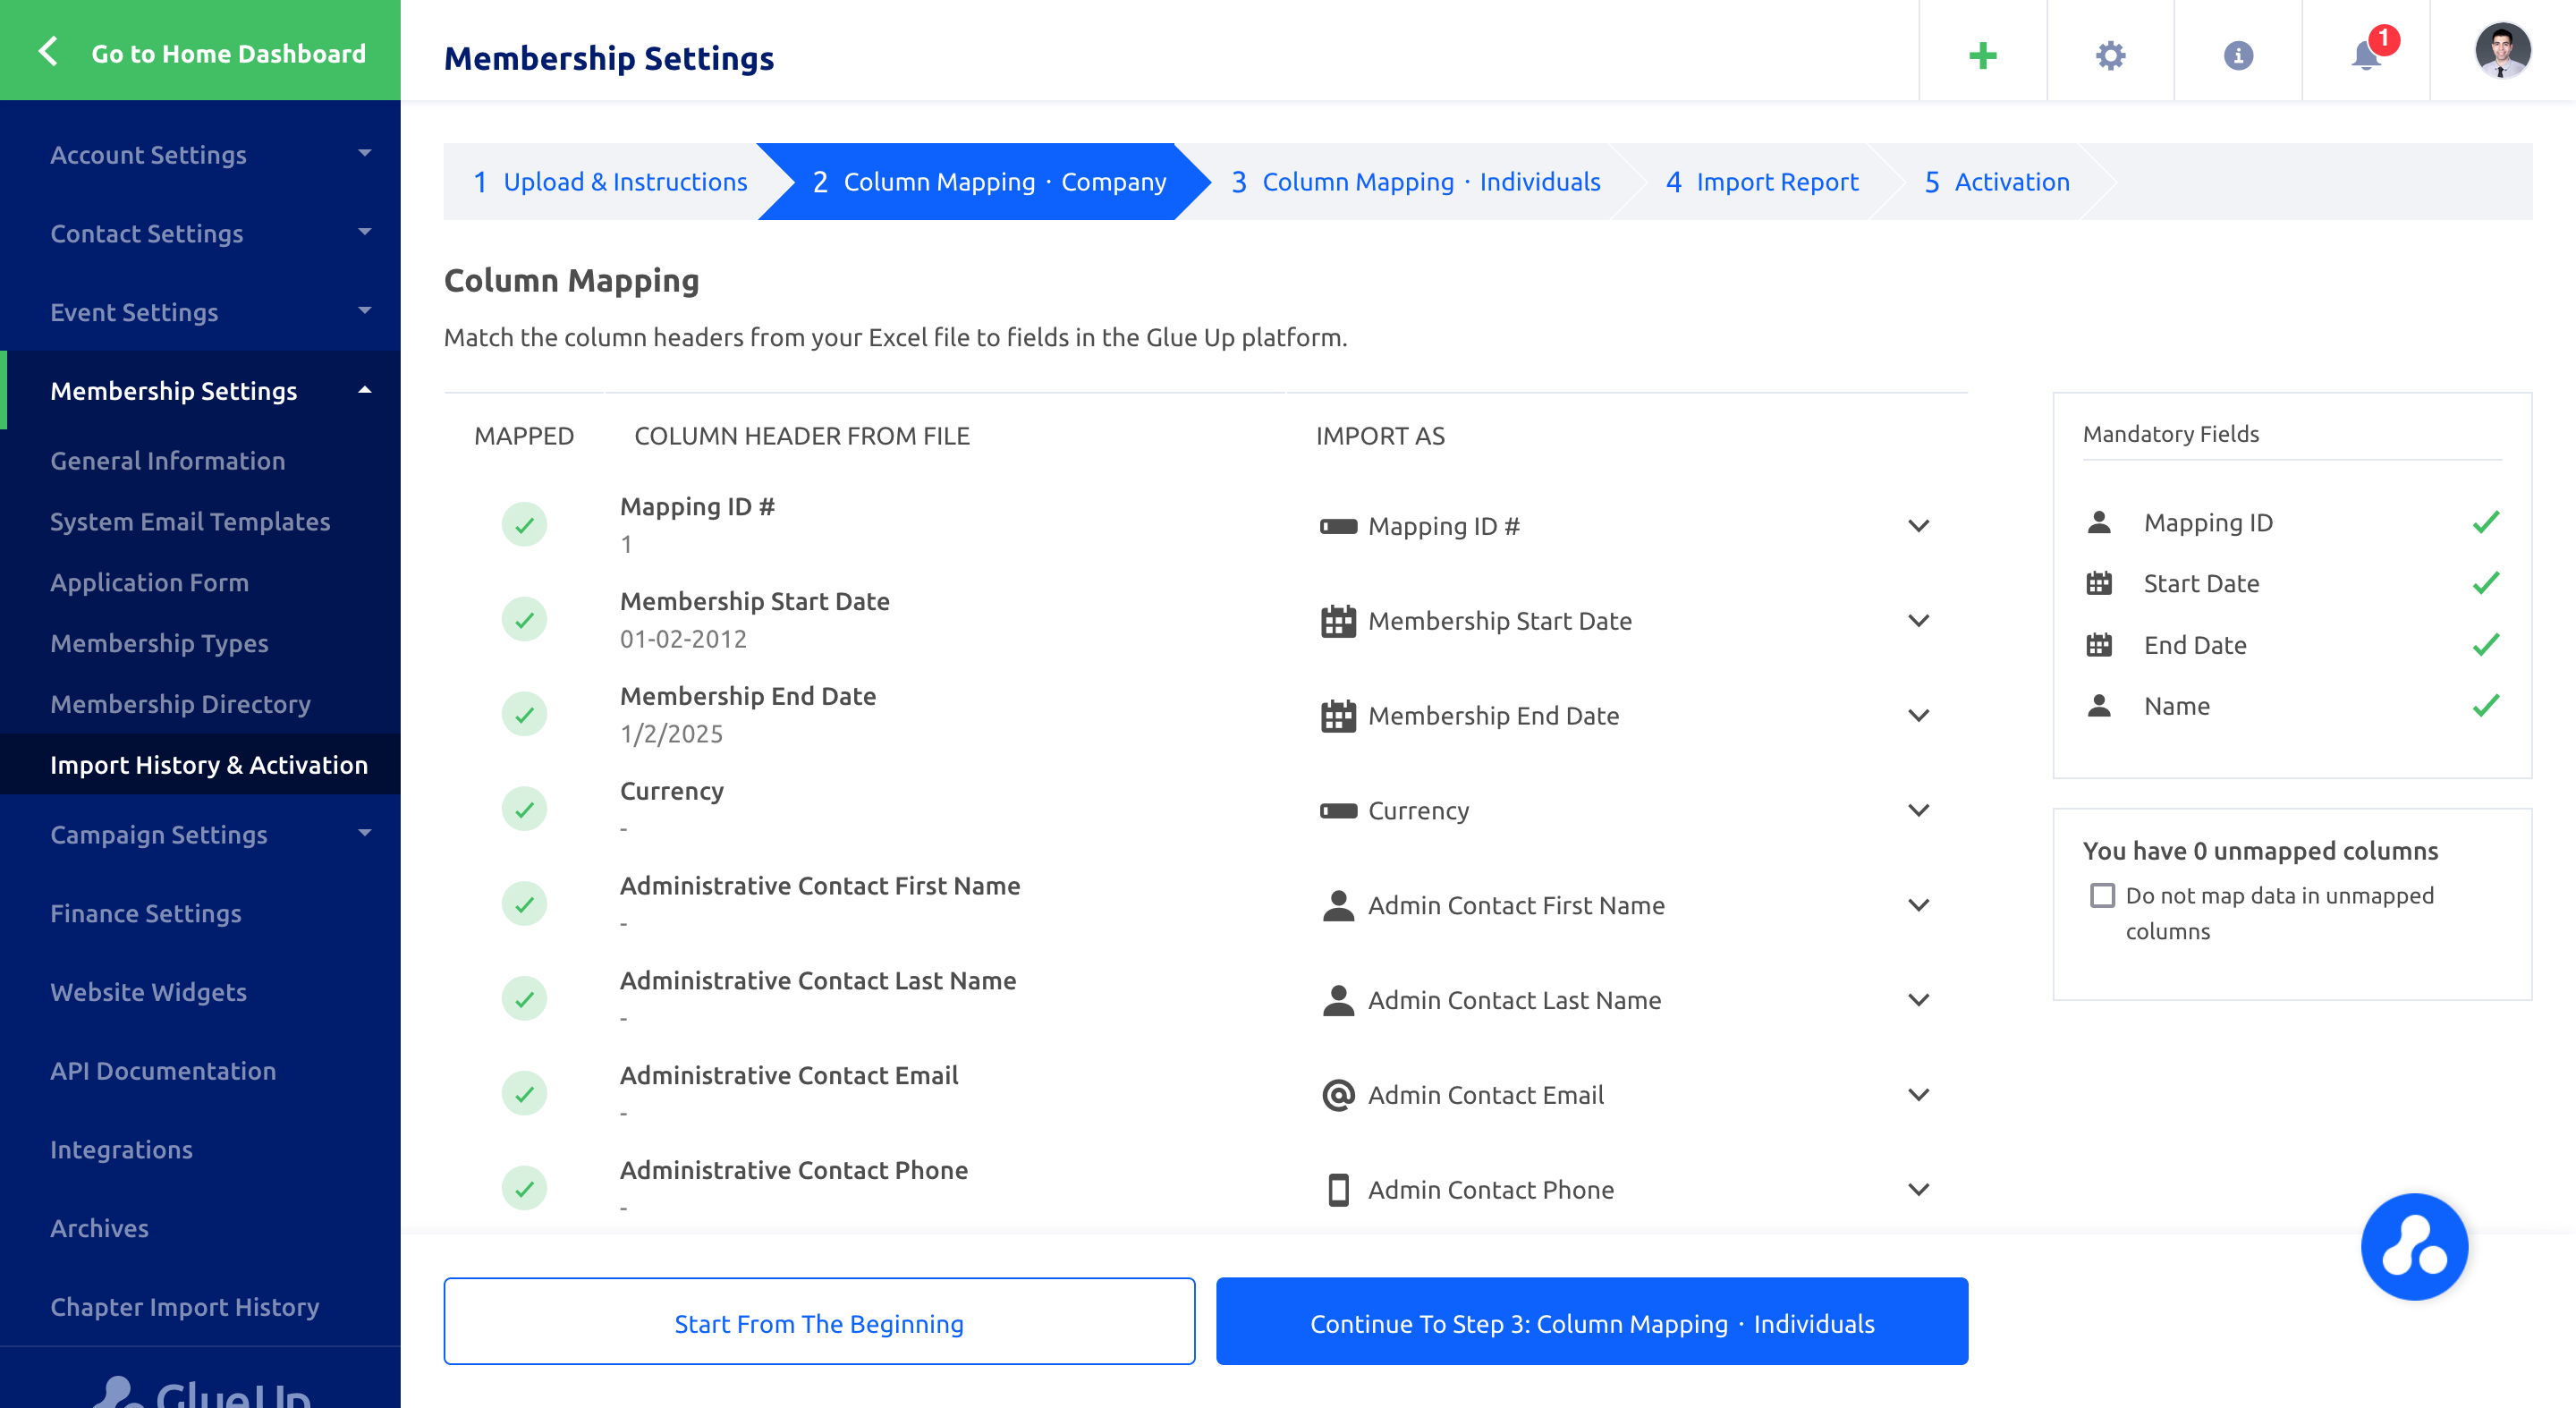
Importing individual membership types only requires one column mapping step, while importing corporate membership requires two. To ensure accuracy, all mandatory fields are displayed in a table on the right side of the screen. After verifying the mapping is correct, simply click on ‘Confirm’ to continue the import process.
Step 5: Import Report
Once the mapping is complete, the next step is the Import Report. This report provides a summary of the process, indicating whether it was successful or not. A green tag indicates a successful import, while a red tag indicates a failed import. This section also provides relevant data such as the number of members imported, any errors that occurred during the import process, and any other important information related to the import.

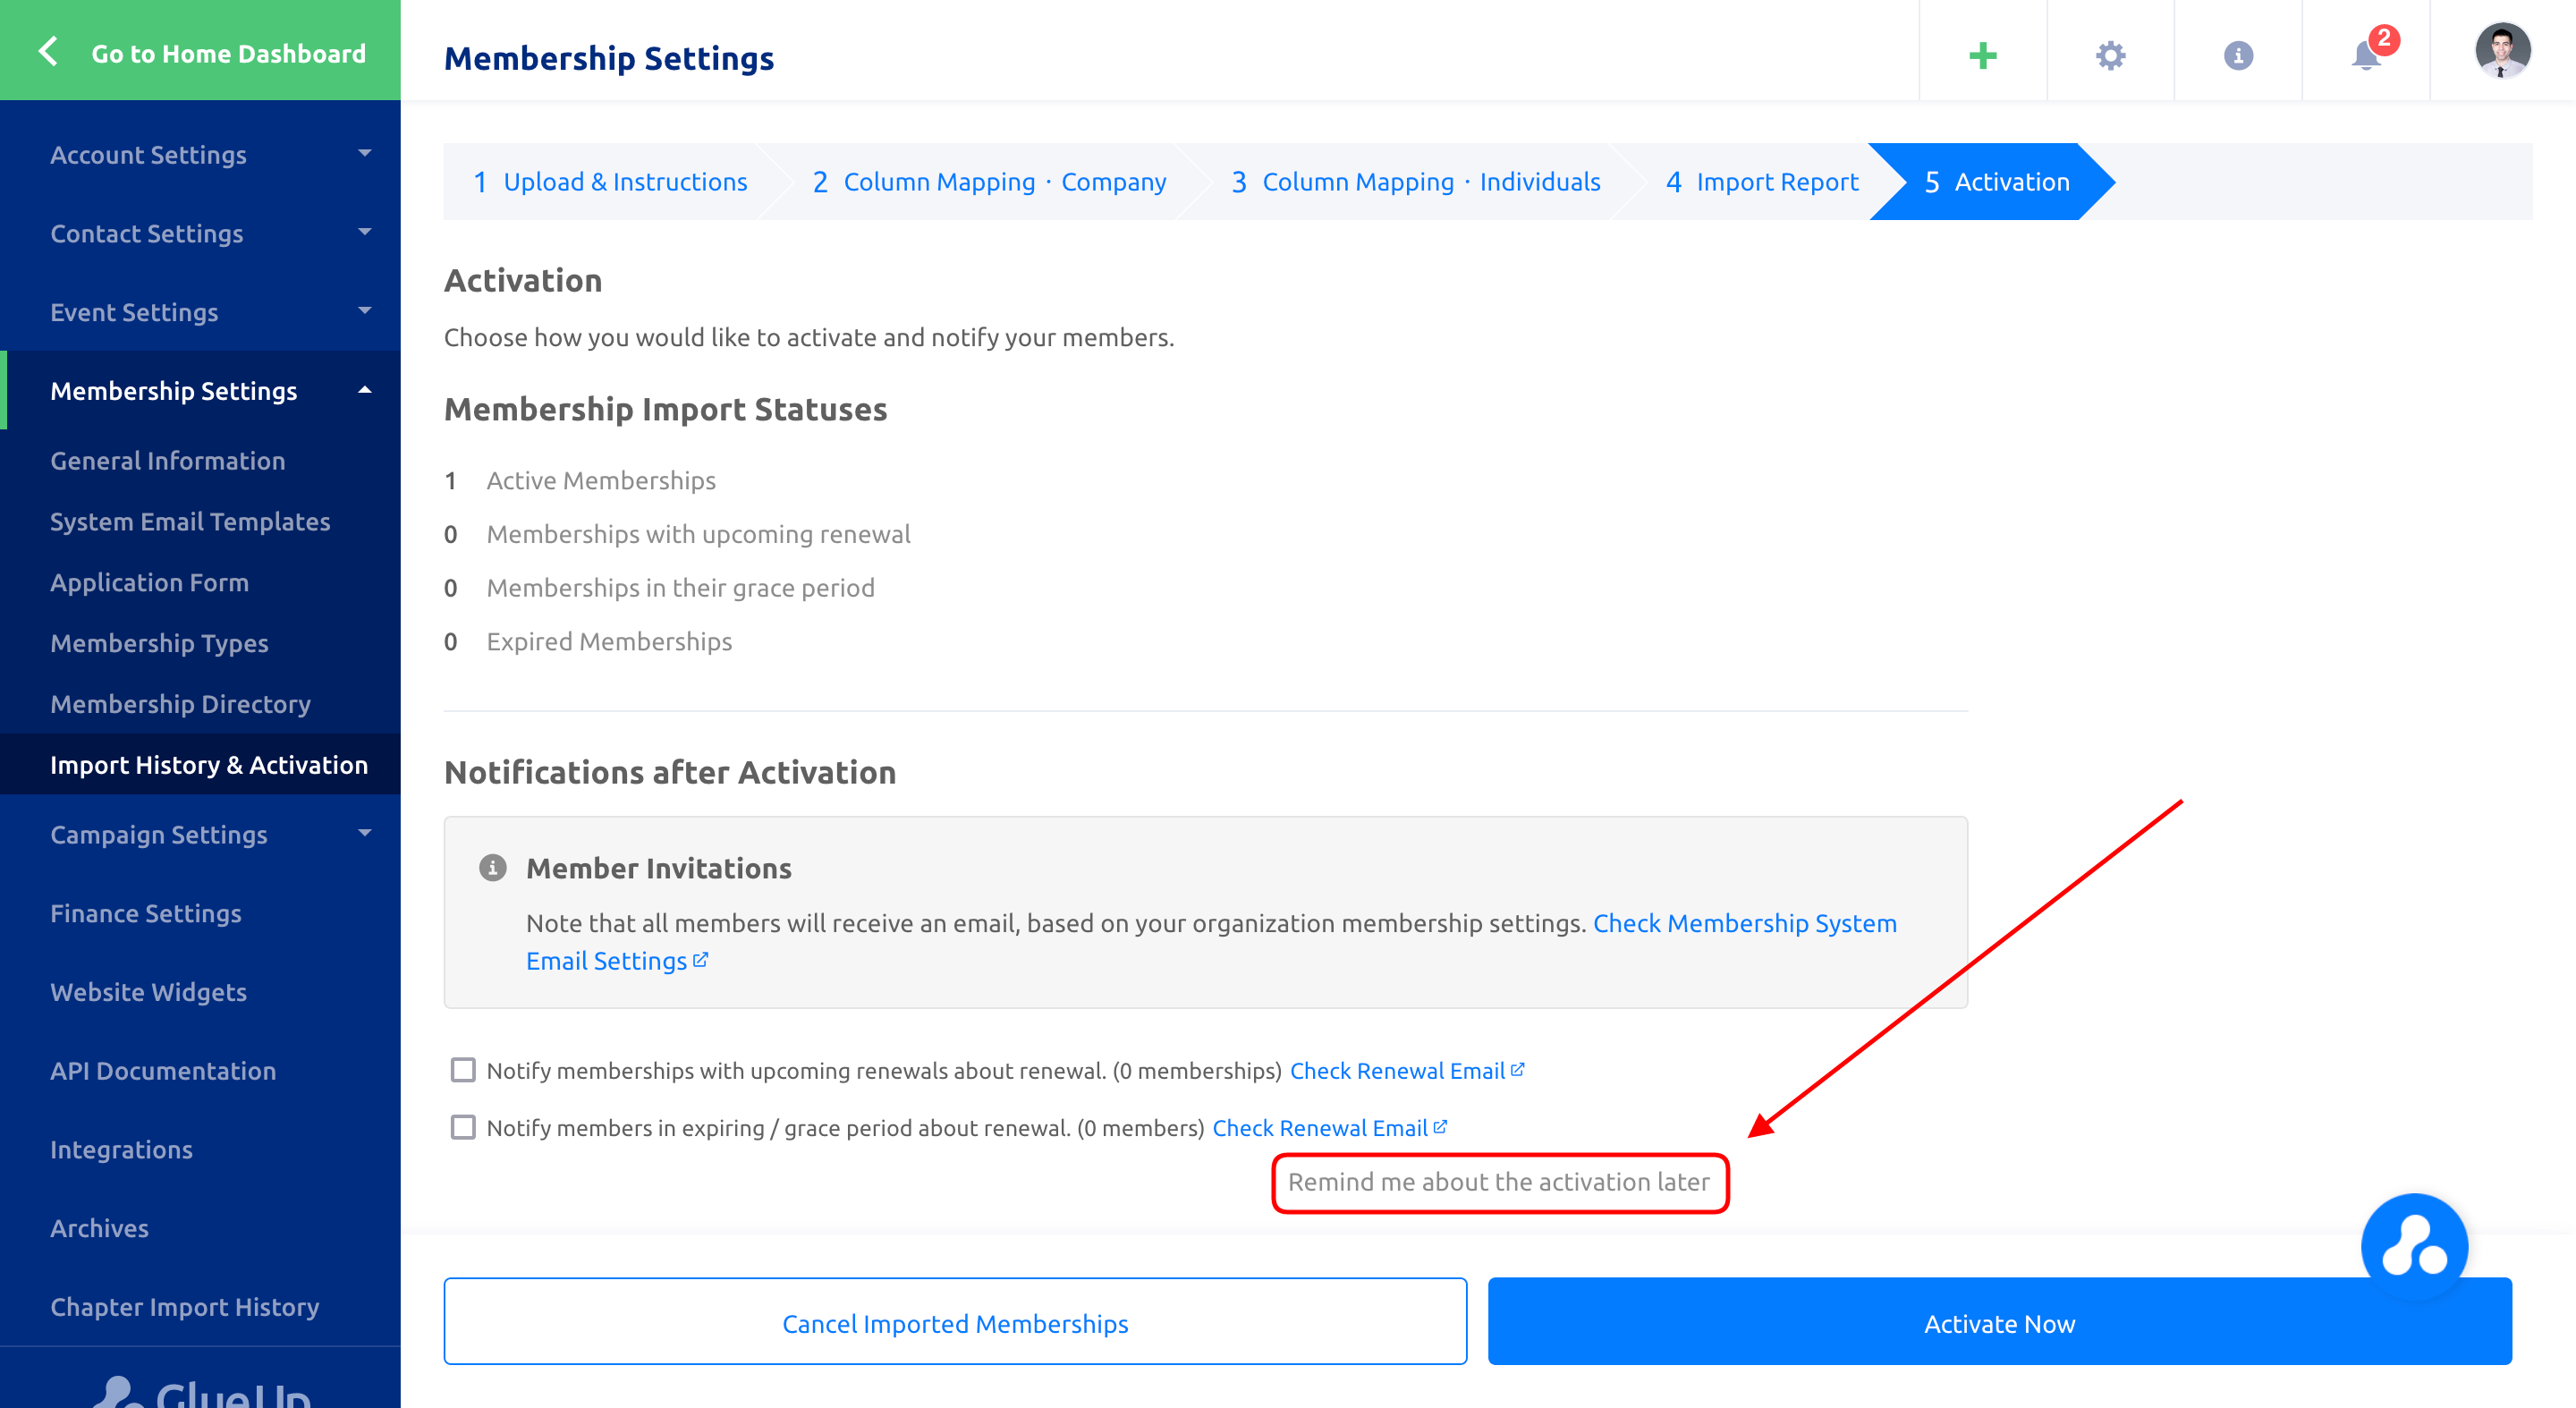
Step 6: Activation
The final step of the membership import process is the activation step, which provides an overview of the number and current status of each imported membership. The status categories include Active Memberships, Memberships with Upcoming Renewals, Memberships in Grace Period, and Expired Memberships.
The user also has the option to manually initiate the renewal cycle by checking the provided checkboxes. This means that upon activation the system will immediately trigger an email notification to members who are in the renewal period or expiring/grace period, reminding them that their renewal is due.

The ‘Remind Me Later’ feature offers users the convenience of activating their memberships at a time that suits them, while also ensuring they don’t forget about this pending task through automated email reminders sent to administrators. Once the memberships are activated, the email notification chain will stop.