To configure all platform settings, click on the gear icon on the top right section of the screen. You can find all general settings of the platform, including language and region settings, privacy policies, etc., under Account Settings. Setting up these configurations is the first step to successfully utilizing the Glue Up platform.
Account Settings:
- Organization Profile
- Language & Region Settings
- Privacy Settings
- Plan & Billing
- Roles & Permissions
- Team Members
Organization Profile:
- General Information: Enter a short introduction for your organization, add the address to your current website, and fill out other details about your organization; users can see the introduction on your Glue Up Organization Website. Make sure to fill out your organization’s Public Contact information; this contact information will appear on communications to your members and event attendees.
- Branding: Add your organization’s logo and select a primary theme color to ensure your Glue Up profile is consistent with your branding. The chosen primary color will also become the theme of your e-mails. The organization banner will appear on your Glue Up Organization Website. All uploaded content can be changed at any time.
- Social Media Links: Link your accounts on different social media platforms to your Glue Up profile. Linked social media accounts will appear under the Contact tab on your Glue Up Organization Website and can be easily added to your email campaigns and event pages.

Language & Region Settings
- Add additional language and currency options for your account, select your preferred date and numerical formats, and choose your organization’s default time zone. The primary language of your account cannot be changed.
Privacy Settings
- Consent Preferences: Enter links to your organization’s terms and conditions and privacy policies (GDPR compliance, etc.) and customized consent terms for events, newsletters, and memberships. For more information, click here.
- Contacts Lookup Settings: Enabling this feature will allow attendees and members to search company names in your Contacts during their event or membership registration. This feature reduces the probability of your members and attendees generating duplicate company profiles on your database. This feature can be disabled at any time.
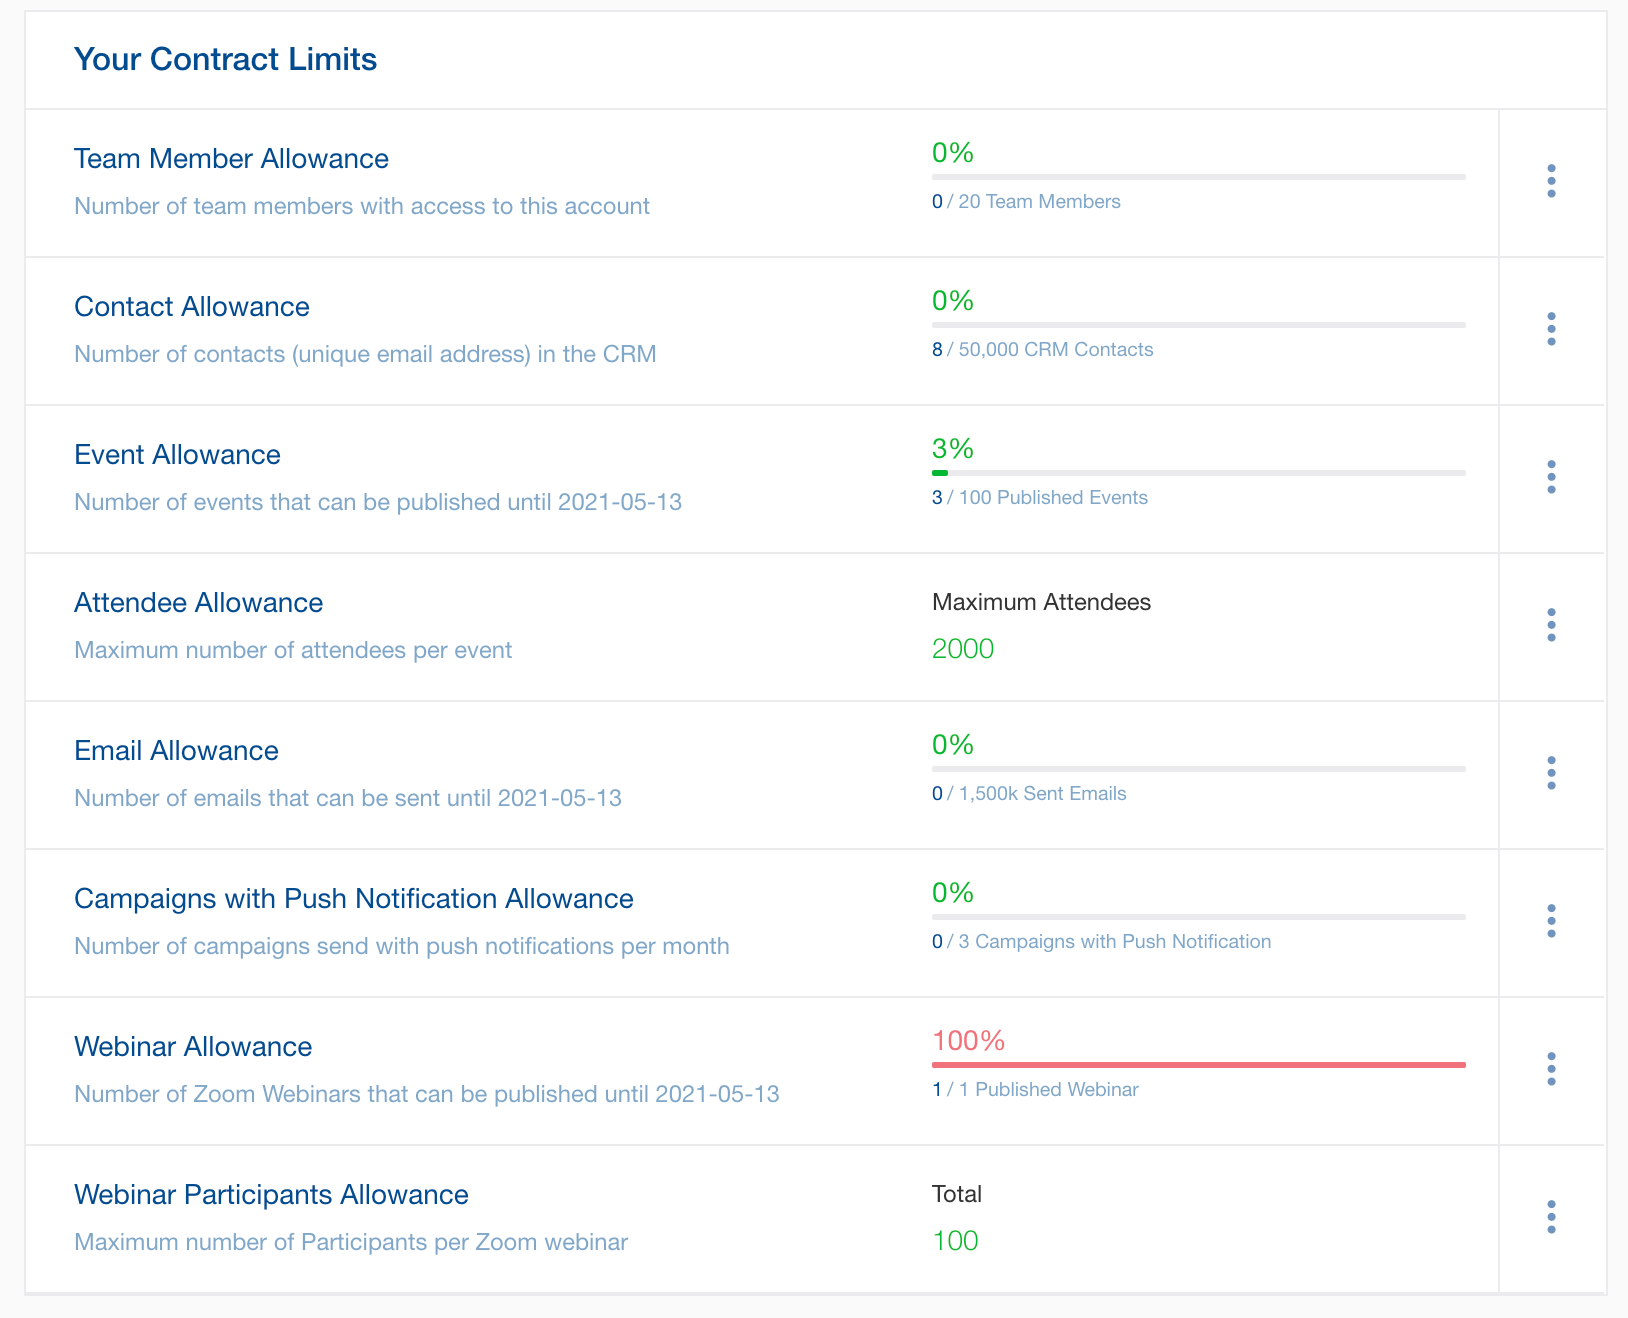
Plan & Billing
In this section, you can track the allowances and quotas of your account. In case of any discrepancies, please reach out to your Customer Success Manager or email us at support@glueup.com.
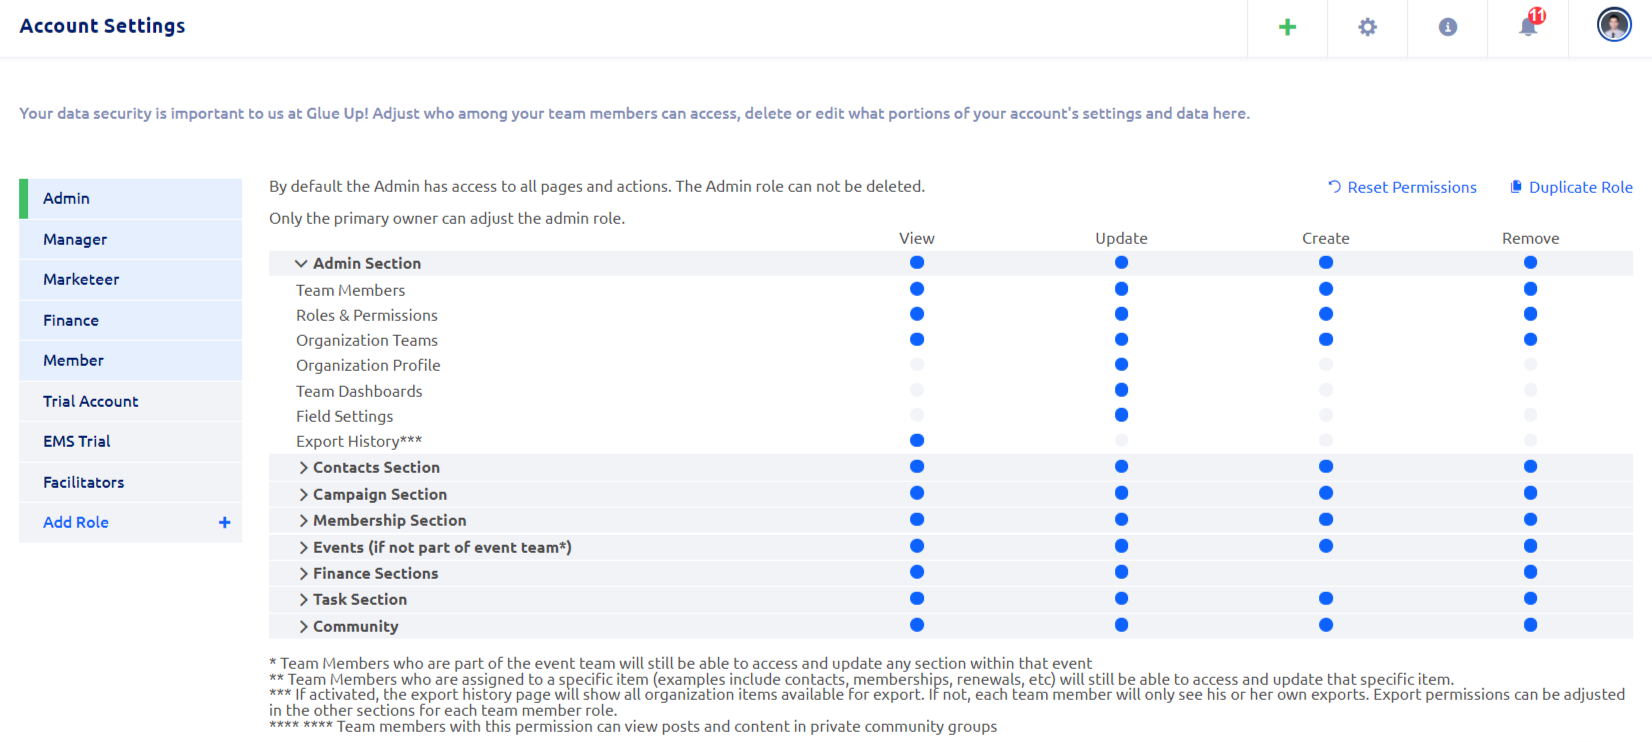
Roles and Permissions
- Creating and assigning roles allows you to ensure each team member can only view and edit specific platform functions. You can add your customized roles to the existing five system default roles.
If you cannot access certain functions, the reason might be that you do not have the correct permission to view or edit that section. Reach out to an admin user of your account to adjust your role or permissions.
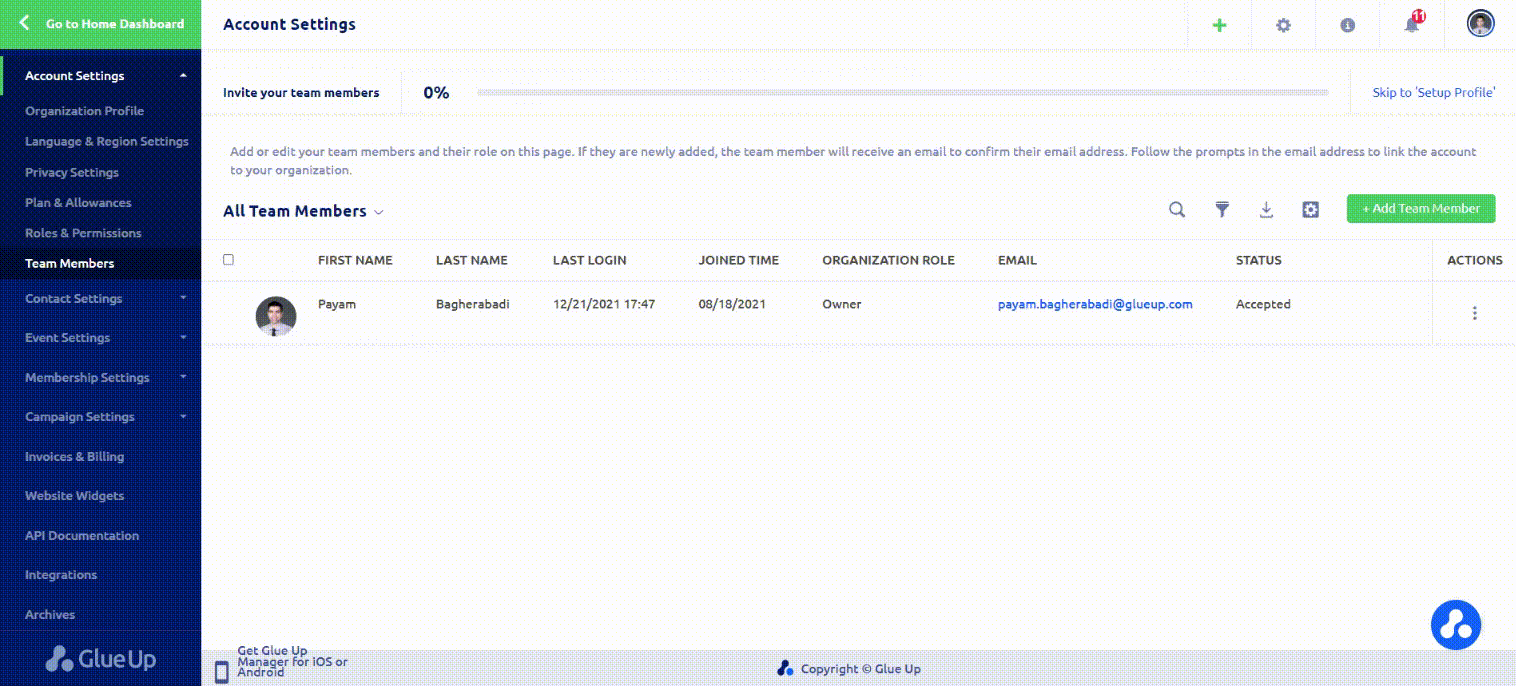
Team Members
- You can grant access to and manage admin users of your account on Glue Up on this page. Click on the green «Add Team Member» button, fill out all mandatory fields (email address, first and last name) and assign a role for each team member. The «Owner» of the account is considered a super admin and has all permissions. The role of the Owner can be transferred to other team members. You can additionally sort your team members into groups by clicking on «Add Team.» (Screenshot below)