Processing Membership Applications
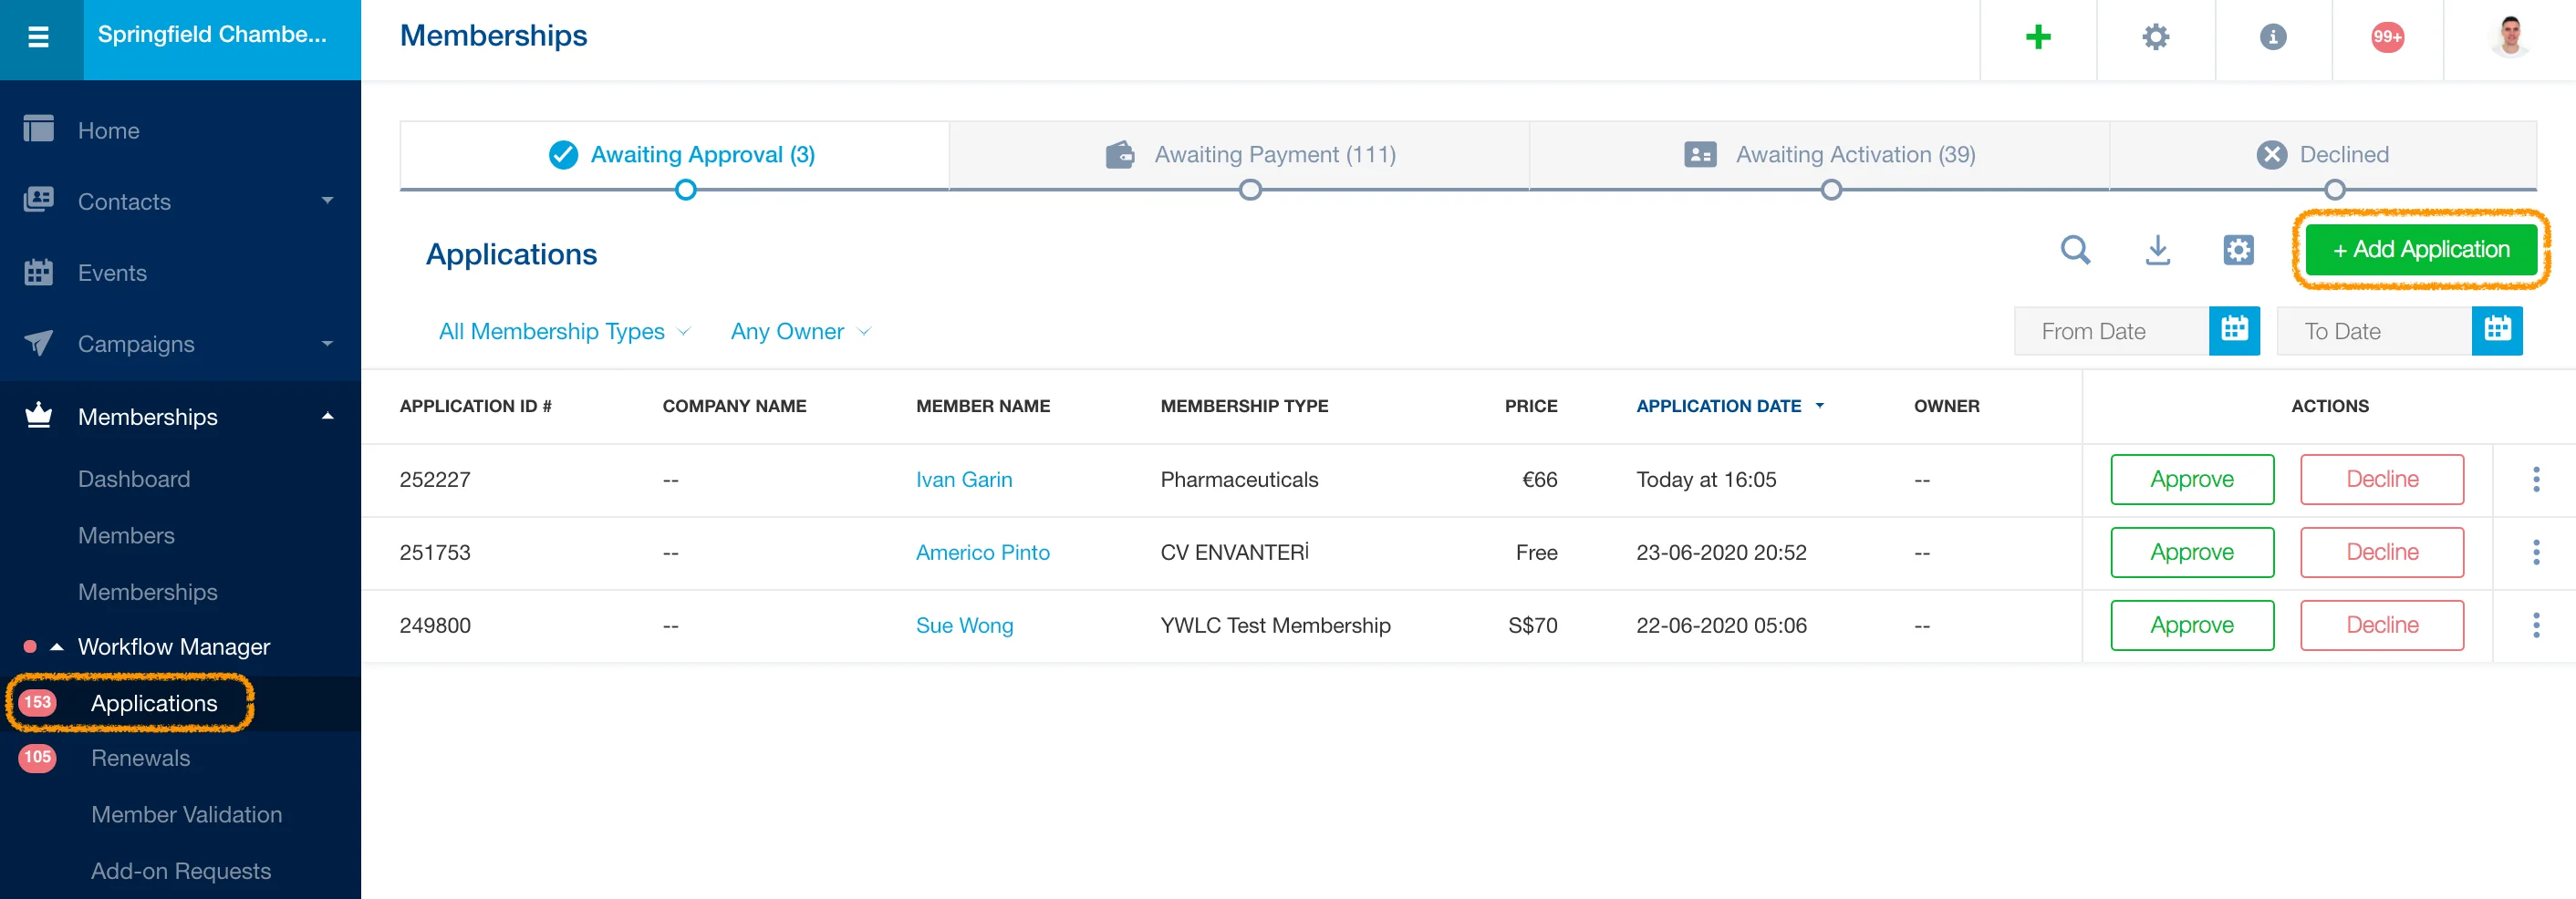
Your organization’s membership applications can be managed in the Applications subsection of the Membership module’s Workflow Manager. The Workflow Manager can be accessed in the left sidebar navigation menu.
Adding a membership application
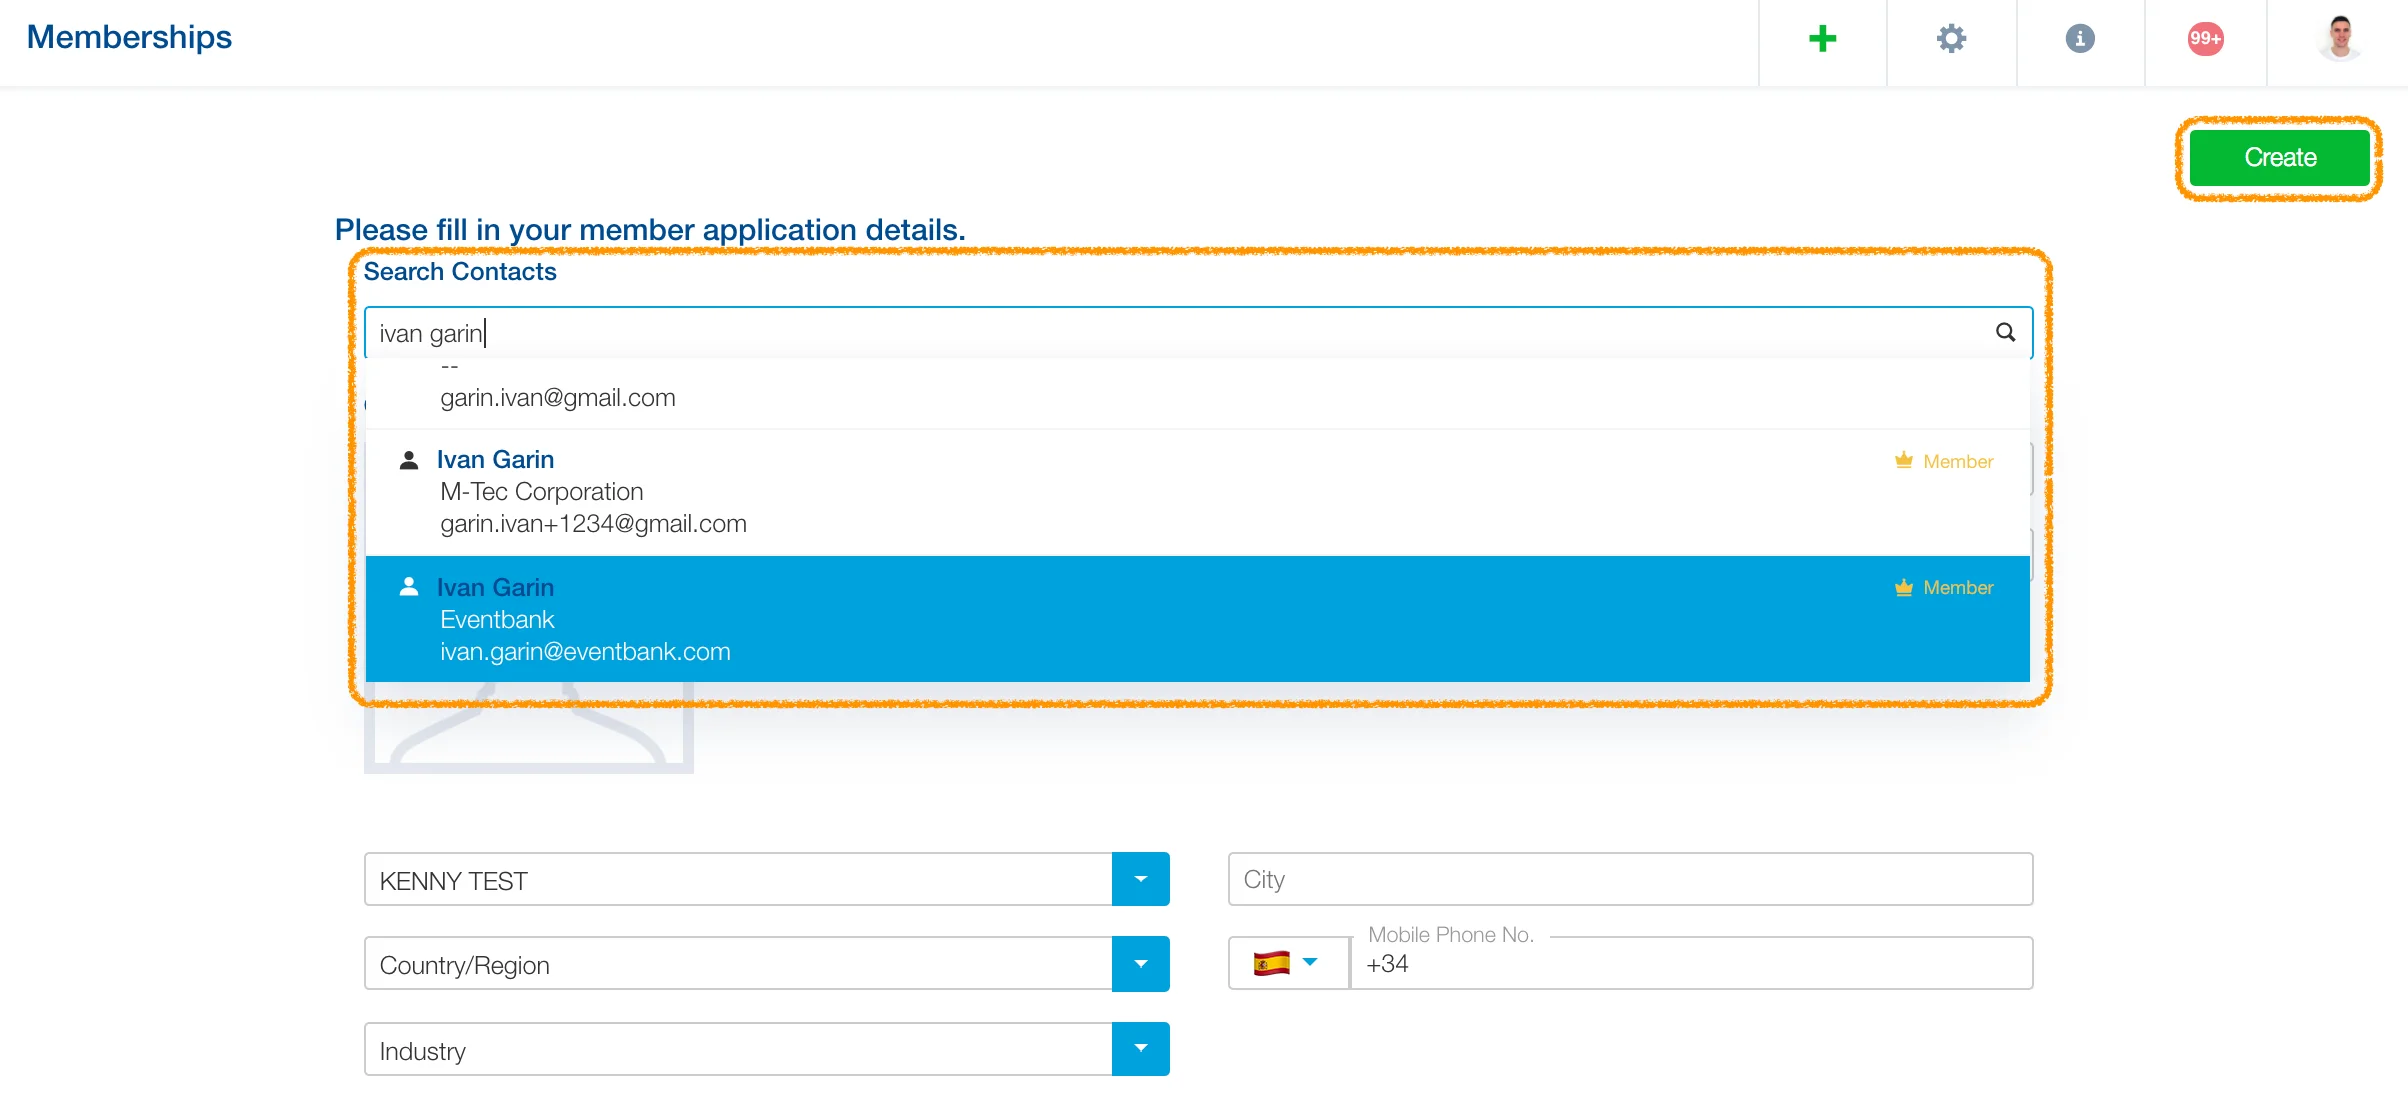
In the main screen of the Membership module’s Workflow Manager, Applications section, click the +Add Application button to add a member application to the Membership module. Select a membership type and choose whether to send email notifications to the new member when the application is created. If the new member is already in the CRM, search for the name of the desired person or company, or simply enter the new member’s name and information manually. Click Create to add the member application to the Membership module.
Managing and tracking membership applications
Membership applications are tracked according to application status and are sorted into tabs. These status tabs appear in accordance with your organization’s preferences selected in each of the Membership Type Settings you have set, Workflow Settings. Application status tabs include:
- Awaiting Approval Tab: all member applications submitted which are awaiting organization approval (from your side)
- Awaiting Payment Tab: all applications awaiting payment, if they pay offline (directly via bank transfer, cheque or cash) you must update manually the payment status.
- Awaiting Activation Tab: all applications awaiting activation by your organization, if you have set this option.
- Declined Tab: all applications that have been declined by someone within your organization.

Sorting applications with list selectors
You can sort applications within each application status tab by clicking the down arrow that is part of each list selector. Available list selectors include:
- Membership Type Selector, option include the following: Any Membership Type, All Individual Memberships, All Corporate Memberships, Custom Corporate Membership Type Name, Custom Individual Membership Type Name
- Owner Selector, option include the following: Any Owner, No Owner, Custom Team Member Name
- Date Selectors: The From Date and To Date selectors allow you to sort applications according to application date.
Managing applications with quick-access icons

In each application status tab, you can use any of the quick-access icons to manage the table display. Quick-access icons include:
- Search: Click the magnifying glass icon to quickly search members.
- Export: Click the export icon to download all applications included in your search.
- Show/Hide Columns: Click the show/hide icon and select Manage displayed columns to customize your table display. The application table can be sorted by default fields. Default fields include: Application ID #, Company Name, Member Name, Membership Type, Price, Application Date, Owner, Administrative Contact Email, Administrative Contact Name, Administrative Contact Phone, and Status.
Tip: If you want to add, delete, or edit any member fields, click the show/hide icon and select Configure member fields settings. This will redirect you to the Application Forms section of your organization’s Membership Settings. You can also select Membership Types settings to go to the Membership Types section of your organization’s Membership Settings or select Import Memberships to go to the Import section of your organization’s Membership Settings.
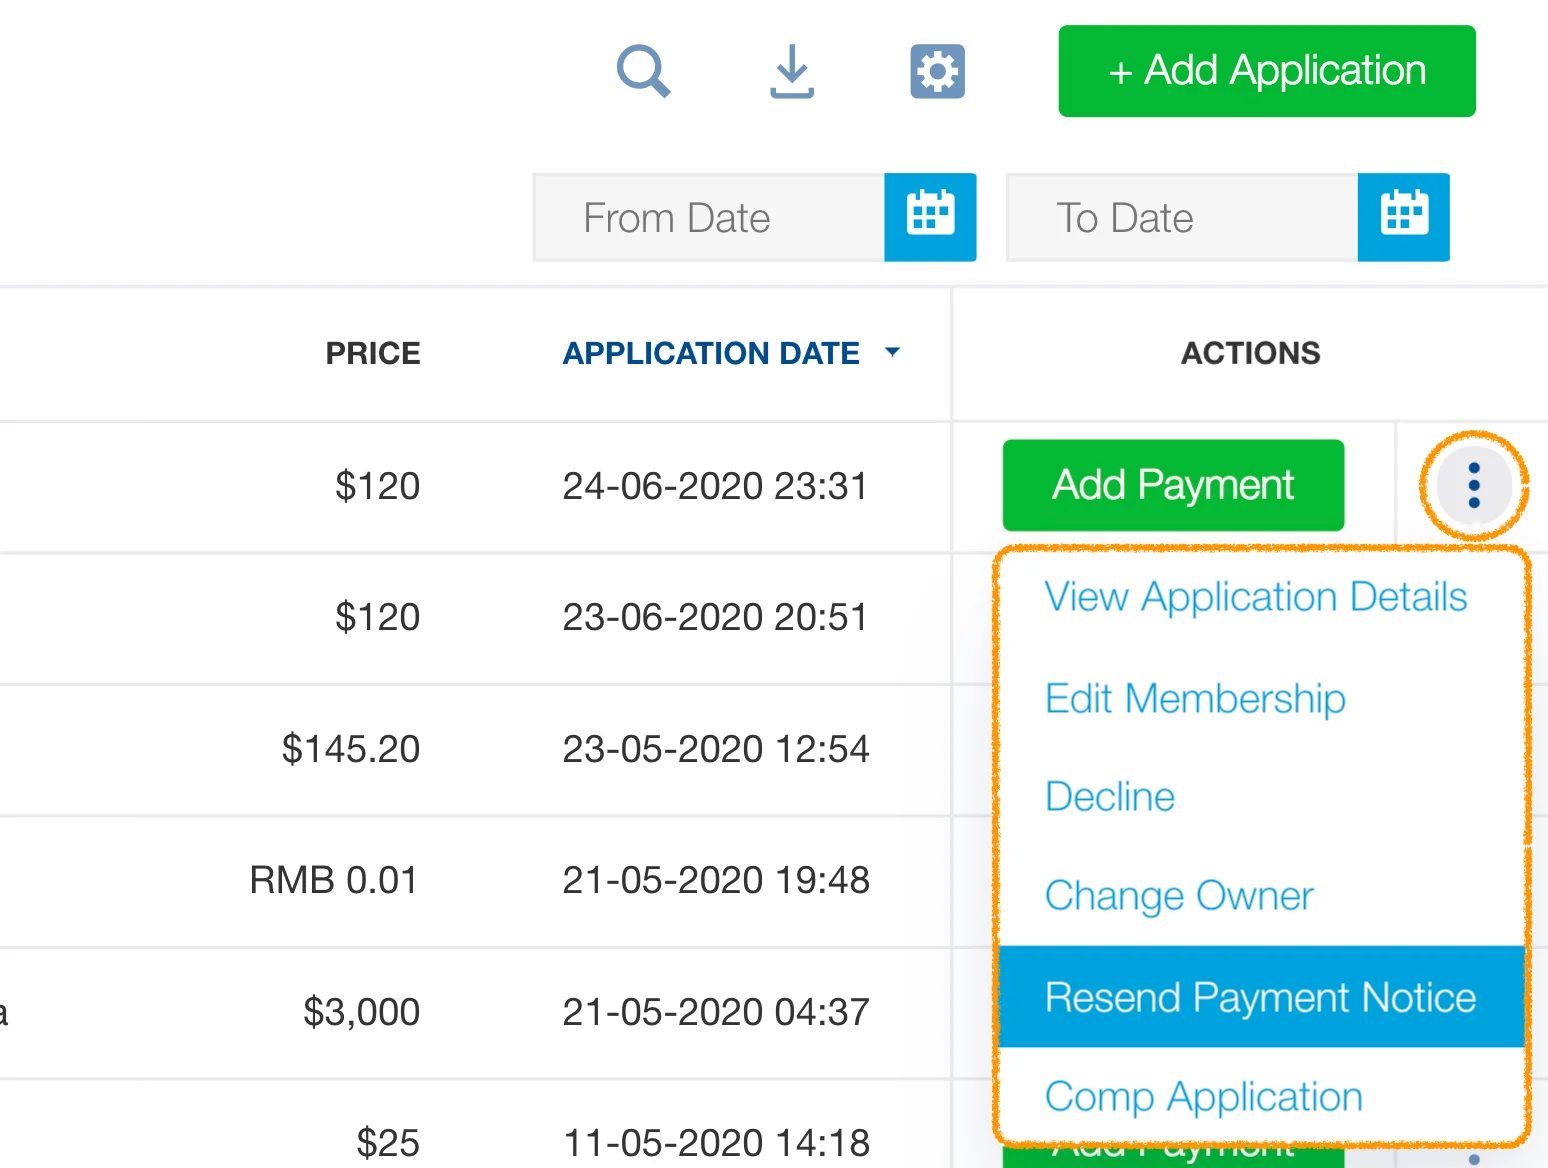
You can also click the three dots icon in the row of your desired application to perform other actions related to the application:
- View Application Details: This takes you to the application details page.
- Edit Membership: This allows you to change the application’s membership type. If you are editing a corporate application, you can also edit the number of additional membership slots.
- Change Owner: This lets you assign the application to an organization team member. That team member will be designated the application’s “owner”.
- Decline: This declines the application. The application will move to the Declined tab.
- Resend Payment Notice: This sends a payment notice to the prospective member’s email address.
- Comp Application: This makes the membership application free and changes the application’s payment status to ‘comped’.
- Re-Enable: This sends the application back to the first phase of the application process.