Managing registration & attendee lists
After you’ve promoted your event, you can manage your event attendees information according to approval and registration lists.
Approval Lists
Managing approval lists with quick access icons
- Search: Click the magnifying glass icon to quickly search registrants awaiting approval.
- Export: Click the export icon to download all registrants awaiting approval included in your list or search.
- Show/Hide Columns: Click the show/hide columns icon to customize your table display. The table can be sorted by default fields. Default fields include: First Name, Last Name, Email, Company Name, Position, and Registration Date.
Note: Registrations that have been approved can be found in the Registration List tab.
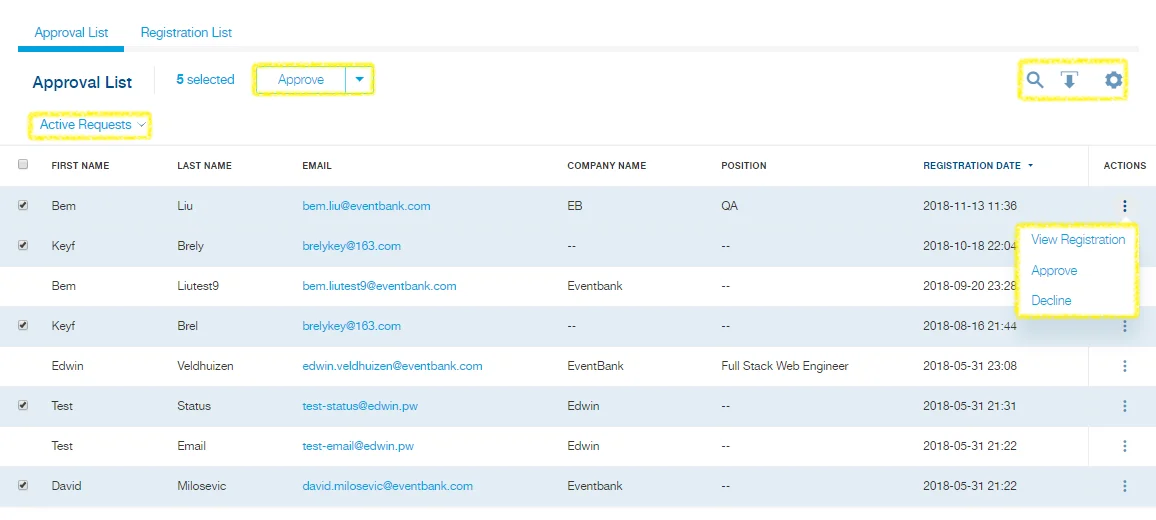
Sorting approval lists with the list selector
Important: This section is only available if you selected the “Attendee approval required” when you set up your event.
You can sort any event registrants that have not yet been approved in the Approval List tab located in the Event module’s Registration List section. You can sort registrants according to requests that are currently active or already denied by clicking the down arrow that is part of the list selector. The list selector defaults to Active Requests when you first arrive on the main screen. List selector options include:
- Active Requests: This displays all registrations that have not yet been approved or denied by an organization staff member.
- Approval Declined: This displays all registrations that have been denied by an organization staff member.

Fast actions for approval lists
In the main screen of the Approval List tab located in the Event module’s Registration List section, you can click three three dots icon in the row of your desired registrant to perform fast actions related to that registrant.
- View Registration: This will take you to the registrant’s profile page.
- Approve: This will let you to approve a registration and move it to the Registration List. System notifications can be disabled for this action.
- Decline: This will let you deny a registration. System notifications can be disabled for this action.
Managing multiple registrations simultaneously
In the main screen of the Approval List tab located in the Event module’s Registration List section, tick one or more checkboxes — respectively located next to the registrants names — to select multiple registrations. Click the Approve button at the top of the main screen to approve all items in your selection, or click the down arrow that is part of the Approve button to decline your selected registrants all at once.
Registration Lists
Adding registrations
In the main screen of the Registration List tab located in the Event module’s Registration List section, click the + Add Registration button to add an attendee to your attendee list. Enter the person’s name and attendee information, and choose whether to disable notifications for the action. You can also click the down arrow that is part of the + Add Registration button to upload a list of attendees from an Excel file.
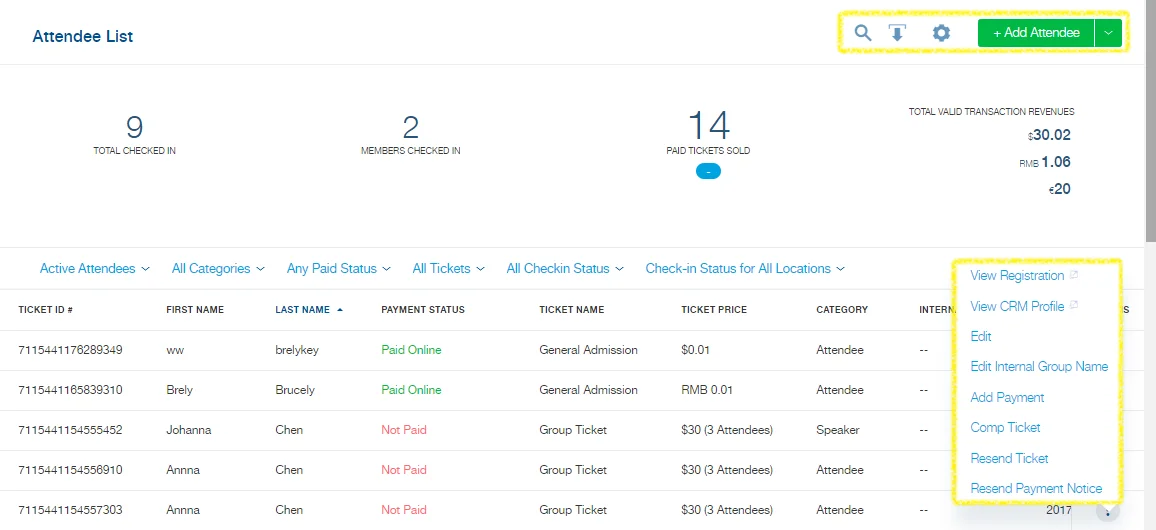
Managing registration lists with quick access icons
- Search: Click the magnifying glass icon to quickly search attendees.
- Export: Click the export icon to download all attendees included in your list or search.
- Show/Hide Columns: Click the show/hide columns icon to customize your table display. The table can be sorted by default fields. Default fields include: Ticket ID #, First Name, Last Name, Payment Status, Ticket Name, Ticket Price, Category, Internal Note, Registration Date, Is a Member (only available if using the Membership module), Discount Name, Email, Preferred Language, and Terms Opt-in (only available if opt-in consent is activated).
Sorting attendee lists with list selectors
You can sort event attendees in the Registration List tab located in the Event module’s Registration List section with multiple list selectors. List selector options include: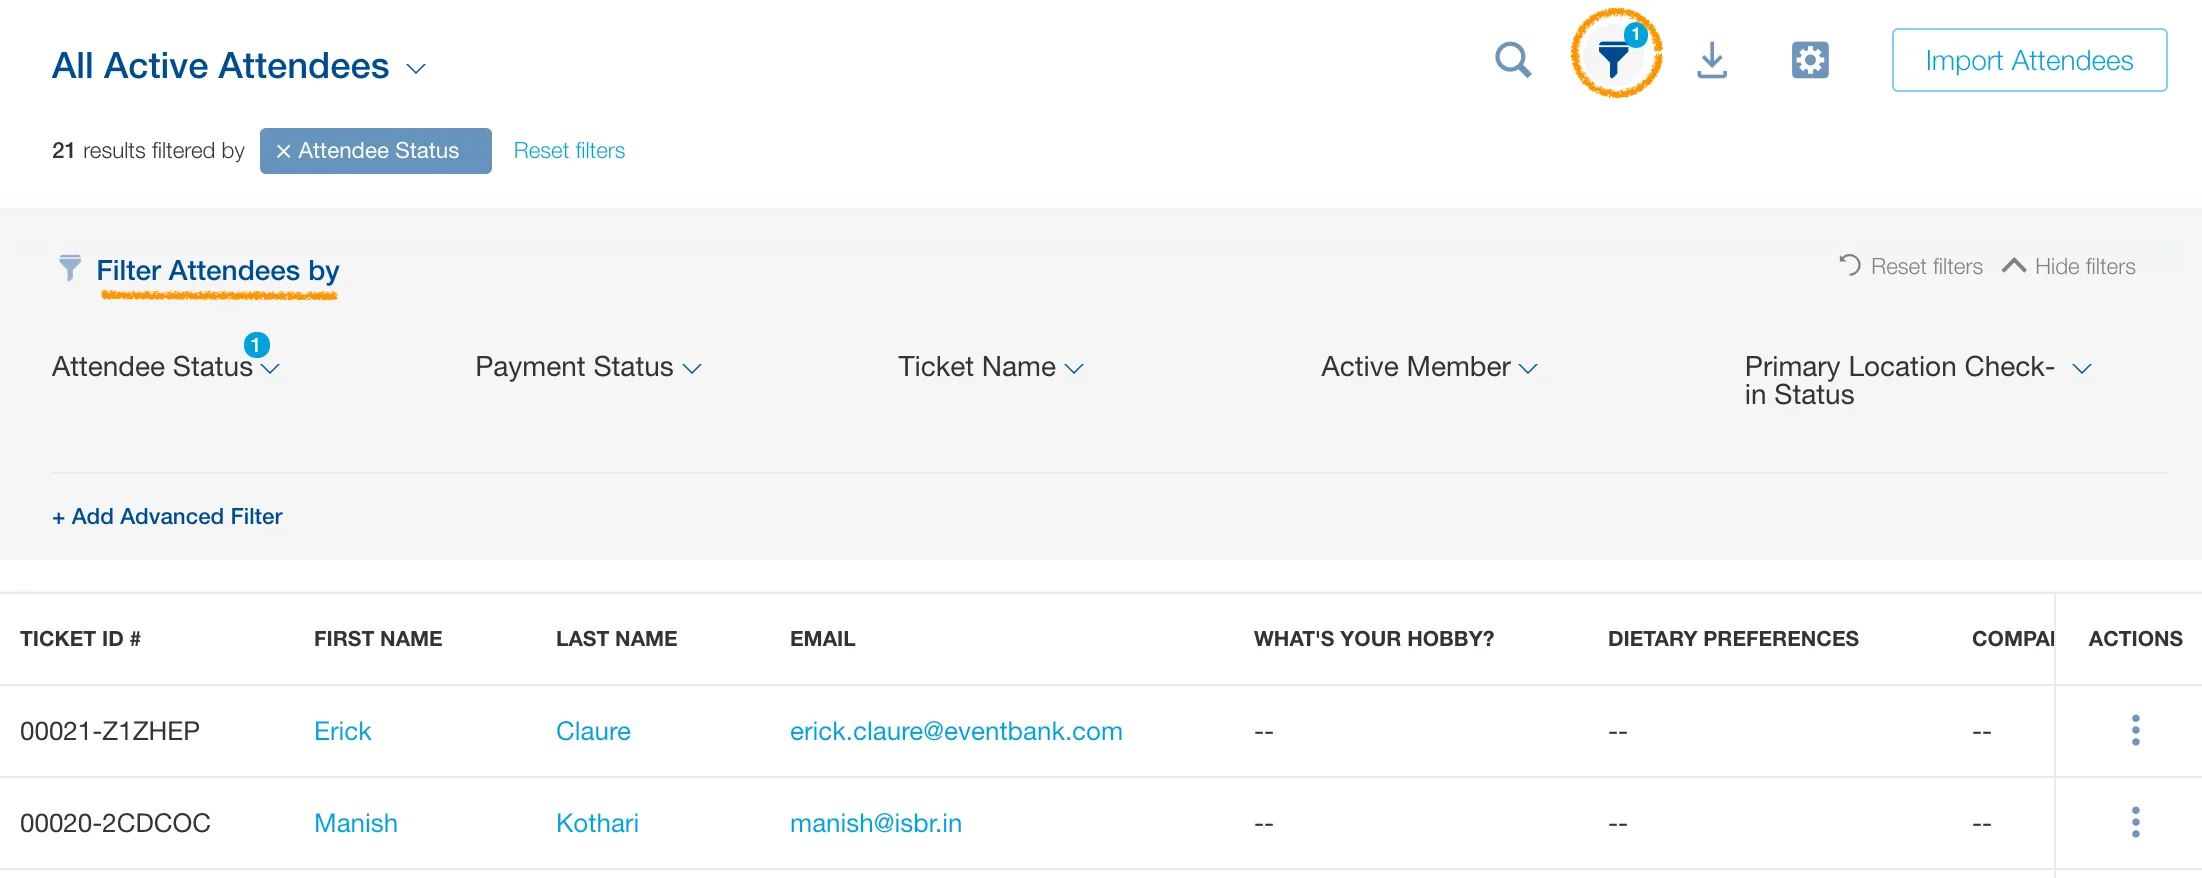
- Attendee Status
- All Attendees: all attendees registered for the event including canceled registrations.
- Active Attendees: all attendees who have not canceled.
- Canceled Attendees: all attendees whose registrations have been canceled.
- Attendee Category
- All Categories: all attendee categories.
- Attendee: all attendees labeled as “Attendee”.
- Speaker: all attendees labeled as “Speaker”.
- Media: all attendees labeled as “Media”.
- Sponsor: all attendees labeled as “Sponsor”.
- VIP: all attendees labeled as “VIP”.
- Paid Status
- Any Paid Status: all attendees for all payment statuses.
- Paid Online: all attendee tickets that were paid online.
- Paid by Bank Transfer: all attendee tickets that were paid by bank transfer.
- Paid by Check: all attendee tickets that were paid by check.
- Paid by Cash: all attendee tickets that were paid by cash.
- Paid by Credit Card: all attendee tickets that were paid by credit card offline.
- Comped: all attendee tickets that were comped.
- Free: all attendee tickets that are comped.
- Not Paid: all attendee tickets that are not paid.
- Ticket Type
- All Ticket Types: attendees for all ticket types.
- [Custom Ticket Type Name]: attendees according to the ticket type name.
The following list selectors are only available after an event has started. The Check-in Status by Location list selector is only available if your event has multiple check-in locations. For more information about setting up check-in locations, click here.
- Check-in Status
- All Check-in Statuses: all attendees for all check-in statuses.
- Attended: This displays all attendees that checked in.
- No Show: This displays all attendees that have not checked in.
- Check-in Status by Location
- Check-in Status for All Locations: This displays check-in statuses for all attendees at all check-in locations.
- Checked in at [Location Name]: This displays all attendees who have checked in at a specific check-in location.
Fast actions for registration lists
In the main screen of the Registration List tab located in the Event module’s Registration List section, you can click the three dots icon in the row of your desired attendee to perform fast actions related to that attendee.
- View Registration: This will take you to the registrant’s profile page.
- View CRM Profile: This will take you to the CRM profile page.
- Cancel Ticket: This will cancel the attendee’s ticket.
- Change TIcket Type: This will let you change the attendee’s ticket type.
- Edit: This will let you edit the attendee’s registration details.
- Add Payment: This will let you add a payment.
- Comp Ticket: This will let you comp an attendee’s ticket. The attendee will not be charged for the ticket.
- Resend Ticket: This will let you resend the attendee’s ticket via email.
- Resend Payment Notice: This will let you resend a payment notice to the attendee.