Introduction
Blueprints and templates help you speed up the process of creating an event. Blueprints let you save event settings such as registration forms, payment options, and event website designs so you can quickly draft and publish new events without having to go through these steps every time. Templates, on the other hand, allow you to save event page designs to ensure branding consistency.
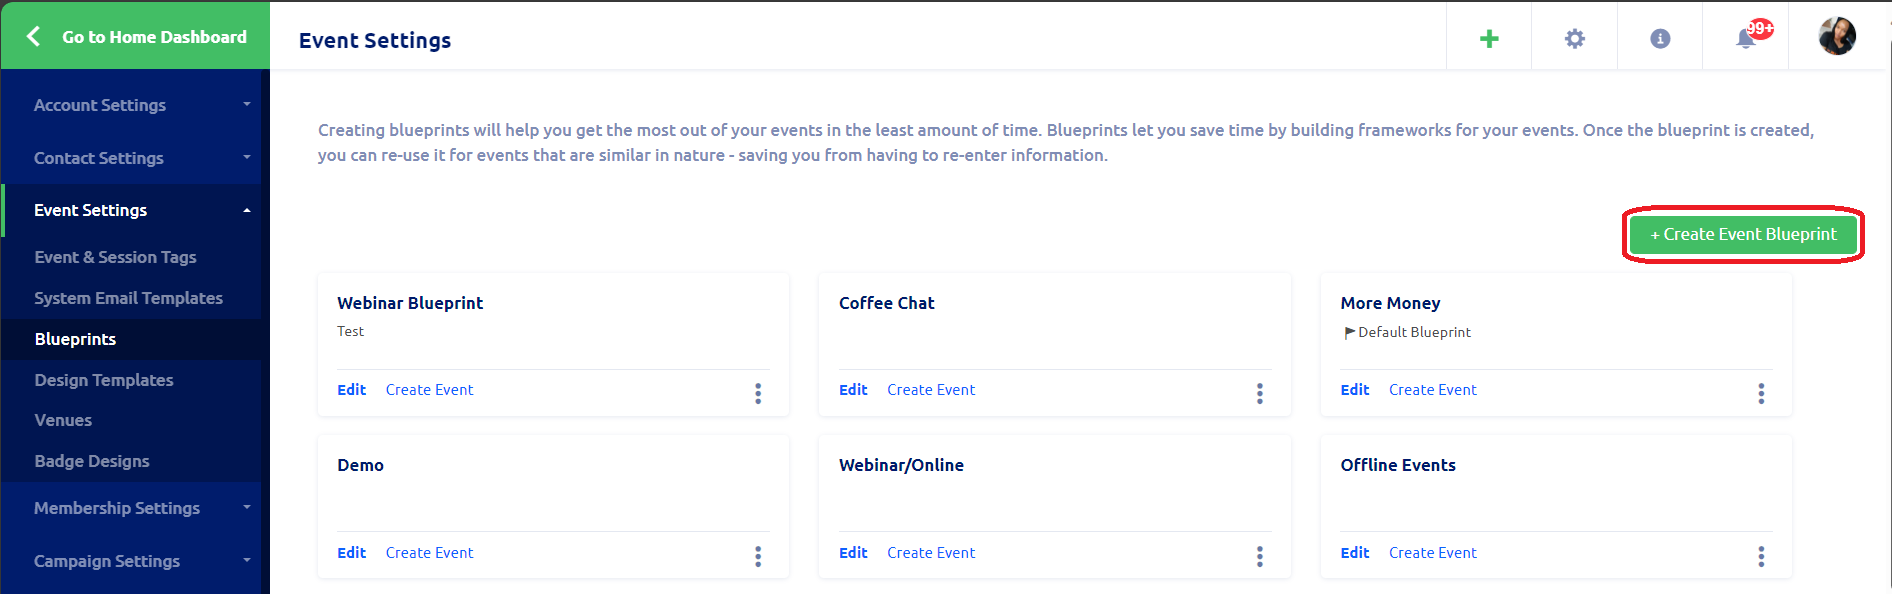
Creating a blueprint
To create a blueprint, first, click on the gear icon ⚙️ on the top right corner of the page. Then, under Event Settings, click on Blueprints. Finally, click on the green + Create Event Blueprint button and enter all the relevant information in the steps below. You can select which blueprint to use when creating new events on the platform.
- General Settings
- Payment Options
- Registration Form
- Event Room
- Agenda
- Tickets & Coupons
- Venue
- Sponsors & Partners
- Layout & Design
- Badges
- Enter a name and a short description for your blueprint and select the primary and additional event languages
- Select the role of your organization, event tags, host committees, and event contact information
- Set a limit for attendee capacity
- Determine whether event registrants are required to create a Glue Up account
- Choose whether to add an approval step before tickets are issued
- You have the option to include e-tickets in the confirmation emails
- You can require attendee information for every ticket, limit registrants to one ticket only and require attendees to opt-in to the terms and conditions of your organization
- Set up how many event reminders to send out (maximum five reminders)
- Choose whether to show the event on your organization’s Glue Up public page
- Add social media share links
- Select all supported currencies
- Choose available payment methods
- Enter your refund policy
- Add taxes and other related information
- Under ‘‘, you create and customize all registration forms for this blueprint. There already exists one registration form by default, but you can create more forms and link each one to different ticket types later. When creating a new form or editing an existing one, you can drag and drop an existing field from the CRM module to the form to collect that information from your attendees.
- In the step, you can choose to activate this feature and also configure the settings related to it. Activating the event room will allow attendees to see who else is attending that event and give them the ability to save one another’s contact information when using the Glue Up app. Choose when you would like the event room to appear and select what attendee details to display.
- In the you create various sessions for your event for each of the event days if it spans several days. You can also include breaks, tracks for sessions that run concurrently and enable session registration. You can also regulate the capacity of each session.
- In the step, you can create different type of tickets for this event. To start, click the green + Create Ticket button and enter the ticket name, description, and the number of tickets available. Then, select a price type (standard, door price, free), currency, and price. Here you can also restrict a ticket type to be only available to members.
- Important: If the box for the number of tickets available is left empty, an unlimited amount of tickets will be available.
- Under , enter the name of the location into the search bar. Adjust the address details and adjust the location on the map if needed — make sure to click the Confirm Pin button to save your pin.
- In the step, you list all sponsors and partners of the event. When creating a new category, enter a name and a short description explaining what the category is, e.g., Gold Sponsor, Contributions of $10,000+. In this step, you can either search the CRM for a company or enter their details manually. You can choose to track the sponsorship value and include it in your event’s Profits & Loss report or choose to hide the sponsors from your event website.
- The section is where you need to choose a template for your event. After selecting a template, you can customize your event pages or add new pages if necessary. Click here to read more about templates.
- In the last step, you can design for your event and select the design for this blueprint. These badges can be printed and used on-site on the day of the event.
You can save the layout and design of an event page as a template to use for your future events without having to start from zero every time. To create a template, click on the gear icon on the top right corner of the screen and, under Event settings, select Design Templates. Click on the green + Create Event Template and enter a name for your template. There are several pre-made layouts available for you to choose from. Make sure to select the one that fits your needs and continue. You then will be able to upload a banner for the event page. Upload an image (not larger than 10MB) with the minimum width of 1920px and the minimum height of 500px for best results. Moreover, in the Design tab, you can change the font and the main color of the page.
Note: GIF files can also be used as event page banners.