Welcome to the new and improved Community Engagement Solution, also known as Community 2.0. Our solution provides users with a digital space to network and connect with others, regardless of their location. The Community feature is an interactive wall where users who have been added to the community can share posts, view each other’s profiles, join different discussion groups, and download files that have been uploaded by the community admins.
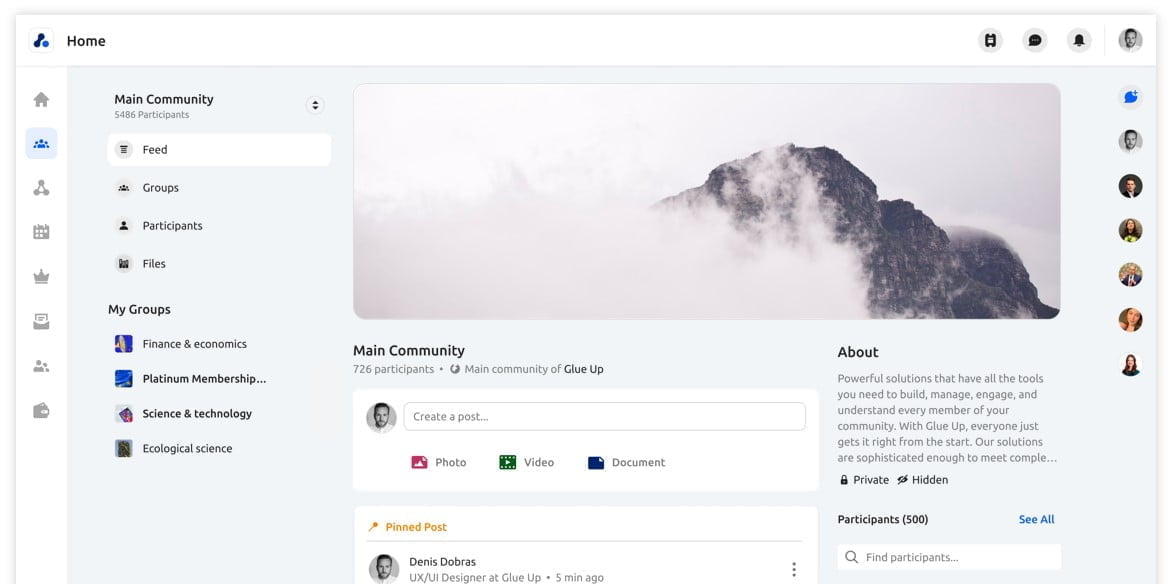
Users can access the Community feature by downloading the My Glue app or by clicking on the “My Community” button on their My Glue page. With Community 2.0, we’ve taken these capabilities to the next level, and in this article, we’ll detail the updates to the Community module.
Community Wall
The Community wall is the main hub of the Community feature. On the left side of the wall, users will see buttons that allow them to easily navigate between the feed, groups they are a part of, participants, and files. The center stage is where users can see the Community cover photo. Below the cover photo, users have the option to create a new post. On the right side of the page, users will see an “About” section that provides more information about the community or group.
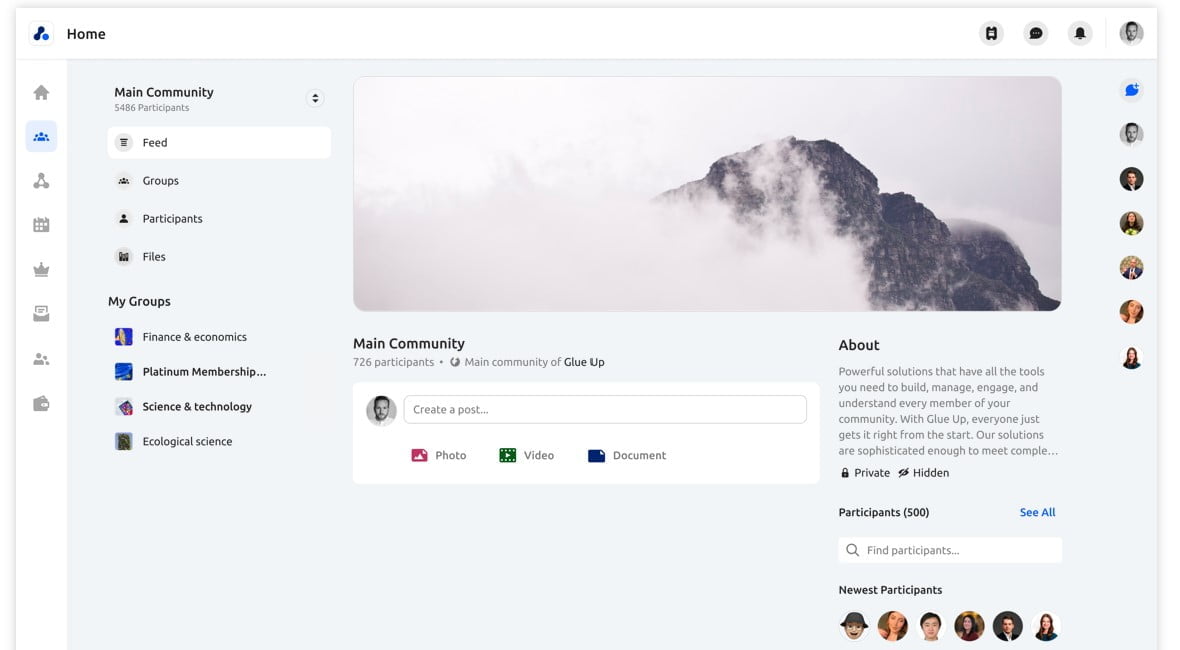
Users can also see the participants and hover over them to view more information, message them or share a business card. Underneath the participants, users can review all files posted in the Community or Group.
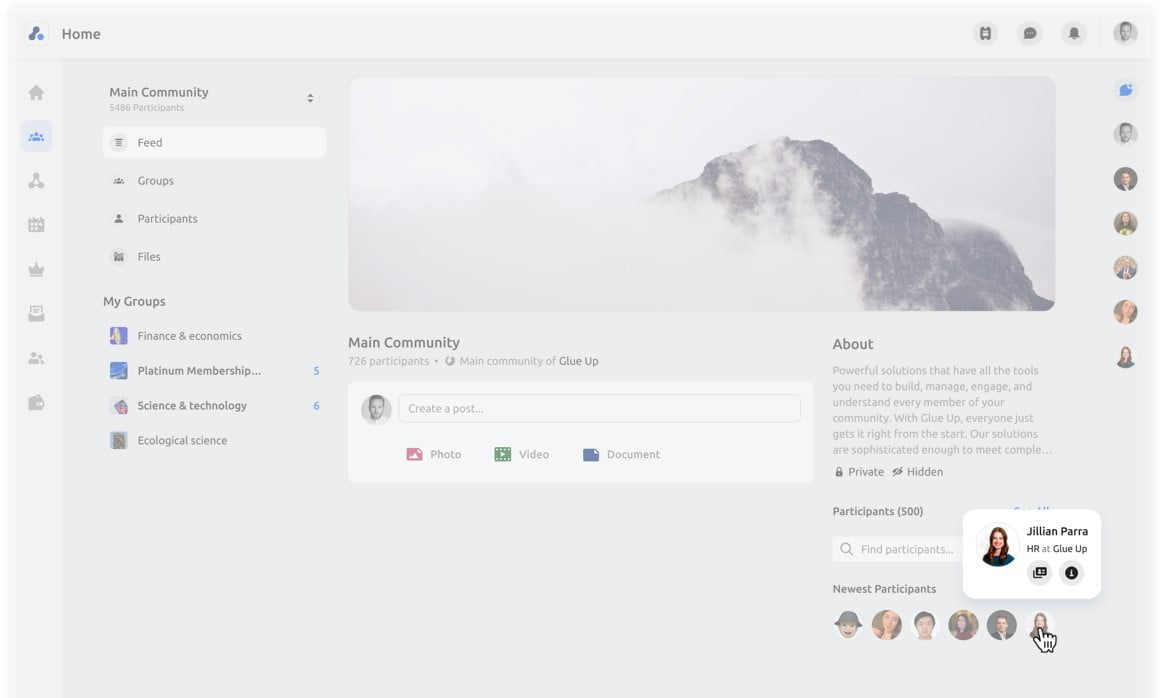
Community admins can now pin important posts to the top of the Community. Keep in mind that you can only keep one message pinned at a time. Admins can review posts within the Community or Group. And as mentioned, when you hover over a participant there is a small pop up that allows you to interact more with that person by sharing a business card and/or sending a message.

Creating Posts on the Community Wall
There have been many improvements to how users create posts on the Community wall. Styling options include font size and formatting, and users can now create bold, italic, and strikethrough text. There are now three available font weights: normal, subheader, header, and an Emoji keyboard option to make text more fun!
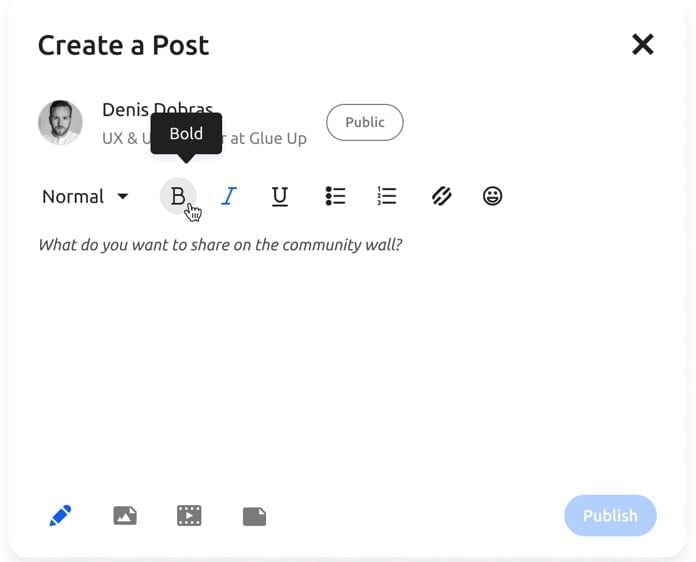
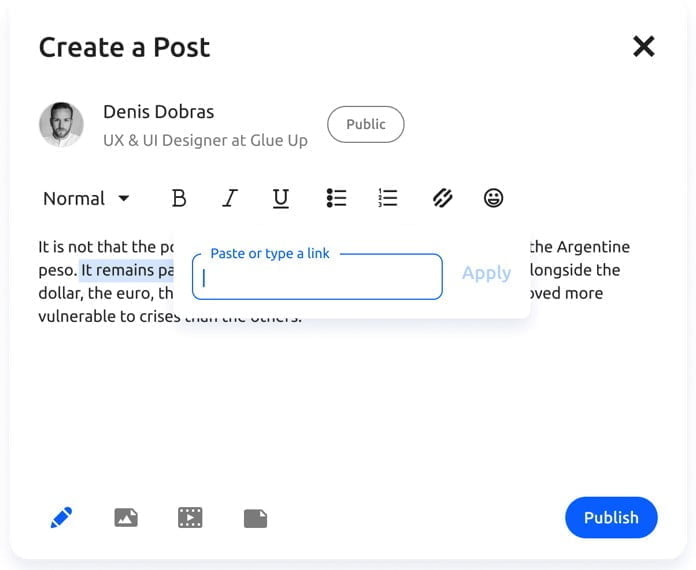
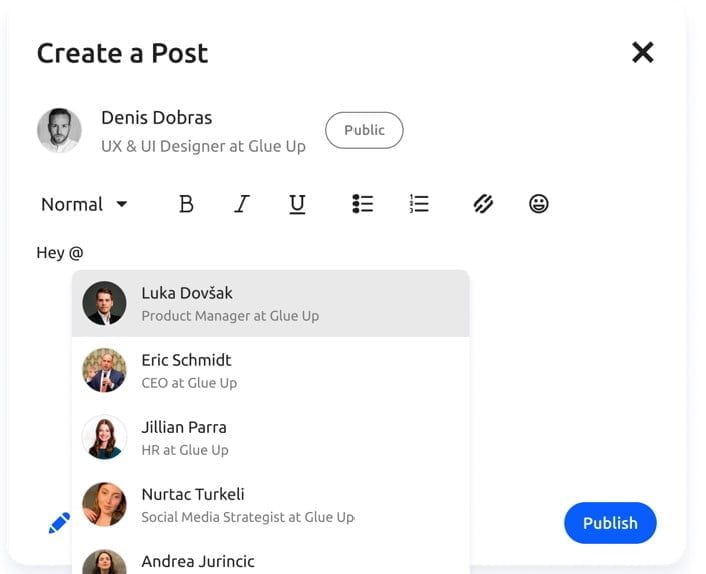
Users can also add URLs to their posts and even tag other community members in the post. Users can tag people in the post by typing @ and the dropdown appears.
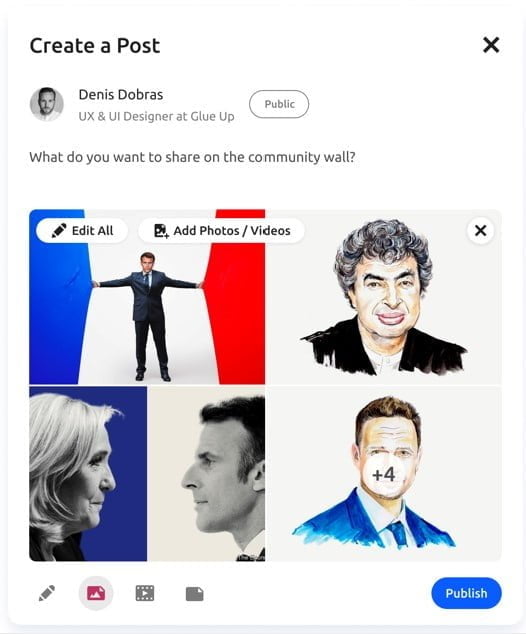
In addition to that, users can upload multiple images at a time (maximum of 9 per post) and edit them (crop, color manipulation), and also upload videos.
File Sharing
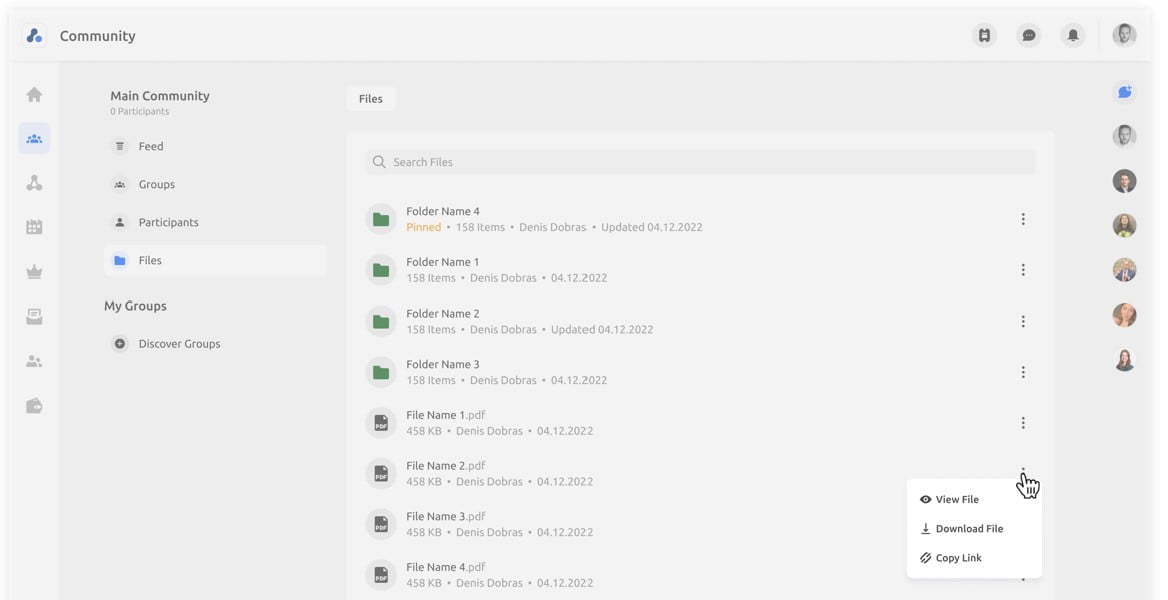
The files within a Community now have a new structure. Members can view, download, or share files with other members of the Community by clicking on the 3 dots next to the file. This link will only work for members who already have access.
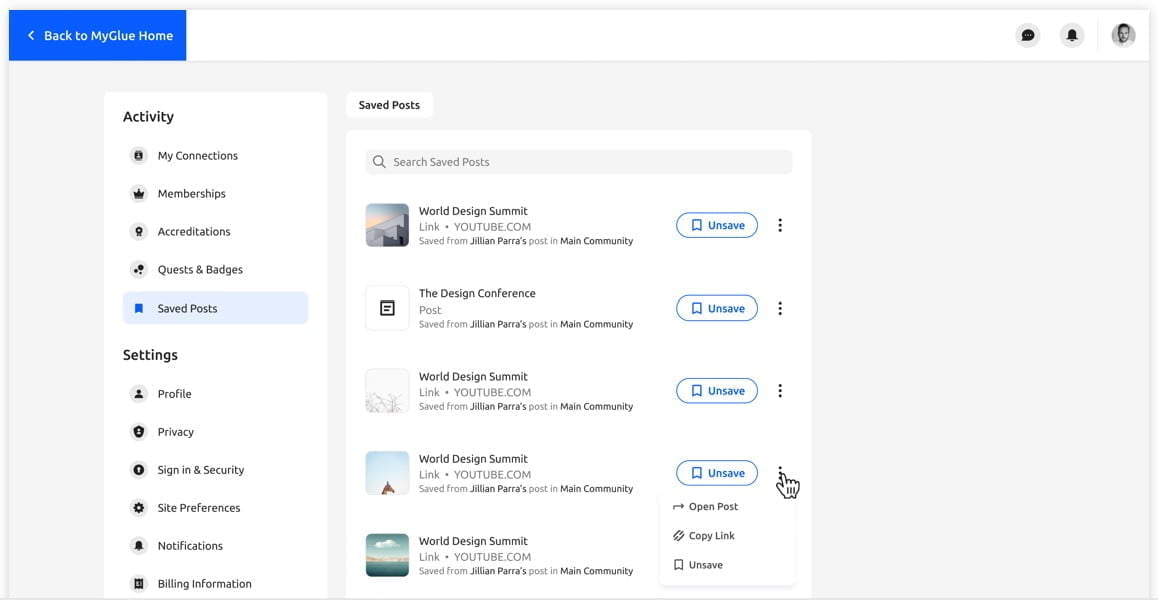
Saved Posts
Users now have the ability to save posts that they find interesting. Under the Activity Tab, users can review all their saved posts.
Notifications
On the top right side of the community, users can access their notifications by clicking the bell icon. From there, they can switch between organizations and review relevant notifications. Users can now mark all notifications as read by clicking the option provided. They can also click on “View all notifications” to be taken to a page where they can review all notifications and filter by notification type.
Users can customize their notification preferences by navigating to My Settings in their My Glue account and selecting the Notifications tab. From here, they can choose which notifications they’d like to receive via email or in-app notifications.

Email Digest
Once a week, users will receive a digest detailing what happened in the Community over the last week. This includes likes, comments, posts, events and uploaded files. Users can then go to the Community to see more details.

Community Moderation
Community/Group Moderation empowers admins to manage their online communities effectively.
1. Removing Posts and Comments
Steps for admins to remove a post or comment:
- Click the 3-dot menu on a post or comment
- Select “Remove post” or “Remove comment”
- Confirm removal and optionally add a note for the participant

The owner of the deleted post or comment receives a notification when content is removed, and can click on the notification to view the removed content and any admin notes.
2. Banning and Unbanning Participants
Steps for admins to ban a participant:
- Click the 3-dot menu on a post, comment, or in the participant list
- Select “Ban Participant”
- Confirm and optionally add a note
- View banned participants in the “Banned Participants” list
- Unban participants using the same process

The banned participant receives a notification and can click on the notification to view ban details and any admin notes.
Important Notes:
- Banned participants can view the community but cannot post or comment
- Banning from a community also bans from all groups within that community
- Banning from a group only affects that specific group
- Content from banned participants is not removed

3. Managing Comments on Posts
Steps for admins to manage commenting on posts:
- Click the 3-dot menu on any post
- Select “Turn off commenting” or “Turn on commenting”
- Option to disable comments while creating a post

ℹ
Note: Only admins can control comment settings on posts.
These features aim to foster a safe and positive online environment by providing administrators with effective tools to manage user interactions and ensure compliance with community guidelines.

