Creating a campaign
Sending personalized, custom email campaigns is critical to your organization’s messaging and marketing success. Creating a new email campaign is simple — just click the green + Create Campaign button in the Draft Campaigns, Scheduled Campaigns, or Sent Campaigns subsections of the Campaigns module. Each subsection can be accessed in the left sidebar navigation menu.
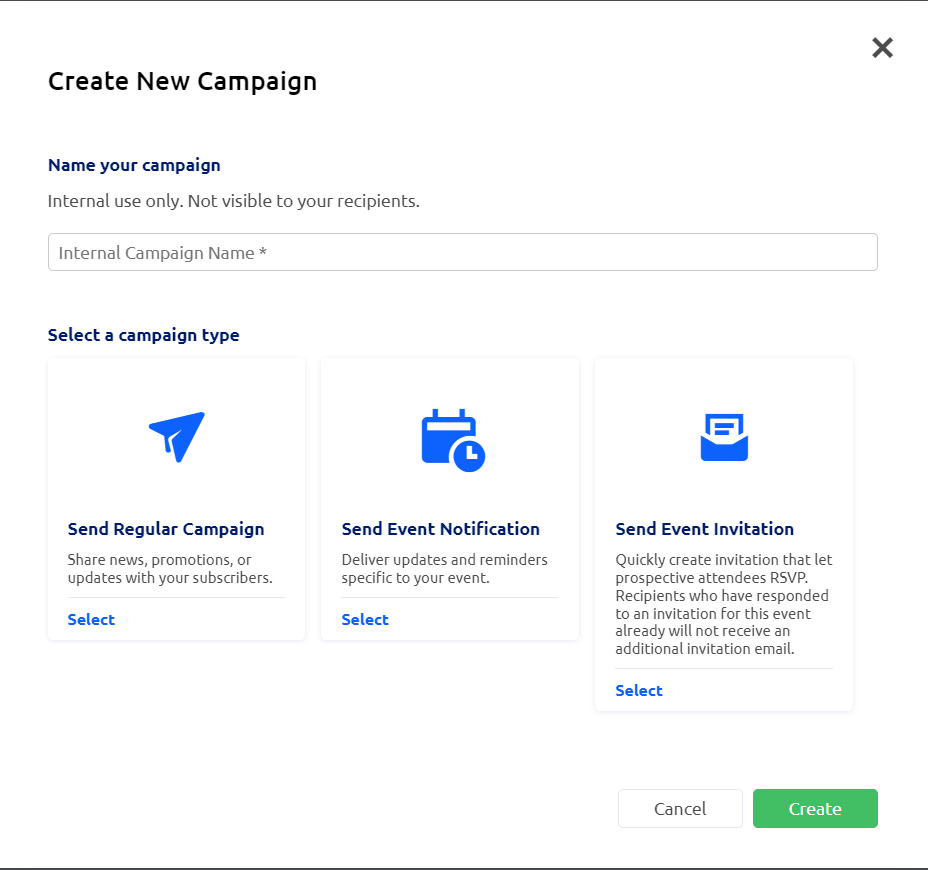
Begin by choosing a name for your campaign and selecting a campaign type. Available campaign types include:
- Regular Campaign: This is used for campaigns not related to the Events module, such as weekly newsletters, updates, or marketing promotions.
- Event Notification: This is used for sending event updates to event registrants and attendees. Event notifications can be sent multiple times to the same recipients.
- Event Invitation: This is used for inviting recipients to an event and recording RSVPs. Event invitations can only be sent once to each recipient.
Step 01: Selecting campaign recipients
Choose your campaign recipients by selecting one or more contact, subscription, or membership lists for your email campaign. If you would like to exclude people from your recipient list, select any lists in the Exclude Recipients area. An excluded recipient is dominant over an included recipient. The net amount of recipients will appear on the top right; this prevents you from sending duplicate emails and deducts excluded recipients

Step 02: Configuring email settings
Select the language of your campaign, subject line, preview text, reply-to email, and verified sender email address. If you like, reply-to and verified sender email addresses can be different.
Tip: Do not forget to use the subject line and preview text with eye-catching verbiage, to entice the recipients to open the campaign, thereby improving your open rate and sender reputation.
Important: If a verified sender email is not set up, the sender email address will be no-reply@glueup.com by default. We strongly recommended you set up a sender email before sending an email campaign. Click here to learn more about creating a verified sender email address. Also note that test emails are sent by use of no-reply@glueup.com but the actual campaign is sent out using the organization’s verified sender emails.

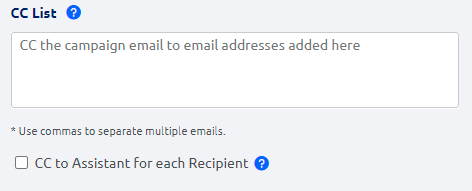
You are allowed to add up to 5 email addresses on the CC list. All the emails will be CC’d for each campaign email and no extra email allowance will be charged. Enabling this feature will only support 300 unique recipient emails due to security performance considerations.
For more details on adding CC Campaigns to a list of contacts & to Assistant for each Recipient check the article here.
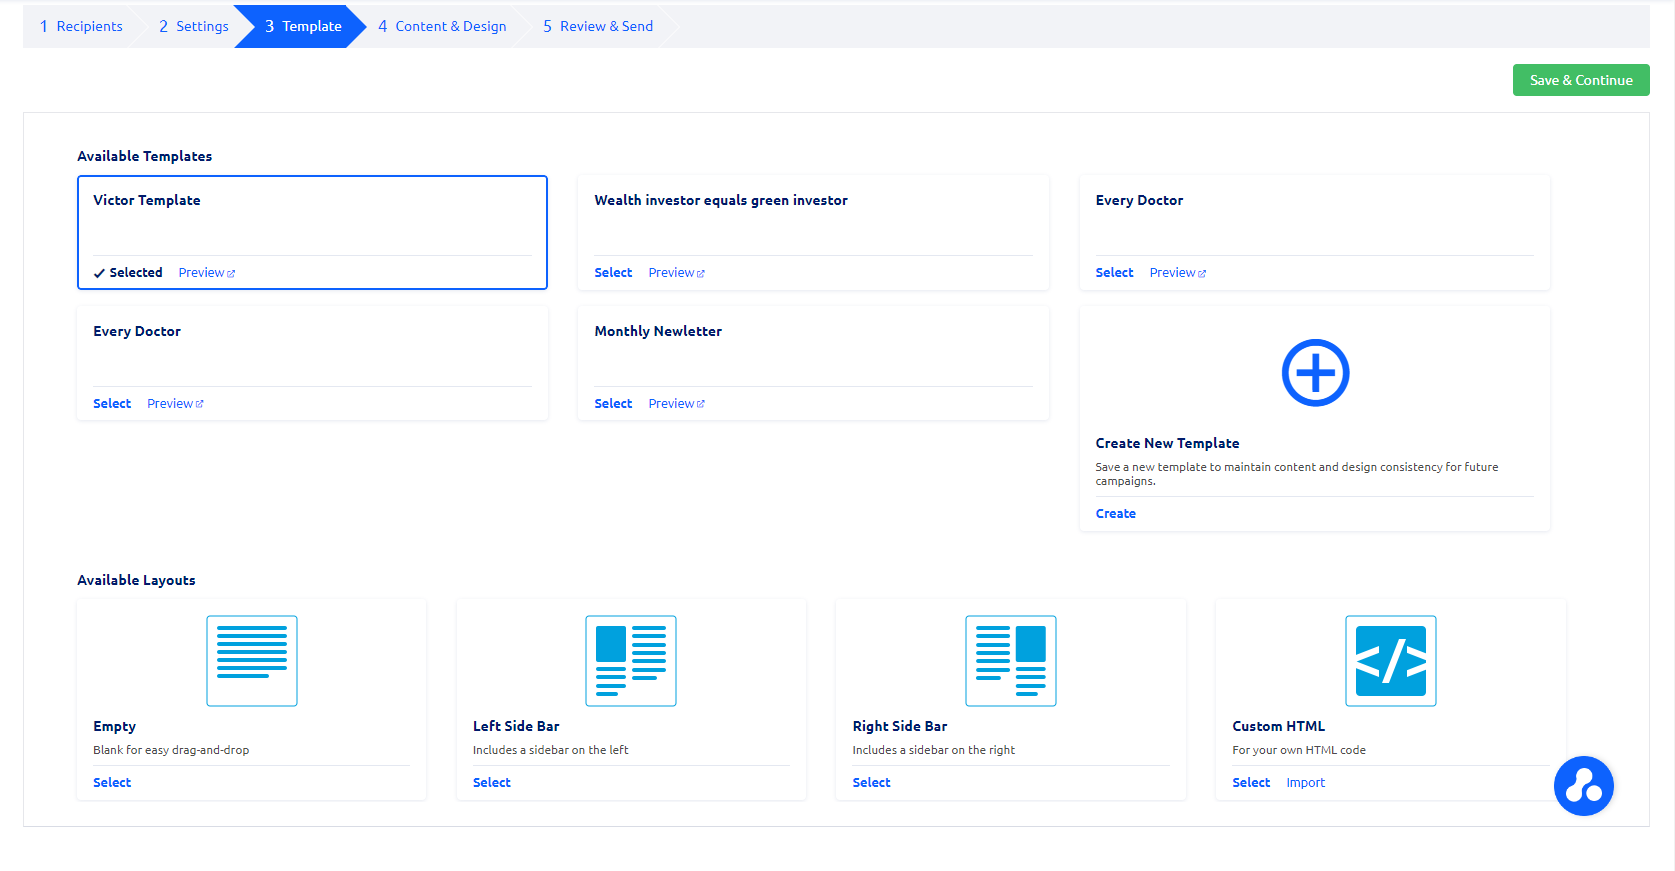
Step 03: Choosing a campaign template or layout
Select an available template or choose an available layout to continue drafting a campaign from scratch.
Tip: ‘Empty’ is the most manageable layout.
Tip: Custom HTML email layouts allow you to fully customize the look and feel of your email campaigns. Click here to learn more about Custom HTML layouts.
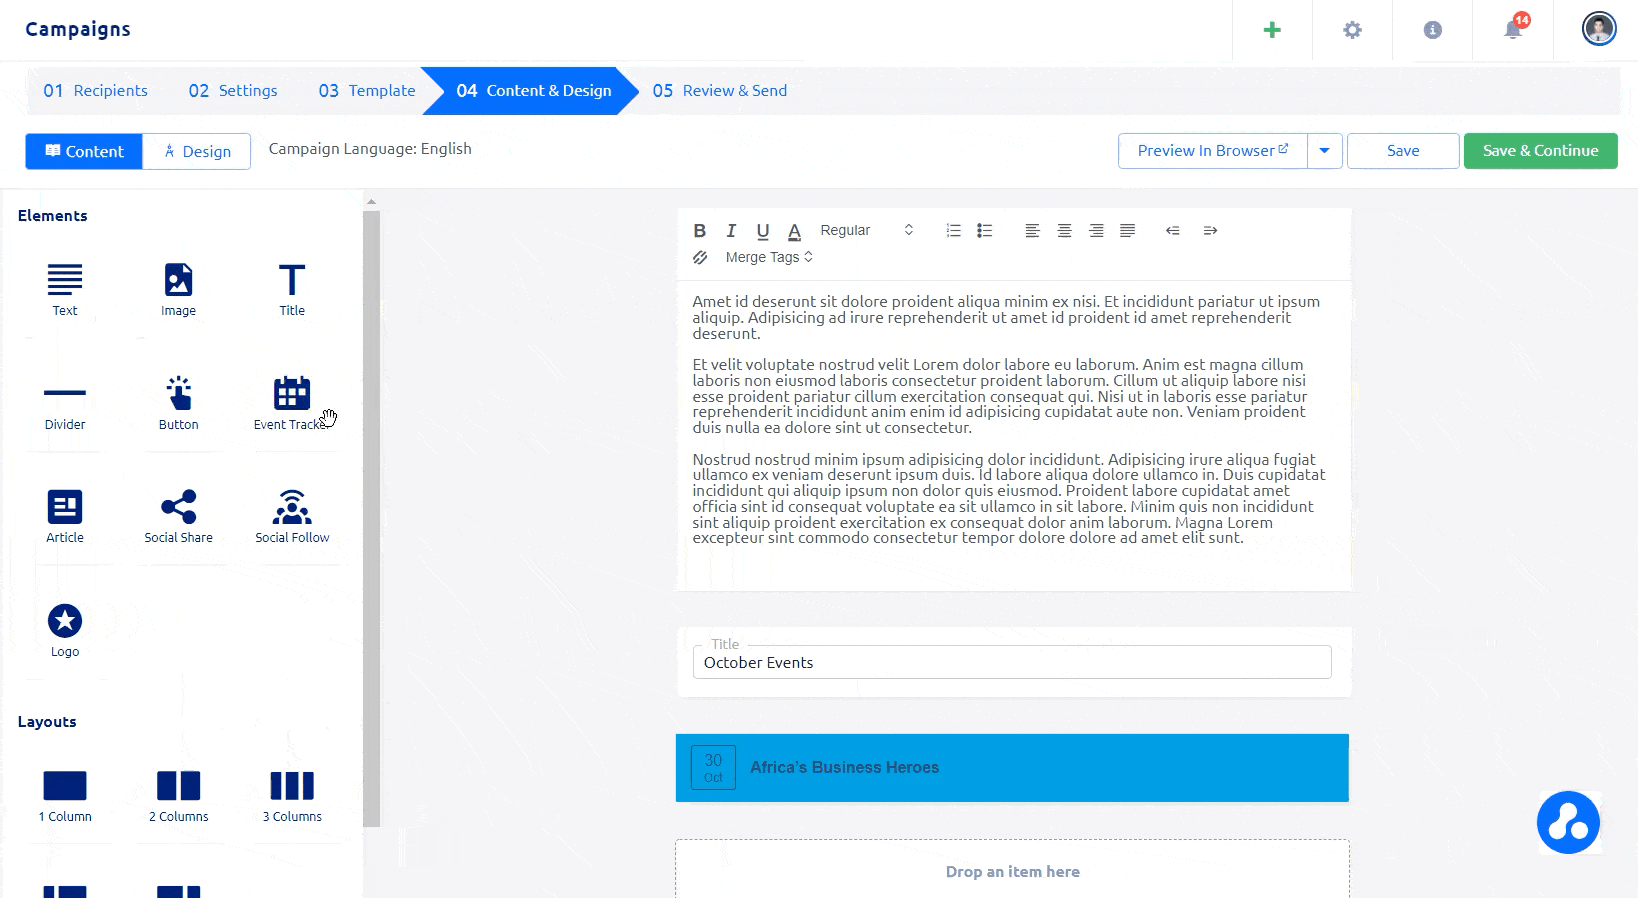
Step 04: Adding content and designing your campaign
Continue by dragging and dropping elements or layout blocks into the editor and adding content as needed. You can make changes to the email design by clicking Design on the Content-Design switcher. All changes need to be saved before you use the switcher. During this step, you can also preview your email in your web browser, send a preview to your inbox, or simply save a draft in the Glue Up platform for later use.
Note: If you selected a Left Side Bar or Right Side Bar template, the header and footer cannot be edited during this step. You can customize the sidebar by dragging and dropping Text, Image, Title, Separator, or Button element(s) into the smaller box of a Text element.
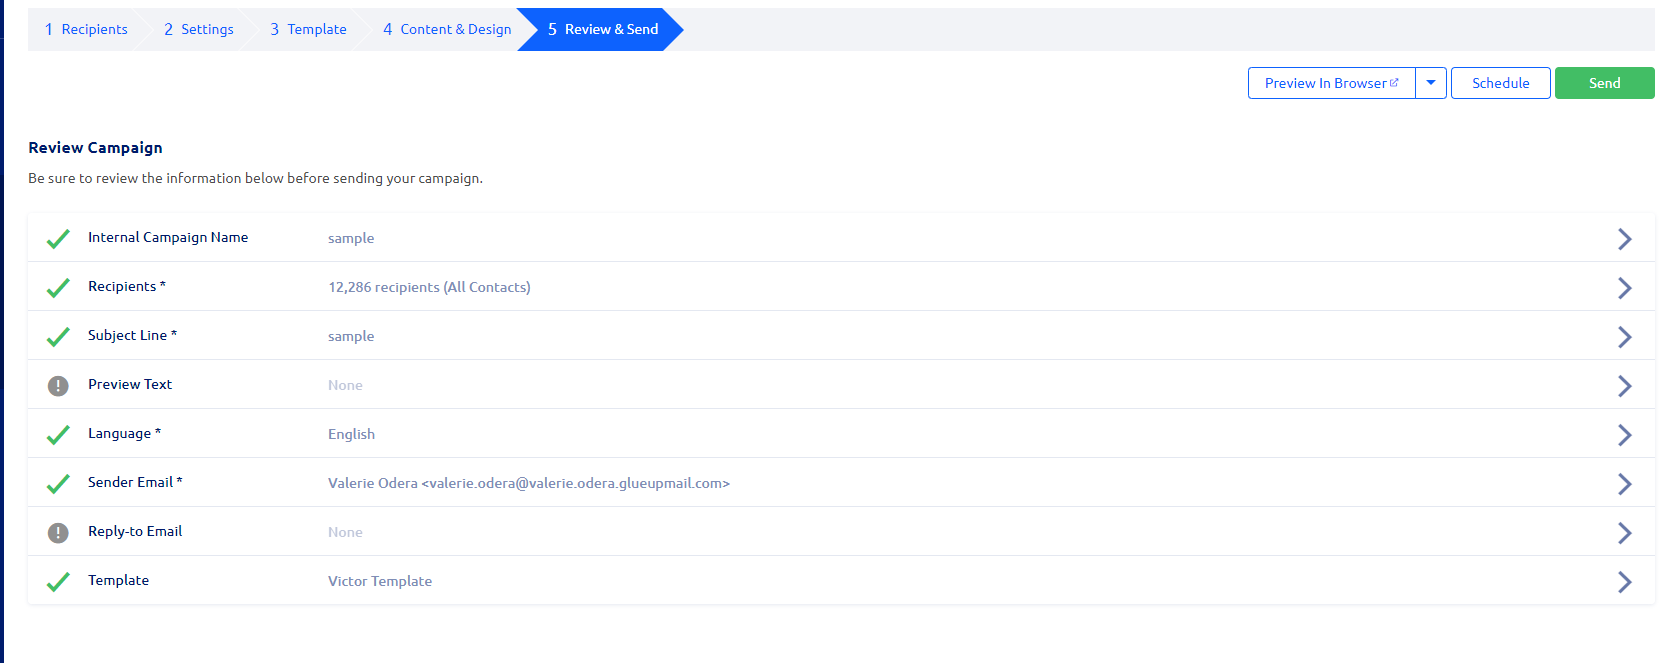
Step 05: Reviewing and sending your campaign
Lastly, review each component of your campaign to quickly view what’s missing and determine what items still need edits. Each review component links directly to the related campaign setup step. Before sending your email, you can also preview your email in your web browser or send a preview to your inbox. You can also schedule the email to go out at a specific date and time.